This simple recipe and technique will give you the perfect ganache for a white chocolate drip cake – every time!
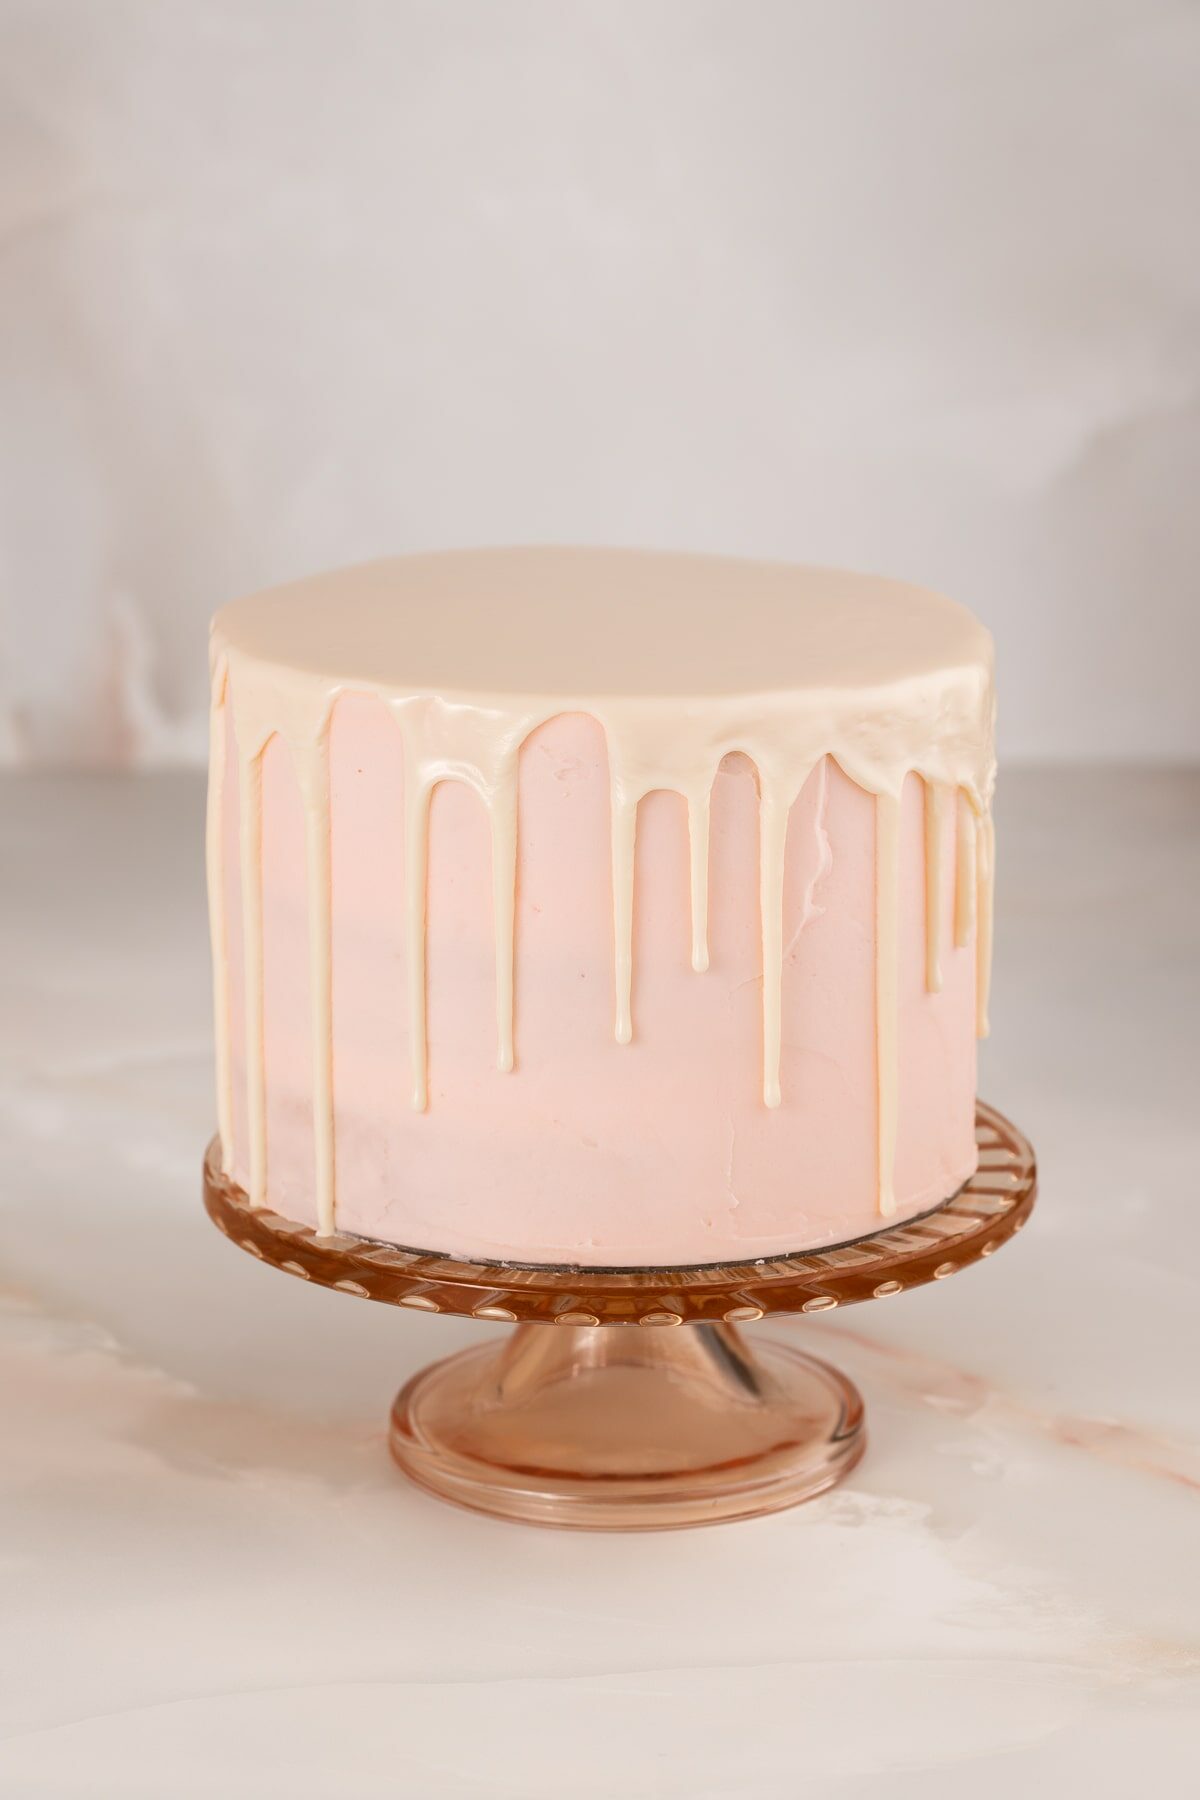
Drip cakes are such a fun cake decorating technique! They’re incredibly versatile, which is why they’re great for everything from birthday cakes, to baby shower cakes, to a 4th of July drip cake.
But, did you know you need a totally different recipe for white chocolate drips than regular chocolate drips? Anyone who had tried making a white chocolate ganache drip recipe by simply substituting white chocolate for regular chocolate knows that it ends up with super thin watery mess of ganache, not a perfect thick drip.
Yup, white chocolate ganache behaves totally different and the ratio of cream to chocolate is much smaller.
While a normal chocolate drip recipe is about a 1 to 1 ratio of chocolate and heavy cream, white chocolate drip is typically 1 part cream to about 2 to 3 parts chocolate.
Plus, you need to let it cool significantly longer, up to 20 minutes to get to the correct dripping consistency.
This tutorial will give you the full instructions on how to make a perfect white or colored ganache drip for your cakes, every single time!
Ingredients
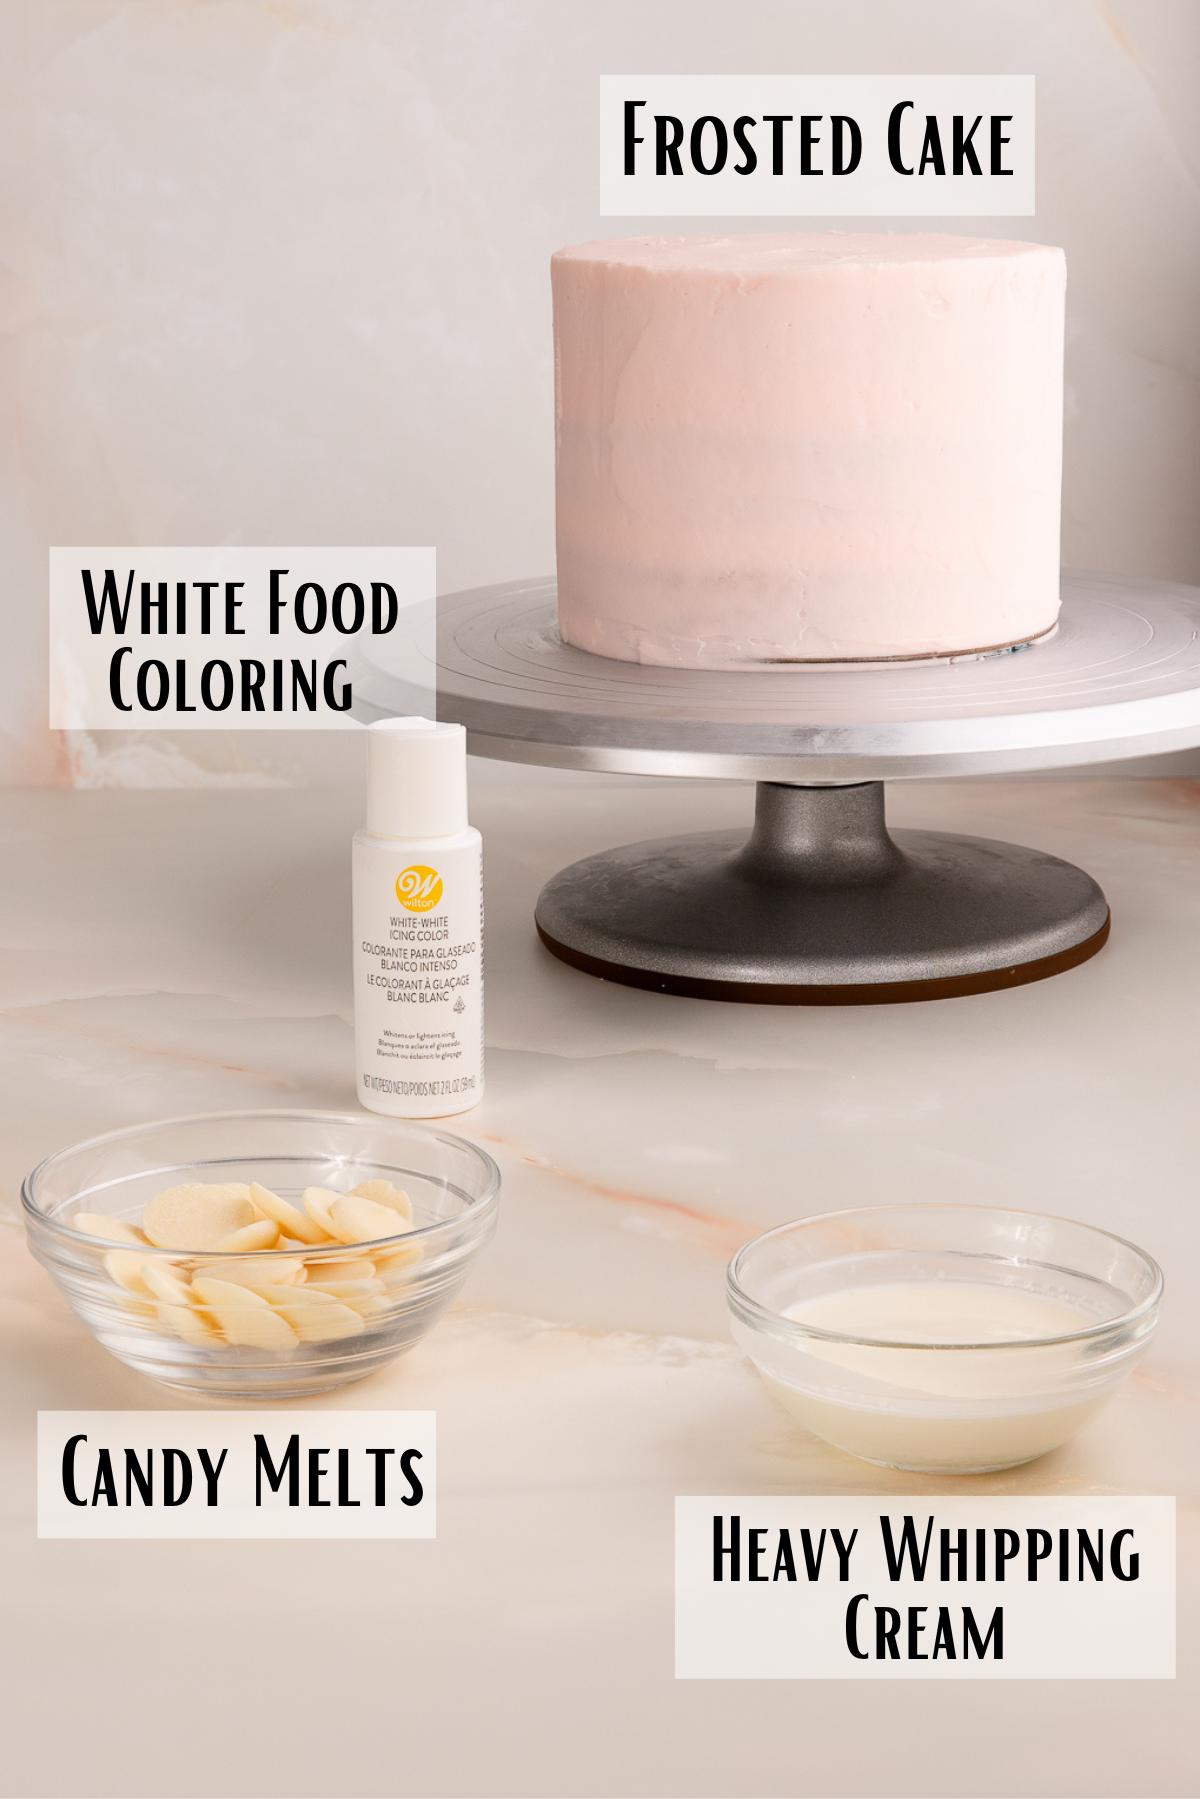
- Candy Melts: I personally prefer to use candy melts in my white ganache drips. I think it makes for more of a consistent drip. And, you can use colored candy melts for colored drips, rather than use food coloring (one less step!).
- Frosted Cake: you can use your favorite cake recipe such as chocolate cake or white cake, and your favorite buttercream frosting recipe.
- White Food Coloring: This is optional, but helpful for getting a bright white color. Otherwise, the drip can be a slightly yellowish color.
Type of Frosting for Drip Cakes
Ant type of buttercream frosting will work for drip cakes. Here are some great ones:
- Swiss Meringue Buttercream
- Italian Meringue Buttercream
- Vanilla Buttercream
- Chocolate Buttercream
- Lemon Buttercream
- Ermine Frosting
As long as it’s a buttercream frosting, it should work just fine. Other types of frosting such as whipped cream or cream cheese frosting are the not the best for drip cakes.
How to Make
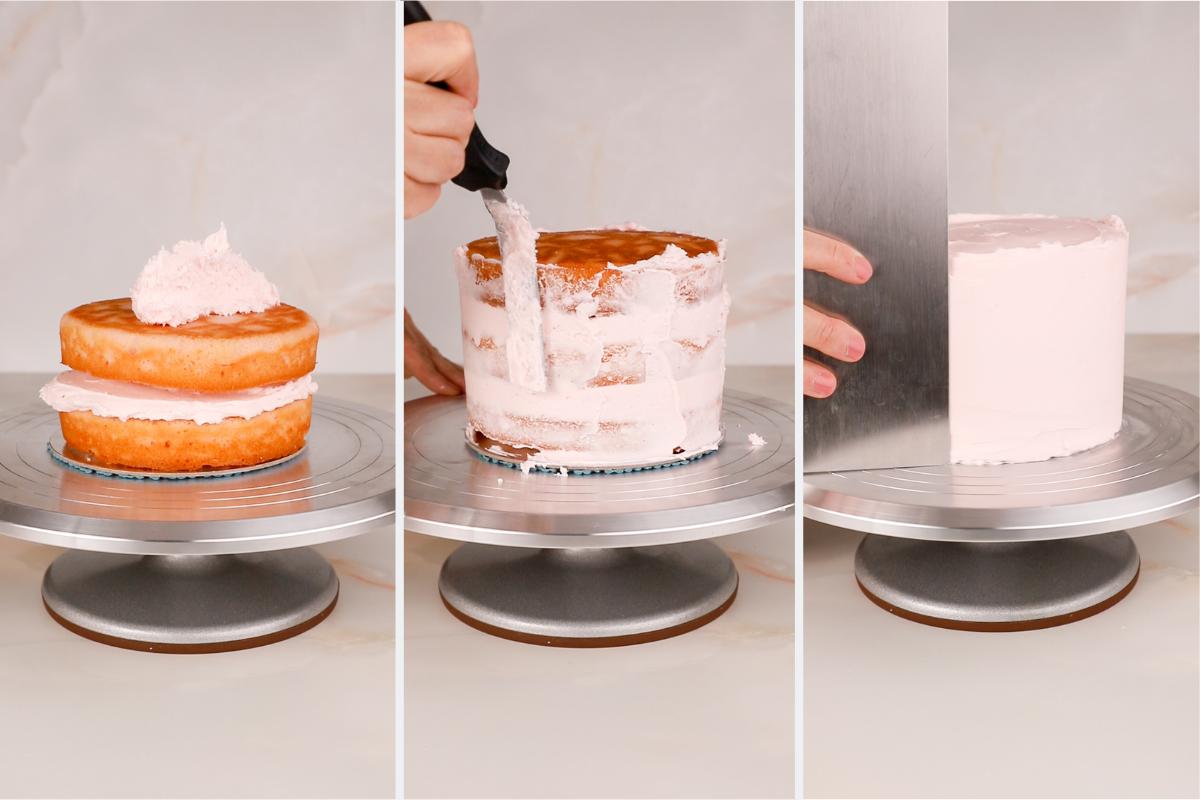
Step 1: Frost and Chill a layer cake
You can use your favorite cake and buttercream frosting recipe. I have a full tutorial on how to frost a layer cake. After frosting, chill the cake in the fridge for at least 30-60 minutes. It is very important that the layer cake be cold when adding the drip.
Step 2: Heat Candy Melts and Cream
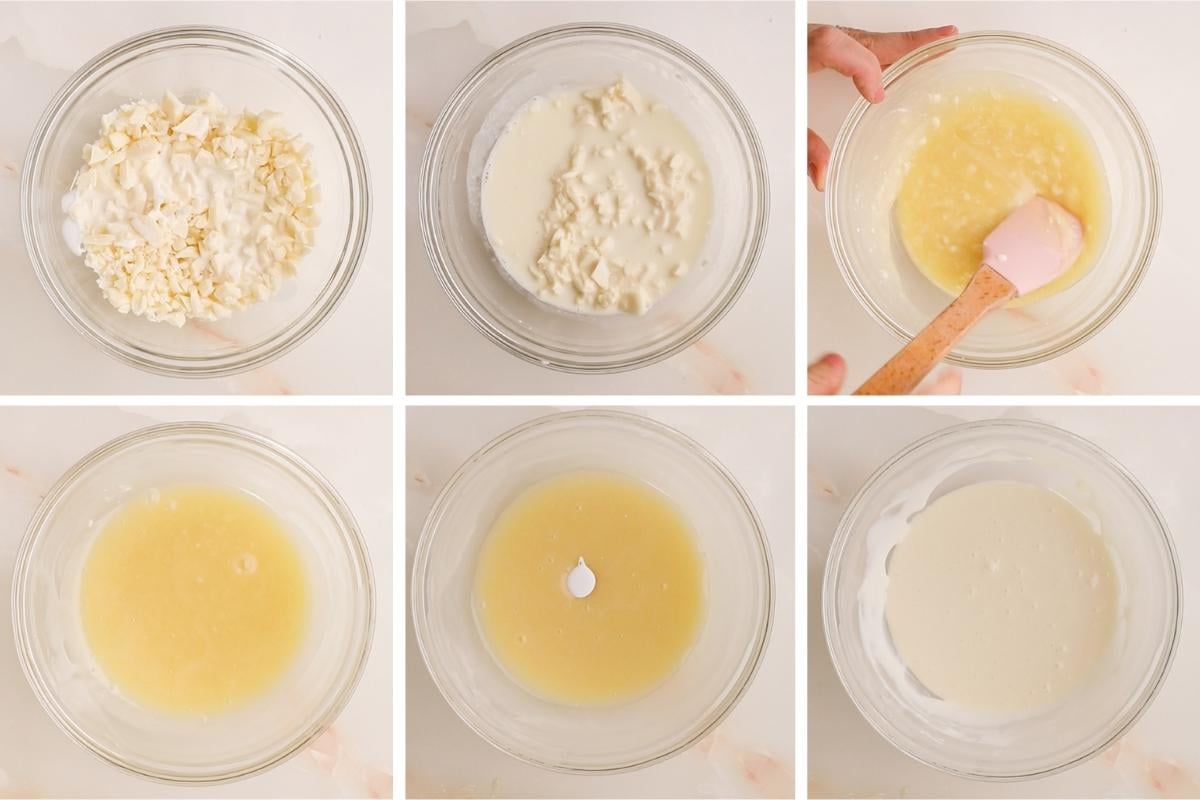
If you haven’t done so, chop the candy melts into very small pieces. This helps for even melting. Then, add the heavy whipping cream to the chocolate and microwave for 15-20 second intervals, stirring in between, until all the chocolate is melted.
You can also use an immersion blender, to blend any small pieces that have a hard time melting.
Once it’s fully melted, add in a few drops of white food coloring if desired. This will help the drip have a bright white color.
Step 3: Let ganache cool
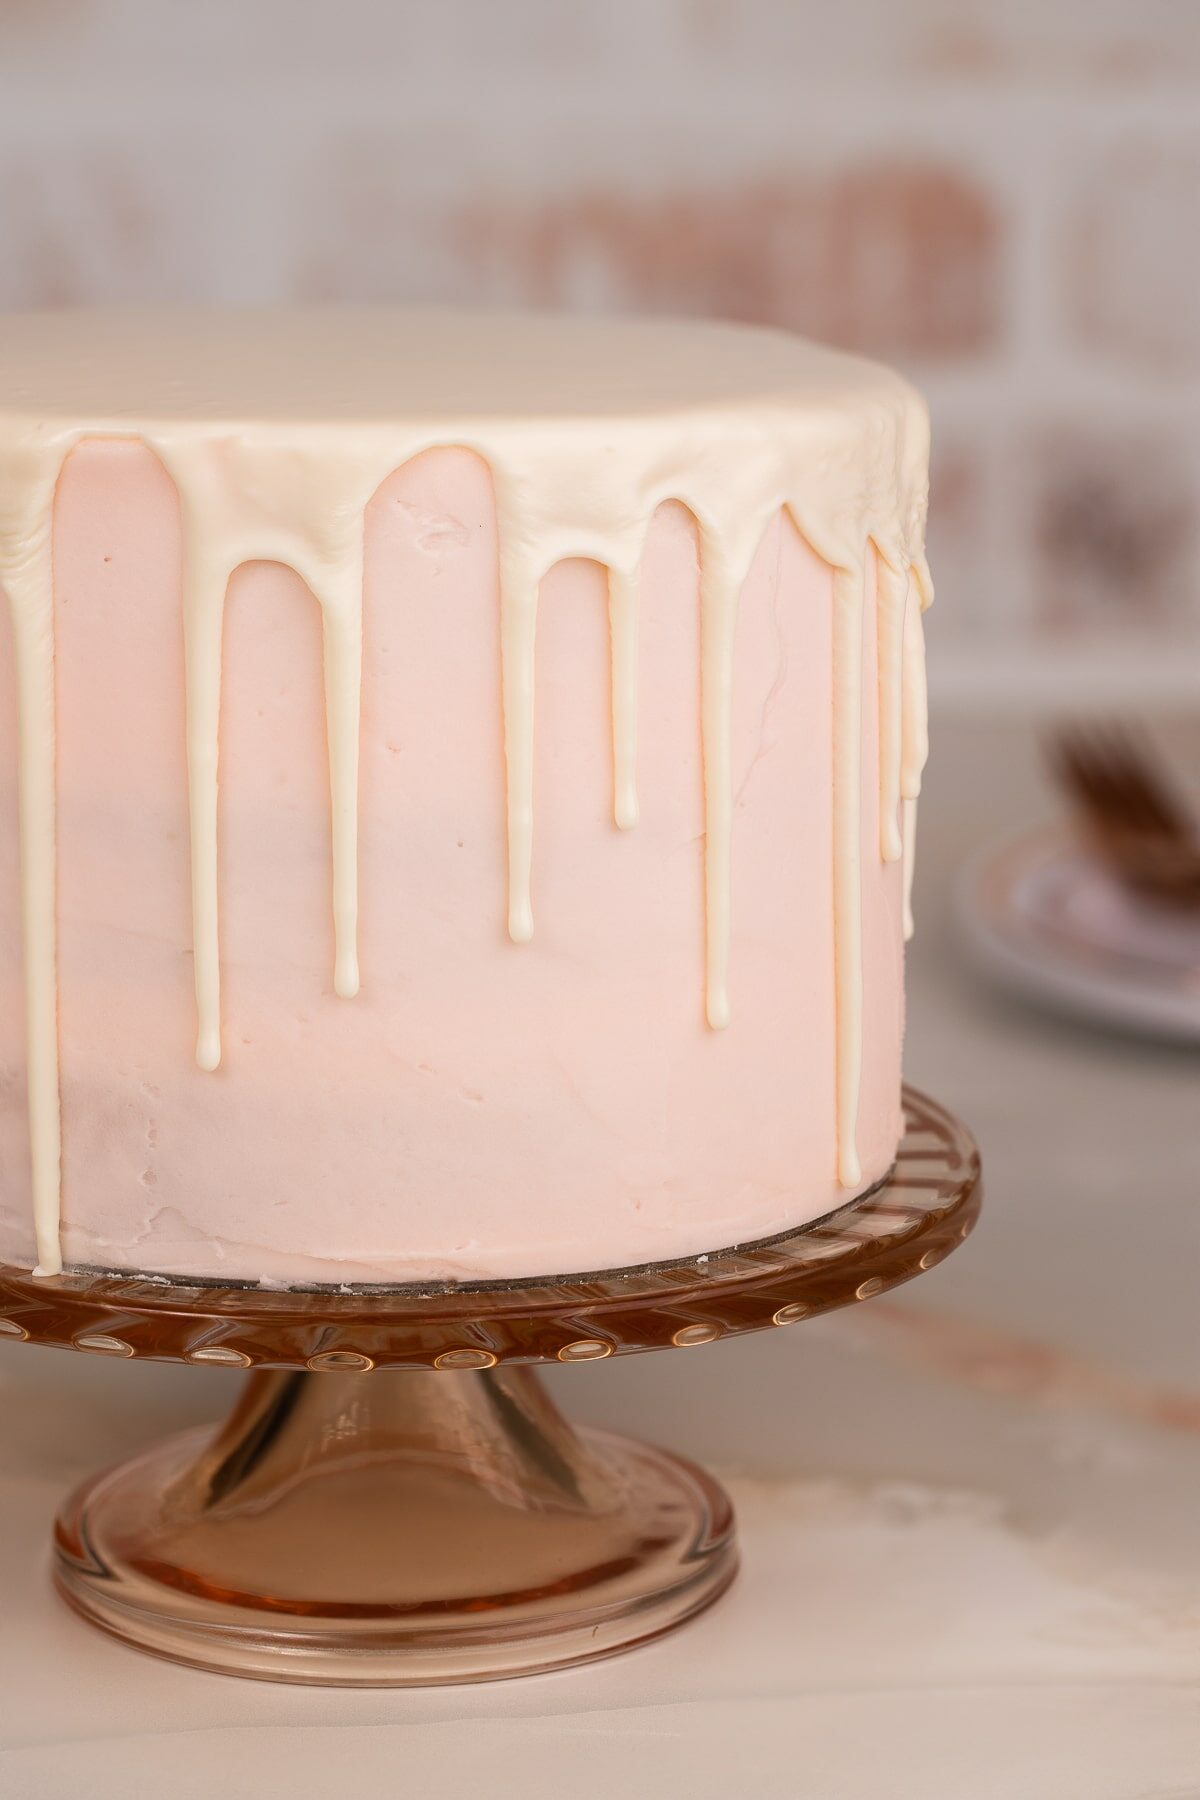
This is the most important step, once you’ve made the chocolate ganache it needs to cool down. Often for much longer than you think, anywhere from 15-30 minutes. It really helps to have a candy thermometer to get it to the correct temperature. You want it about 85-95 ℉.
Ways to tell it’s the right temperature:
- A candy thermometer: This is my preferred method to get the drips exactly the right temperature, of about 85-95 ℉ (30 to 35℃).
- Test Drips: You can a test drip along the side of a cup or bowl. You want it to run down fairly slowly and looks like a nicely formed drip.
Tip: If you cool the drip too much, you can reheat it and let it cool again.
Step 4: Add the Drips to the Cake
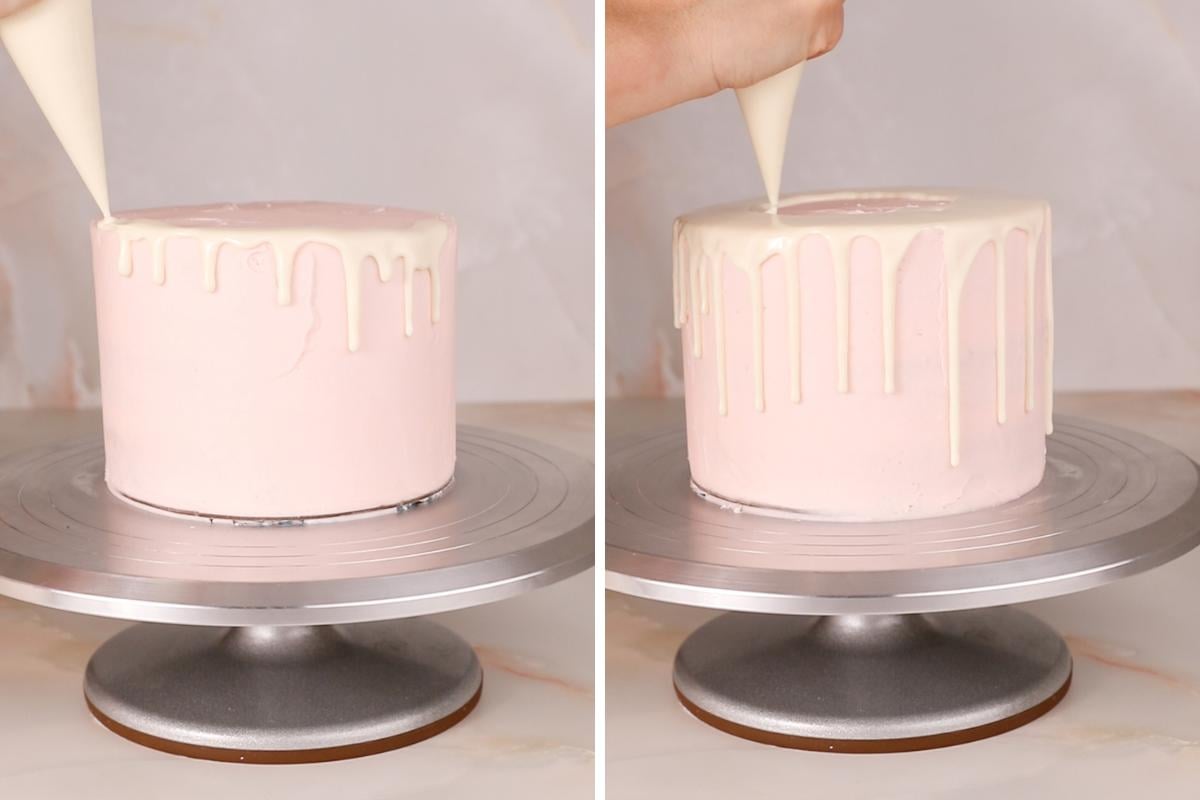
Now for the fun part, adding the drips to the cake. Make sure the cake is properly chilled before adding the drips. This helps slow down the ganache drips down the side of the cake.
There are a few different methods to add drips to a cake. How to add chocolate drips to a cake:
- Piping Bag: Add the ganache to a pastry bag and cut off a tiny piece of the end. The, add the drips where you want them, and fill in the middle.
- Squeeze Bottle: This is a very similar method to the a piping bag, but instead of the bag you add to a squeeze bottle. Similar to the piping bag method, this also allows for very exact drips.
- Spoon: You can use a spoon to add the ganache towards the edges of the cake allowing the ganache to fall down the sides. Then, spoon in the ganache towards the middle and if necessary, even out with an offset spatula.
- Pour: You can also just pour the ganache on top of the cake and then use an offset spatula to spread the ganache towards the edges. This makes for a more organic drip down the sides.
I personally perfect the pastry bag method, but they all work just fine! That’s it, once you add the drip you can chill the cake until you’re ready to finished decorating.
Tips and Tricks
- Make sure the chocolate or candy melts are chopped to small pieces. If you don’t, it can sometimes take awhile to make sure it gets fully melted and incorporated into the cream.
- Use an immersion blender if there are pieces of candy melts that have trouble melting.
- Be patient when letting the chocolate ganache cool. It takes longer than you think, normally between 15-30 minutes to cool down to the right temperature.
- Use a candy or instant read thermometer – this is key to getting the chocolate the right temperature. You want it between 85-95 degrees Fahrenheit.
- Make sure the cake is cold. Keep it in the fridge and take it out right before you are going to add the drip. This helps slow the drip falling down the side of the cake.
FAQ
Coloring a white chocolate drip is super easy! The easiest way is to use colored candy melts in place of the white, such as pink candy melts for a pink drip, blue candy melts for a blue drip, etc.
But, you can also mix in gel food coloring to the melted ganache to get your desired color. The white chocolate ganache tends to have a yellow hue so it can help to use white food coloring first, then add your desired gel food coloring for a brighter more true color.
I’m not a huge fan of fondant so I haven’t personally tried using a ganache drip on fondant. But, I’ve heard mixed reviews as to if it will work properly. Some people say it works just fine, others say the fondant bleeds and get weepy. Please let me know if you do try it and it works! Also, with some practice and a few tools you can frost a cake like a professional to look just like fondant.
This is normal, especially if the chocolate was heated to a boiling point. It’s not a problem though! If the ganache is still warmer than 85 ℉, just re-stir and it should come together again without any noticeable hardening. If it does cool too much, you can reheat it again and let it cool to the correct temperature.
The drip recipe itself is so simple, I don’t recommend making it ahead of time as you’ll still need to remelt it and then let it get to the right temperature. But, you can always make and frost the cake up to a day ahead of time, and then add the make and add drip the when you’re ready to decorate.
DECORATING IDEAS
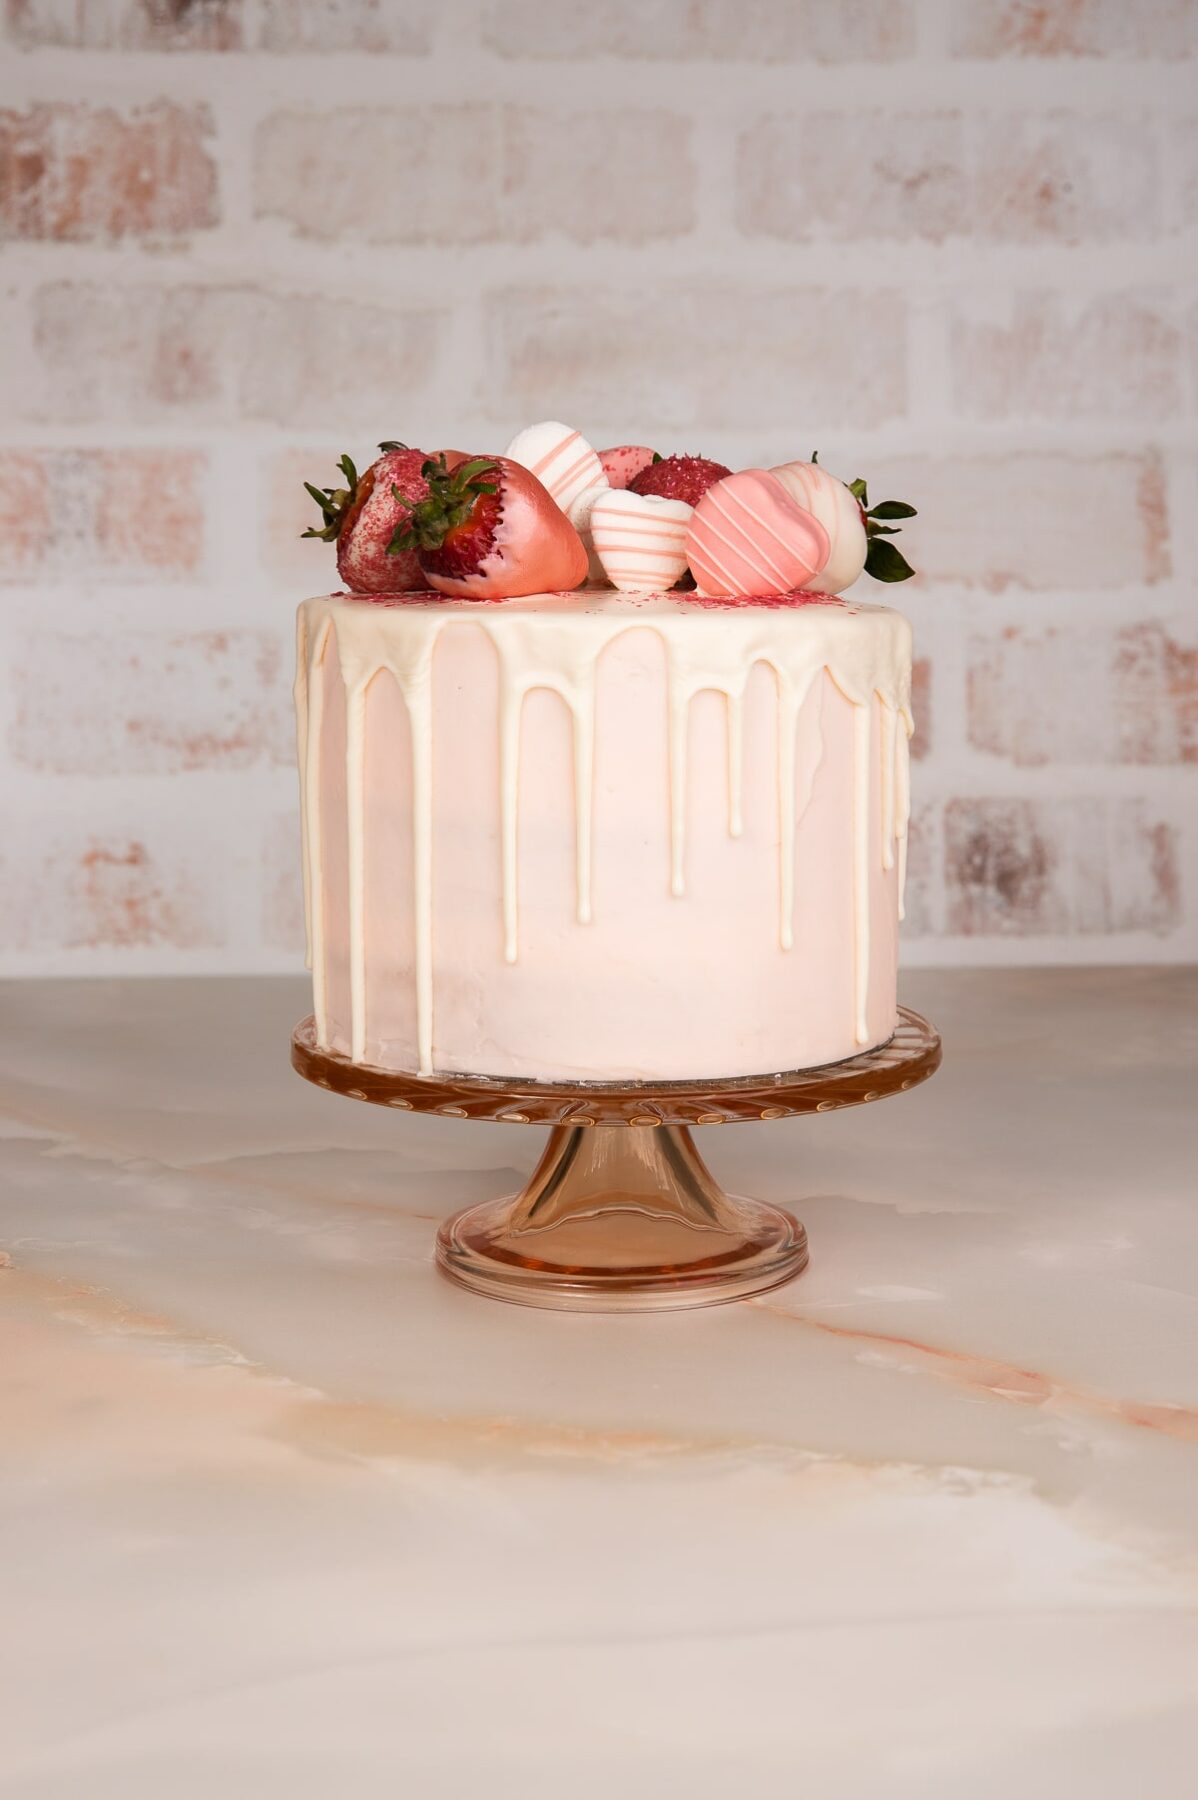
For this recipe I did a pink champagne cake, decorated with chocolate covered strawberries and marshmallows. But, the great thing about these chocolate drip cakes is you can use whatever type of cake you want decorate them however you want!
Here are some more fun decorating ideas:
And, unlike floral cakes or rosette cakes, which tend to be used around Easter, Mother’s Day or at Wedding showers, these drip cakes are incredibly versatile and can be used for birthdays, Halloween, and really any event of party you can think of.
Looking for more Unique Cake and cake decorating Ideas? Check these out!
WANT TO JOIN THE PARTY? Subscribe to my newsletter and follow on Tik Tok, Pinterest, Instagram, and Facebook for all the latest recipes!
White Chocolate Drip Cake
INGREDIENTS
- 1 frosted layer cake chilled
- 2 tbsp high quality white chocolate chips finely chopped, optional
- 1/2 cup candy melts, chopped 100 g
- 3 tbsp heavy cream 43 g
- white food coloring optional
Instructions
- Chill frosted cake at least 30-60 minutes.
- Chop the chocolate candy melts into small pieces.
- Add to microwave safe bowl and add heavy cream.
- Microwave for 20 second intervals, stirring in between each interval, until all the chocolate is melted.
- Once melted, let sit for 15-30 minutes, until it reaches 85-95 ℉.
- Either pour over cake, spreading towards the outside of the cake so it drips or add to a pastry or plastic bag with a medium trip and drip around the edges, then fill in the center and smooth with a spatula.
- Put back in the fridge to chill until ready to finish decorating.
Notes
- Chop all of the chocolate into small pieces. If you don’t, it can sometimes take awhile to make sure it gets fully melted and incorporated into the cream. If you have pieces of unmelted chocolate, you can use a plastic spatula to press against the side of bowl to break it down. Then, reheat until it’s all combined. You can also use a regular or immersion blender to mix if there are pieces of unmelted chocolate. Then reheat for 10-15 seconds until smooth..
- Be patient when letting the chocolate cool. It takes longer than you think, normally between 15-30 minutes to cool down to the right temperature.
- Use a candy or instant read thermometer – this is key to getting the chocolate the right temperature. You want it between 85-95 degrees Fahrenheit.
- Make sure the cake is cold. Keep it in the fridge and take it out right before you are going to add the drip. This helps slow the drip falling down the side of the cake.
- To get the drips exactly how you want them, put the chocolate use a pastry or plastic bag with a medium size tip and drip around the edges of the cake, and then fill in the top.






Our microwave just went out this week, could I do this using the glass bowl over a pot method?!
Yes! Using a double broiler to heat the chocolate/cream would definitely work!
Hi, cake looks beautiful. Quick question, can you use this recipe on fondant icing?
Thanks x
Hi, unfortunately I haven’t tried a ganache drip on fondant and i’ve heard mixed things about if it will work. I’ve read that it makes the fondant wrinkle and others say it works just fine. I’ve heard using a thinned out royal icing works well on fondant, but I personally haven’t tried that either as I tend to stick with buttercream for my cakes. I’m really curious now if it will work, please let me know how it turns out if you try it!
Is it possible to make this one day in advance and heat in the microwave in short bursts to get to the right temperature?
I haven’t tried it that way. It’s a pretty simple recipe so I do recommend making it the day you are decorating your cake, but if you try reheating it let me know how it goes!
I live in the UK. Can you tell me what Candy Melts are please. Would like to try this recipe.
Hi, these are candy melts. You can usually find them in craft stores or online. The big brands that sell them are Wilton and CK products.
Please can you share the recipe for the cake? Is it a regular sponge?
Hi, it’s a champagne cake. The recipe is linked in the post under the Decorating White Chocolate Drip Cakes section.
Thank you 🙂
So glad you liked it!
Does this set hard?
I am needing to paint drip rose gold…so I am thinking white chocolate is best! This looks fab and easy recipe to follow.
Thanks.
Kathryn 🙂
Yes, it will set hard enough for you to paint it!
Did you melt the chocolate and candy melts together?
yes, you cut up both the white chocolate and chocolate melts and add to the same bowl to melt.
Never done drip icing nor ganache , but thanks to your recipe I’m really pleased with my first white chocolate ganache drip cake. Really easy after following your instructions, thank you.
Sophie
Thanks, so glad you liked it!
Fast question, can you replace the heavy cream with evaporated milk? Or do the milk and butter mix?
I haven’t tried evaporated milk so I’m not sure if it will work. If you’re looking for an alternative to cream here is a recipe for a drip cake using water. I haven’t personally tried the water drip, but if you try it or try subbing evaporated milk for cream, let me know if it turns out!
Wow… What an elegant looking cake. I am just loving everything about this cake. Beautiful capture!!!