This step by step tutorial will show you how to make cakesicles in any flavor, with troubleshooting and decorating tips and tricks!
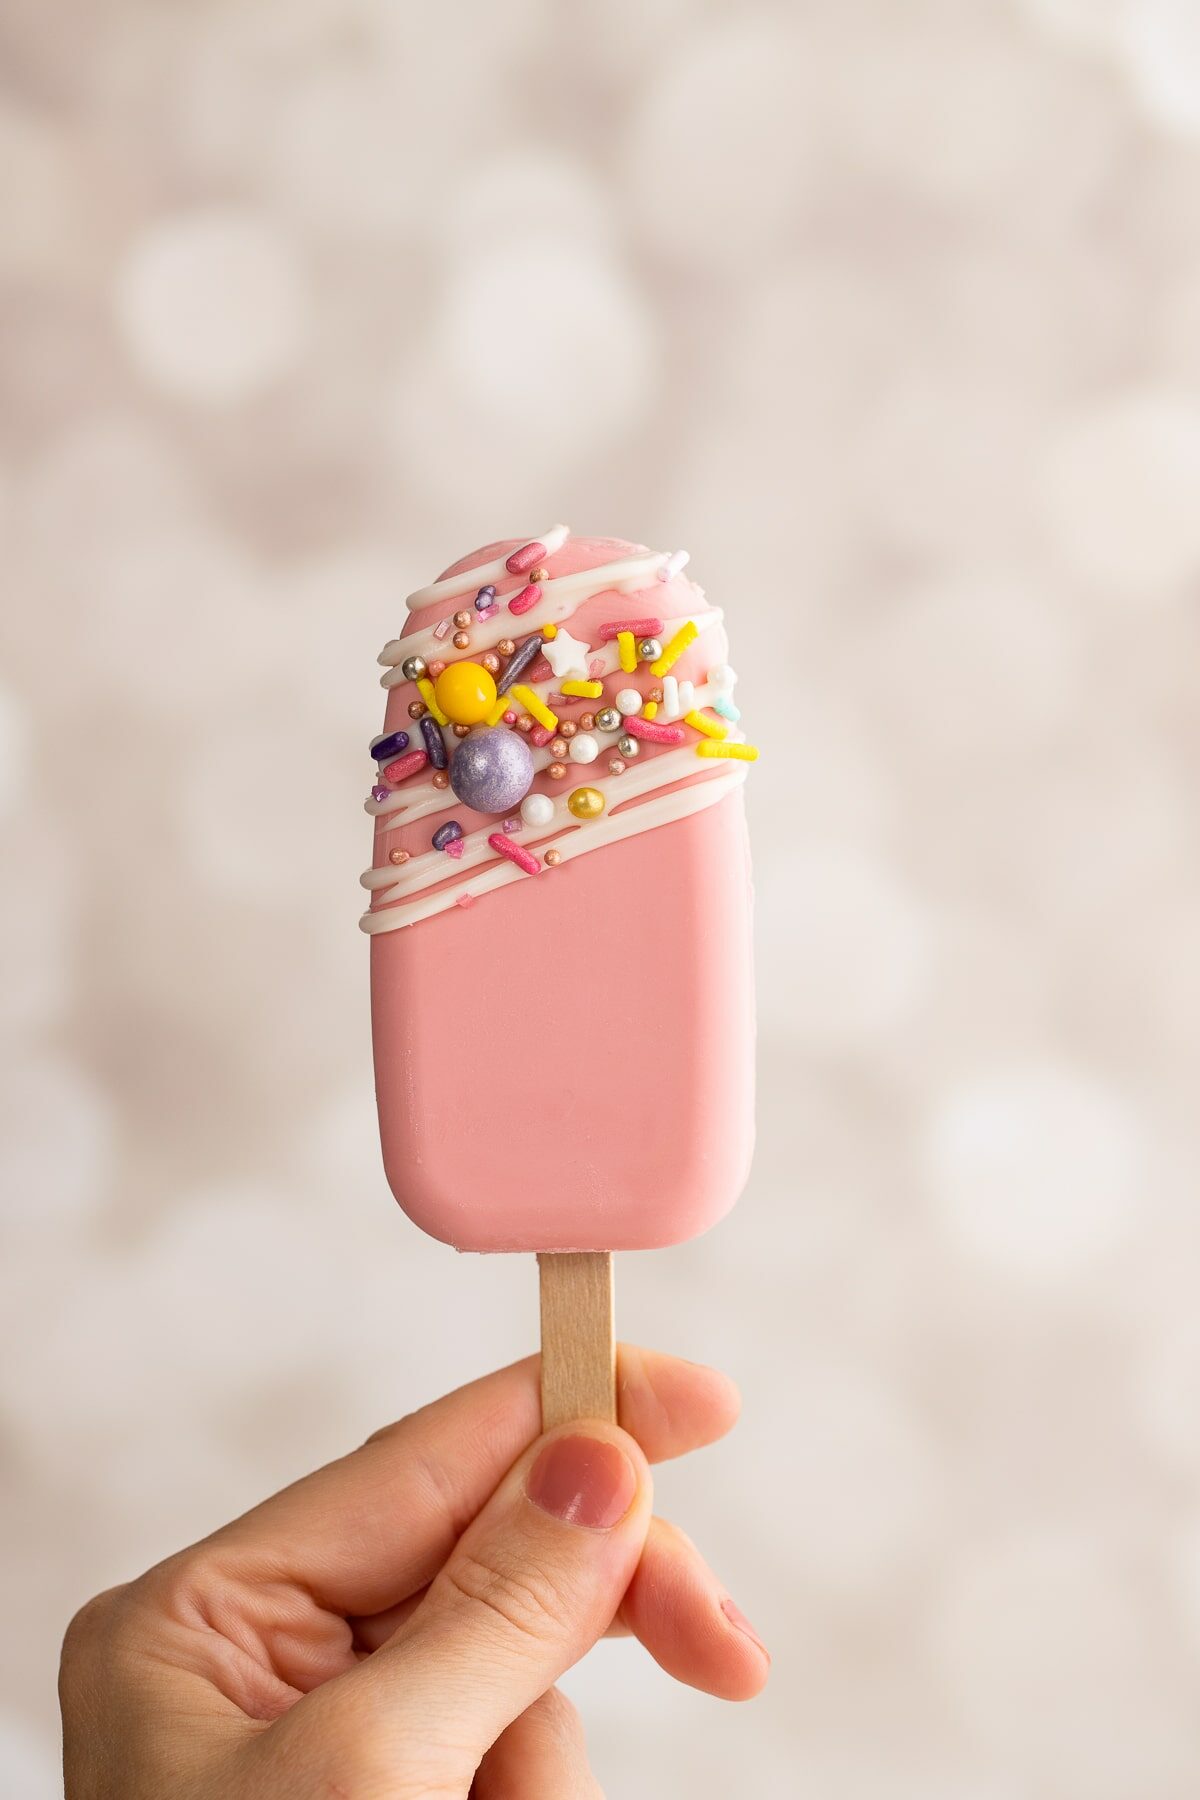
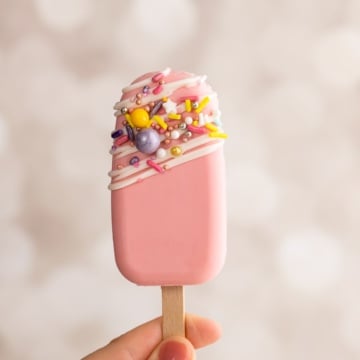
Cakesicles, also known as cake popsicles, are such a fun and unique dessert! Often found at weddings, baby showers, birthdays, and other events or parties, these are an individual and customizable take on the classic cake pops.
I personally think they're much easier to make than cake pops and with more surface area, they're super fun and easy to decorate! Check out these Easter-themed cakesicles. So cute!
If you've never tried making them, here is a step-by-step tutorial that will show you all the tips and tricks for perfect cake popsicles, every time!
Ingredients and Tools

Cake
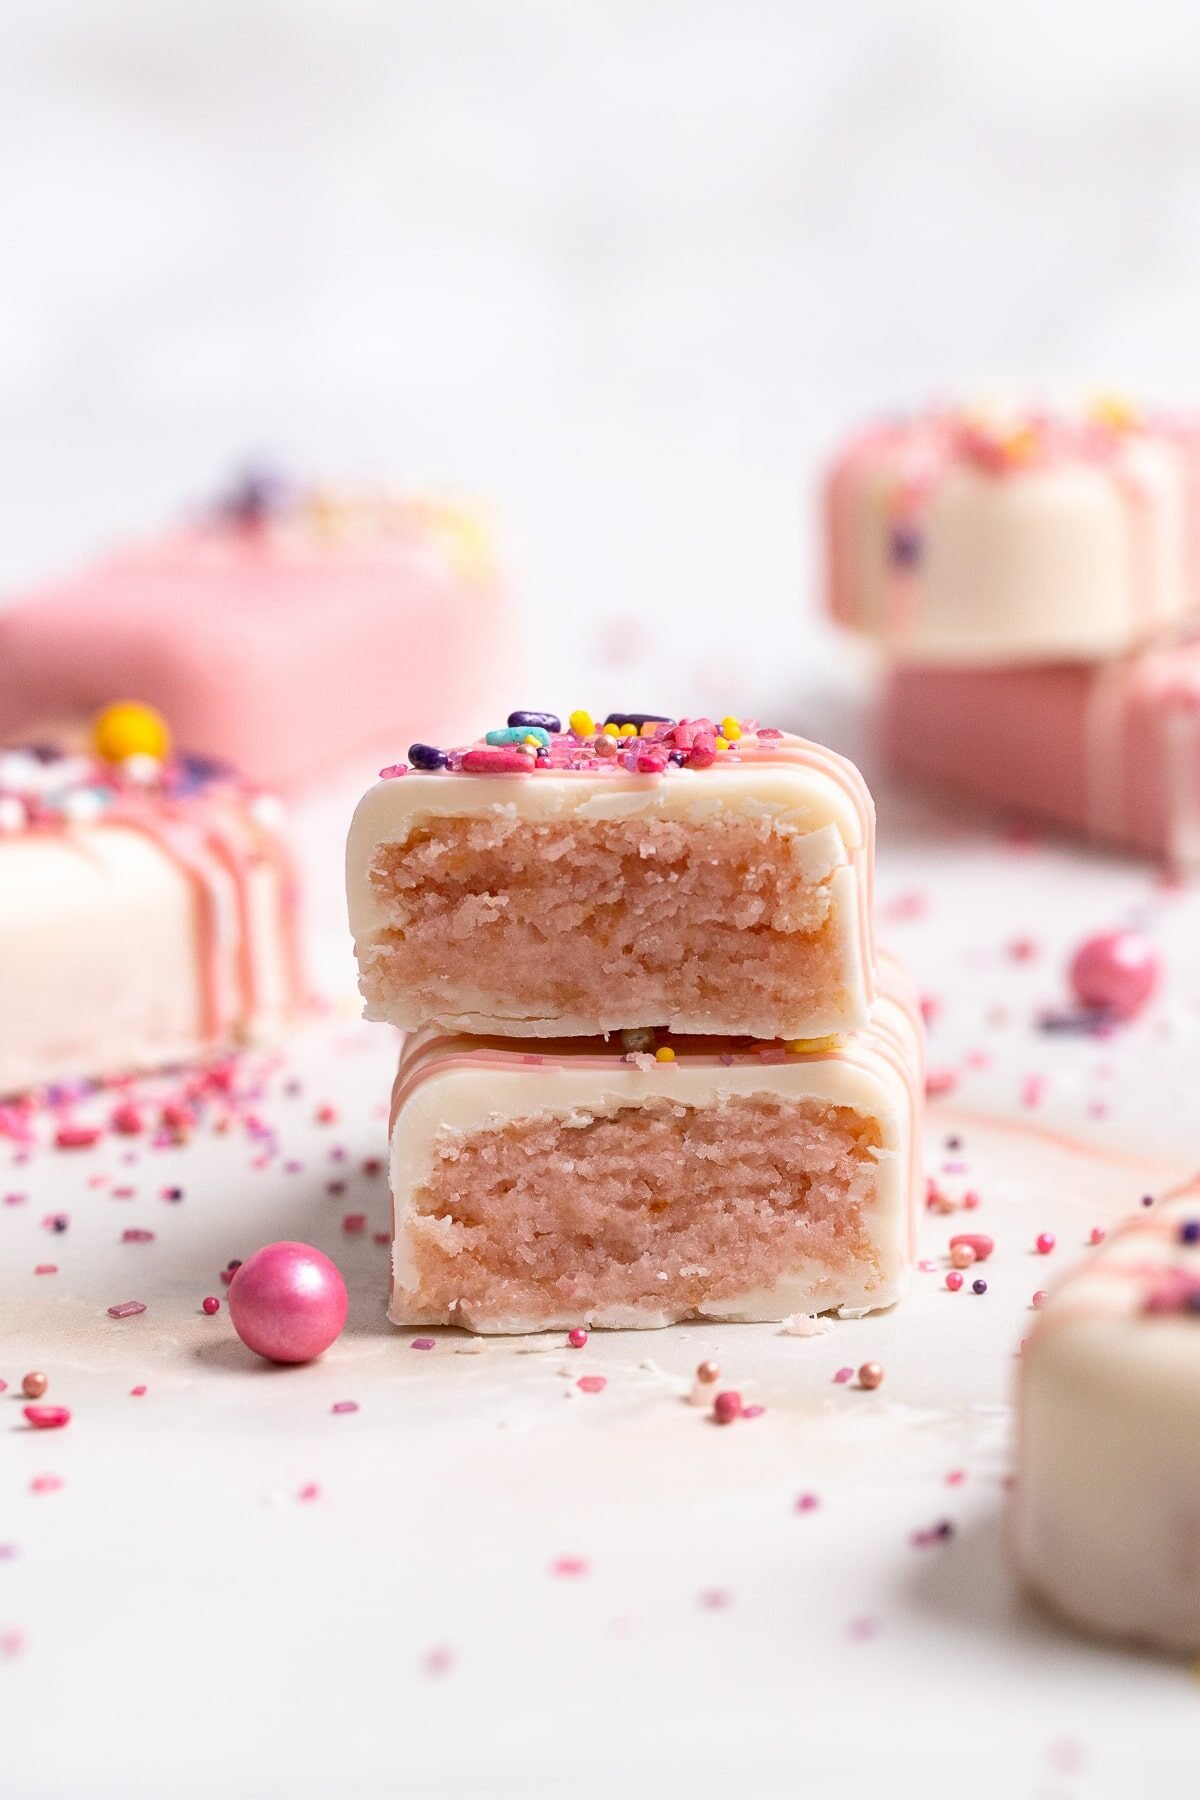
You can use your favorite type of cake for cake popsicles! Boxed cake mixes work great, as do pre-made cakes like pound cakes.
If baking a cake, make sure it is at room temperature before making the filling. If it is warm, it can melt the frosting. Here are some cake flavor ideas:
- Devil’s Food Chocolate Cake
- Vanilla Cake
- Champagne Cake
- Yellow Cake
But, you can also use carrot cake, strawberry cake, lemon cake, red velvet cake, really any cake you like! And you don't need to fill these dessert popsicles with cake at all! You can use other fun fillings. Other unique filling ideas:
- Edible cookie dough
- Brownies (or edible brown batter!)
- Cheesecake
- Donuts
- Rice Krispie Treats
Types of Frosting
The purpose of the frosting is to keep the cake moist. You only need a little bit (much less than you think!), so while homemade or store bought buttercream frostings and cream cheese frostings are the most common, you can also use things like Nutella, chocolate ganache, or a bit of jam or fruit filling like this strawberry cake filling.
Here are some fun frosting ideas to pair with cake:
Pro Tip: You can also try the no-frosting method! This is an Instagram and social media hack of crumbling the cake when it’s hot out of the oven and letting the steam bind the cake together. Then, use as outlined below.
Chocolate Coating
I highly recommend using melting chocolate for chocolate and white chocolate cakesicles, and candy melts for colored chocolate coating.
It makes coating these so easy, and you won't need to temper the chocolate first! Some candy melt brands:
I personally think Ghirardelli tastes the best and you can find them at most grocery stores and Target. But, they only come in white chocolate, dark chocolate, and milk chocolate.
You can buy candy melts in a variety of colors, but if you want to add food coloring to chocolate you’ll need to use candy colors, which are oil based food colorings, perfect for coloring chocolate.
You can not use regular or gel food coloring to color chocolate or else it will get grainy and seize up.
If you do decide to use regular chocolate rather than the above melting chocolate or candy melts, it is highly recommend to tempter it first so it doesn't melt as easily and keeps that nice shiny smooth texture and crunch.
Cakesicle Molds
Yes, we have a whole section on cake popsicle molds. Why? Because the options are basically endless! As long as they are food grade silicone molds that are flat popsicle molds (not the stand up kind), they'll work! Be careful if there are too many grooves as they can be difficult to release from the chocolate. But, other than that some options are below:
And, you can even turn any food-safe silicone mold into a cakesicle mold by carefully cutting a little slit in the mold for the popsicle stick.
How to Make Cakesicles
Cakesicles are surprisingly easy to make! I think they're easier than cake pops in that you don't have to worry about them falling off the stick as much as with cake pops. You just need a few special tools and some basic troubleshooting tips and you're good to go!
Step 1: Make Cake Filling

Crumble Cake: Add your crumbled cake into a large bowl.
Add Frosting: Start mixing in a small amount of frosting, about a tablespoon at a time, until you get your desired consistency. You can mix with a mixer, a spatula, or your hands. Typically you will need way less frosting than you think. For one prepared 9×13 box mix cake, I used a little over ½ cup of canned frosting. But, amount of frosting to cake ratio will vary depending on the cake and frosting recipe you're using.
How You’ll Know It’s Ready: The ideal filling will hold together when you pinch it, but not be gooey or sticky. Some people like their cake pops and cakesicles dryer and some like them with more frosting. It's somewhat of a personal preference, but keep in mind that if you add too much frosting they have a harder time staying on the popsicle sticks.
STEP 2: CHOCOLATE COATING
There are two main ways to coat the cakesicles in chocolate:
- Dipping Method: where you dip the cake pop into chocolate, similar to making pink chocolate covered strawberries or cake pops.
- Spread and Fill Method: where you spread the melted chocolate all around the mold, let harden, and then fill with the cake filling.
There are pros and cons to each method:
Dipping Method Pros:
- Evenly Coated Chocolate
- More Sturdy Since the Chocolate Covers The Popsicle Stick
- Quicker- No waiting for the Chocolate to Dry in the Molds
Dipping Method Cons:
- Can Have Texture or a Slightly Bumpy Surface
- The Chocolate Needs the Right Consistency
- Works Best on Smaller Cakesicles
Spreading Method Pros:
- Super Smooth and Even Front
- Chocolate Consistently Isn’t as Much as an issue as with Dipping Method
- Works for All Shapes and Sizes of Cakesicles
Spreading Method Cons:
- Chocolate Can Break Around the Stick if Not Careful
- Back of Cakesicle Can Be Bumpy and Have Texture
- Have to Wait for Chocolate to Dry Before Second Coat and Adding Filling
Dipping Method
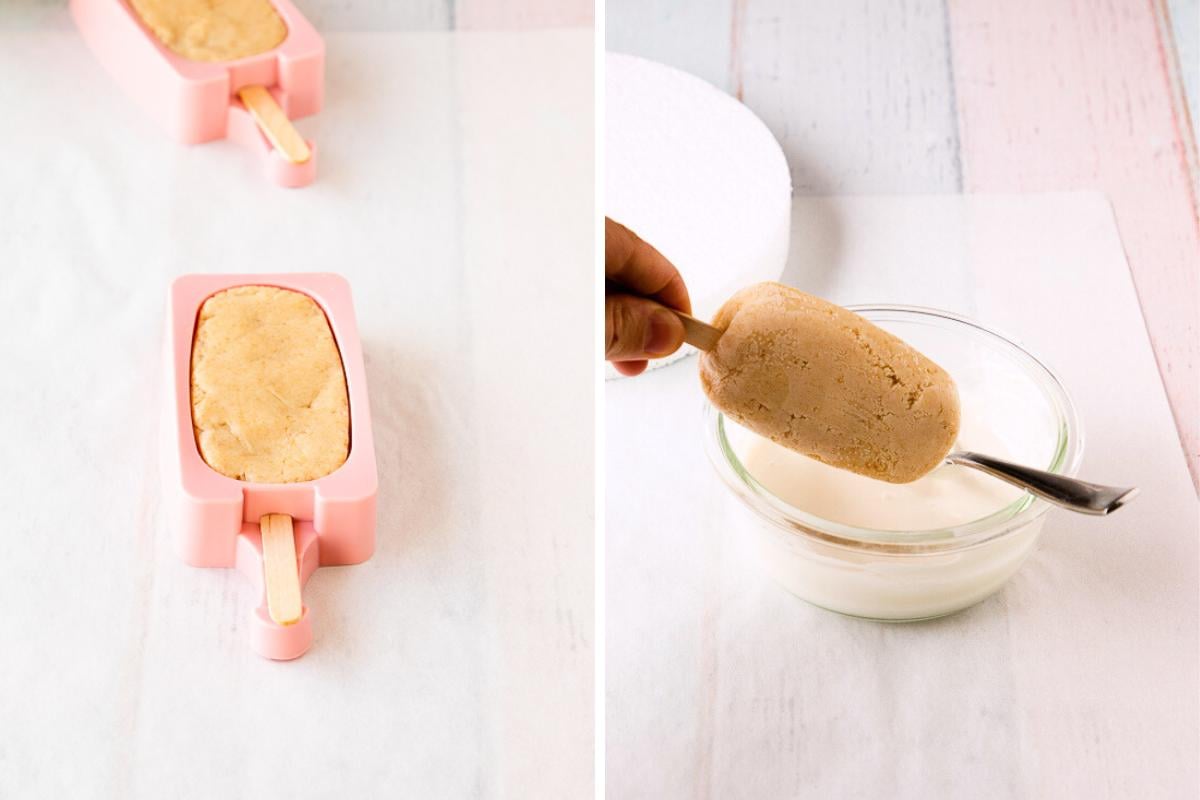
Fill Molds: Fill the cakesicle molds with cake filling and put in the freezer for 20-30 minutes to harden. When ready to dip, melt the chocolate melts according to the instructions on the package.
Melt and Test Chocolate: When ready to dip, melt the chocolate melts according to the instructions on the package. It's really important to have the right consistency of chocolate, so depending on the brand of chocolate melts you might need to add some vegetable shortening to thin it out. You can test it by dipping a knife or spoon in the chocolate - it should be thick enough to coat but thin enough that when you shake it any drips reincorporate back into itself.
Dip Cakesicle: Once the cakesicle has hardened and the chocolate has melted, remove the cakesicle from the mold and dip the cakesicle in the melted chocolate. Remove from the chocolate and very gently shake to reincorporate any drips back into the chocolate.
Let Dry: You can either put the popsicles on a styrofoam board to dry, (like in this chocolate strawberry post, which also tons of tips and tricks -for chocolate dipped food) or lay flat on a piece of parchment paper.
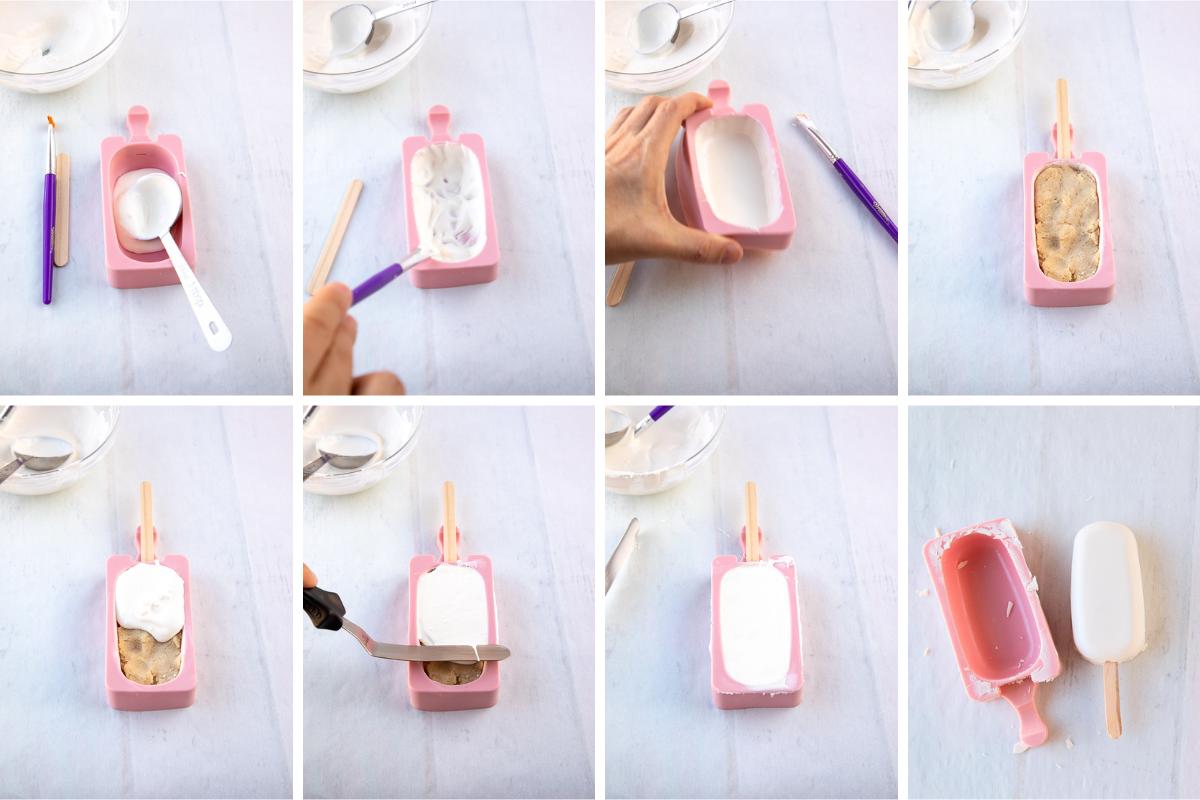
Spreading and Filling Method
Even though this method has more steps, I actually think it's easier and they come out perfectly smooth and shiny every time.
Add Chocolate to Mold: to start, add about a tablespoon of melted chocolate to the molds. The amount can vary depending on the size of your molds. But, about a tablespoon is a good start.
Spread Around: Using a spoon, pastry brush, or paint brush, spread the chocolate around the sides of the mold, making sure it is thick along the sides and the chocolate goes all the way to the top. If it's too thin or doesn't cover everywhere, the chocolate can crack when you try to remove the cakesicle. You can also add a second layer of chocolate along sides once the first layer has dried. This helps to ensure the sides aren't too thin and won't break. Shake the mold to even out the chocolate. If there any air bubbles, pop them using a toothpick, scribe, or tip of a knife.
Add And Remove Stick: While the chocolate is still wet, clear out the space for the popsicle stick by adding and removing the popsicle stick. Cleaning out a space for the stick helps ensure the ends of the cakesicle don't crack.
Let Harden: Then, let the chocolate harden in the fridge for 5-10 minutes. Once it's hard you can either add another coat of chocolate if you like a thicker coating and/or reinforce the edges of chocolate by adding another teaspoon or so of chocolate around the edges. This can help ensure the chocolate doesn't break. If you add more chocolate, let harden again in the fridge for another 5 minutes.
Fill Mold: Add about 2 tablespoons of cake filling to the molds. This amount can vary depending on the size of your molds. Be very gentle when adding the filling, if you push down too hard you can break the chocolate. You want to leave some room on the top to add the chocolate.
Add Popsicle Stick: Then, gently push in the popsicle stick. It's okay if the chocolate around the stick breaks a bit, we can fix it in the next step.
Add Chocolate to Top: Add another tablespoon of melted chocolate to the top of the filled molds, making sure to add a bit extra to where the popsicle stick is. If the chocolate broke in the previous step, use the top of a knife or spatula to gently press the chocolate near the popsicle stick. The warm melted chocolate should reinforce any broken chocolate in that area. Then, using a knife, spoon, or cake spatula, drag the chocolate over the filling. Add more chocolate and re-scrape if needed.
Let Harden and Remove From Mold: Then, let the chocolate harden at room temperature for at least 20 minutes or in the fridge for 5-10 minutes. Once firm, gently remove the cakesicle from the mold, and you're ready to decorate.
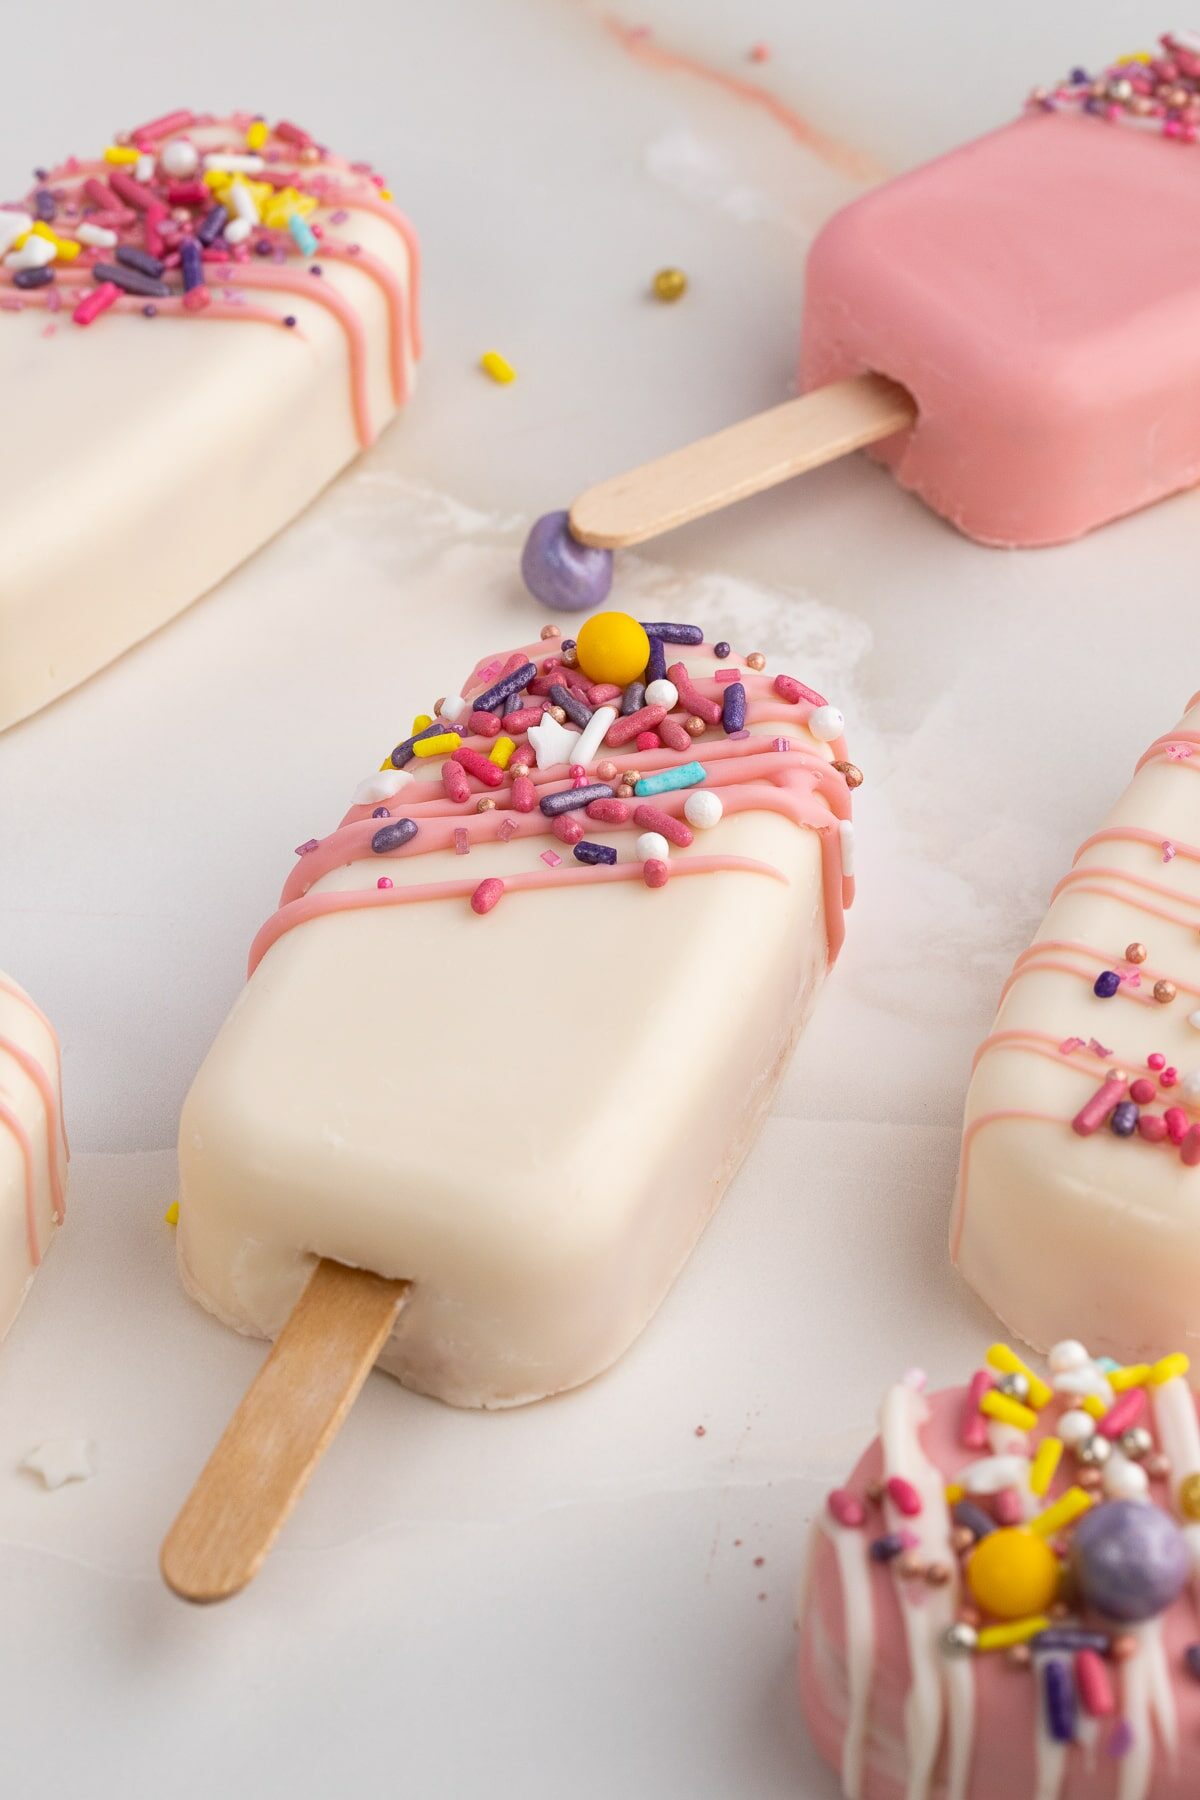
Decorating Cakesicles
Now for the fun part, decorating!! Because these are so much bigger than cake pops, they're easier, and I personally think more fun, to decorate.
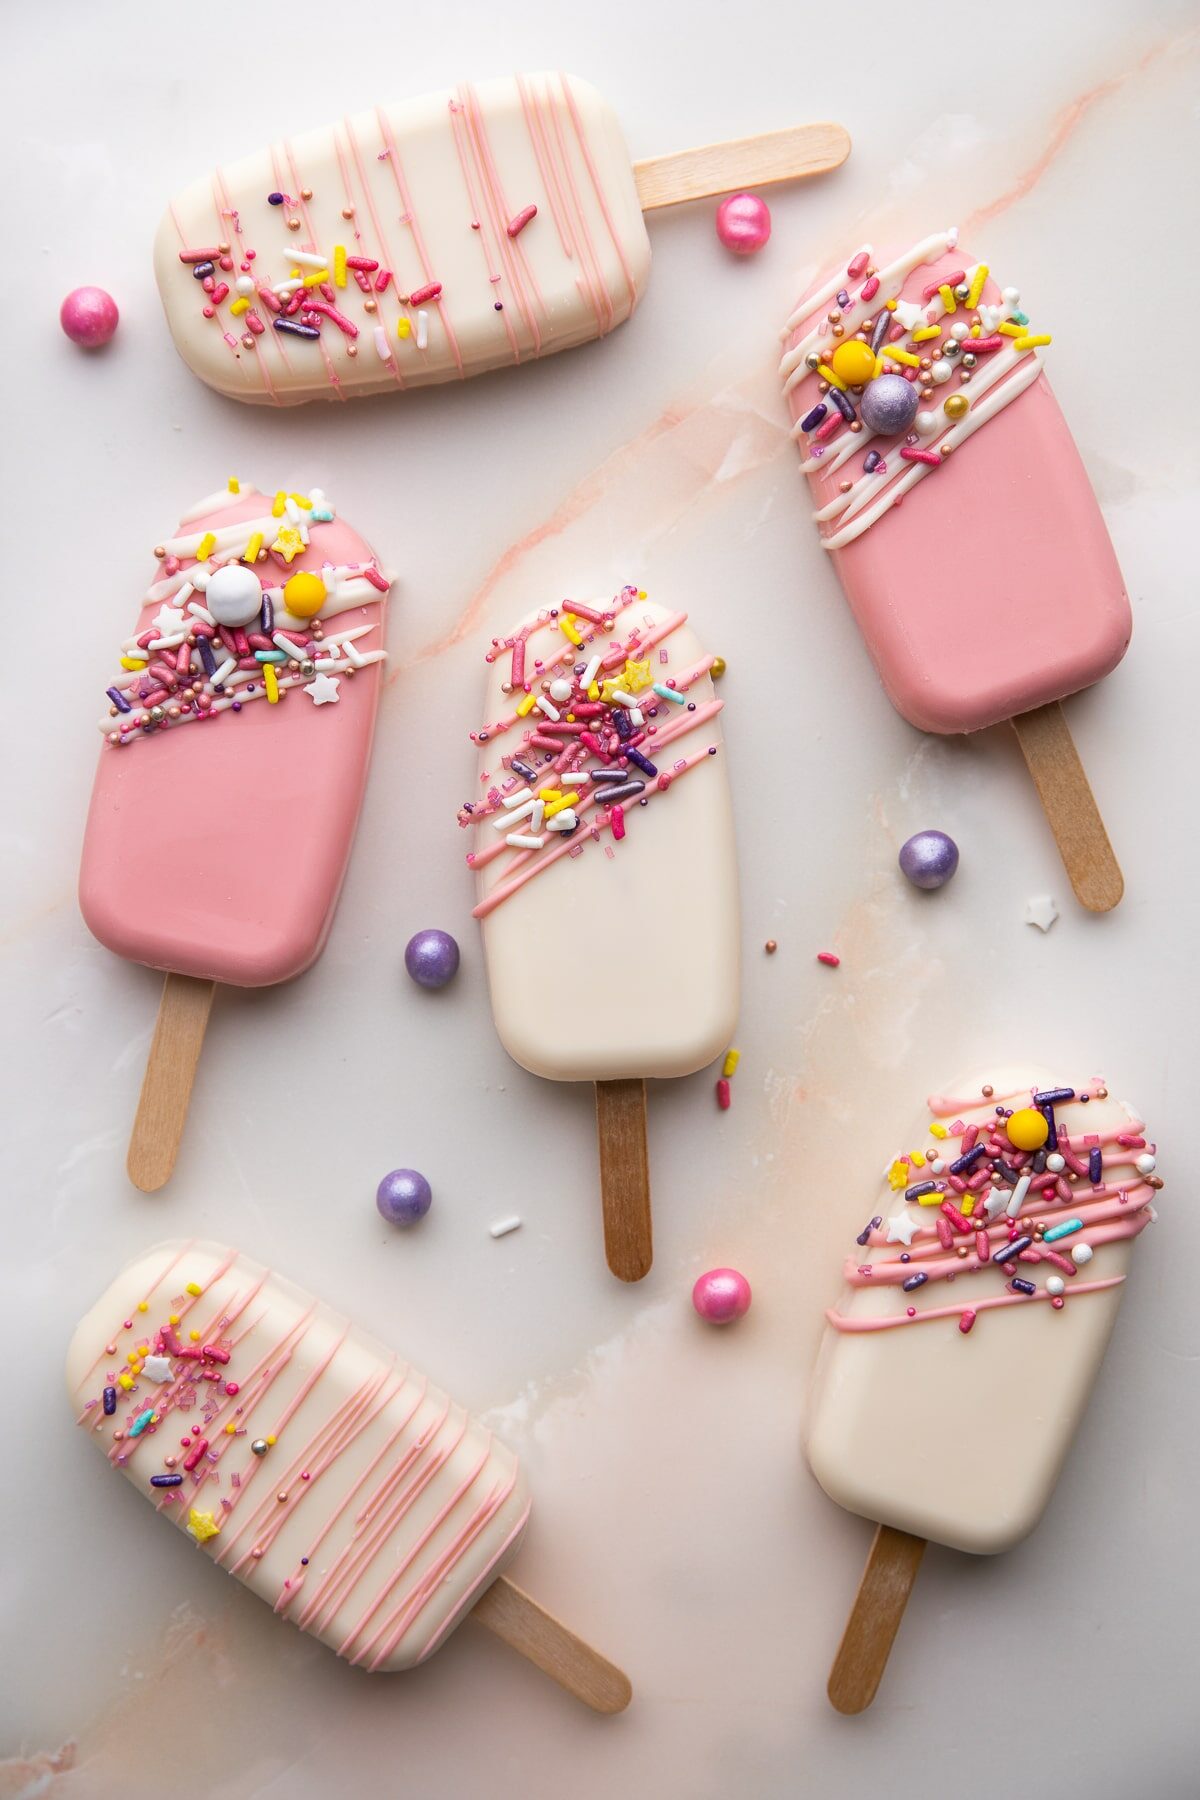
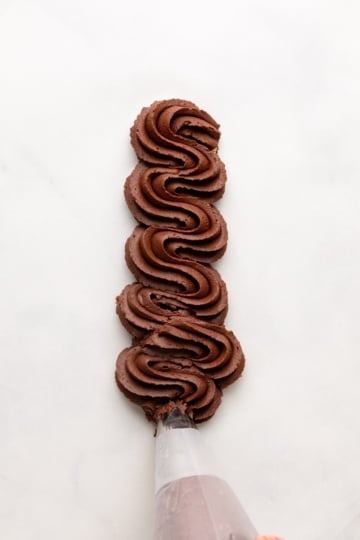
A super easy way is to drizzle extra chocolate over the cake popsicles. Then, add some sprinkles while the chocolate is wet. In addition to adding more chocolate and sprinkles, you can also add the following:
But, similar to decorating sugar cookies with royal icing or a layer cake, the decorating possibilities are endless. You can decorate these for any holiday or theme you like:
- Weddings, Showers, and Events: Baby Showers, Gender reveals, wedding showers, engagement showers, Birthdays, Graduation
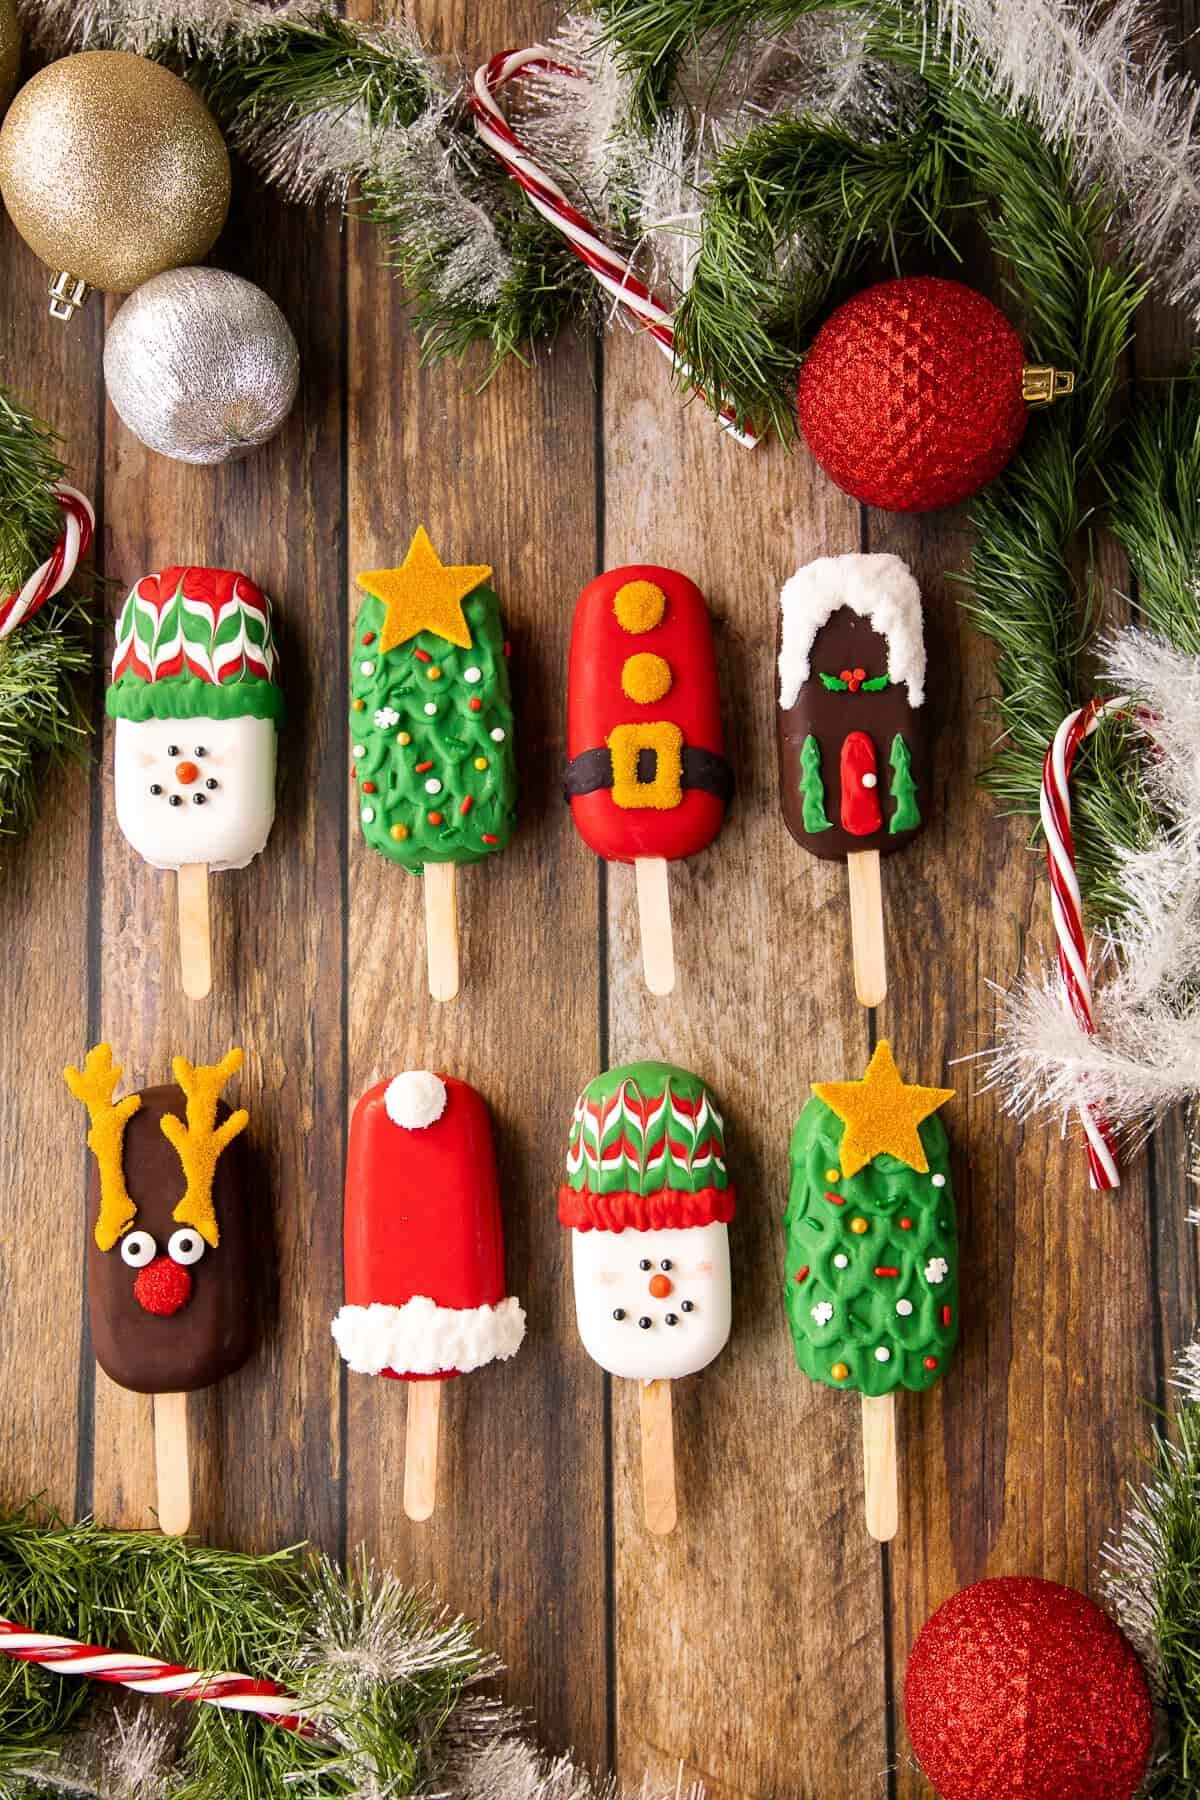
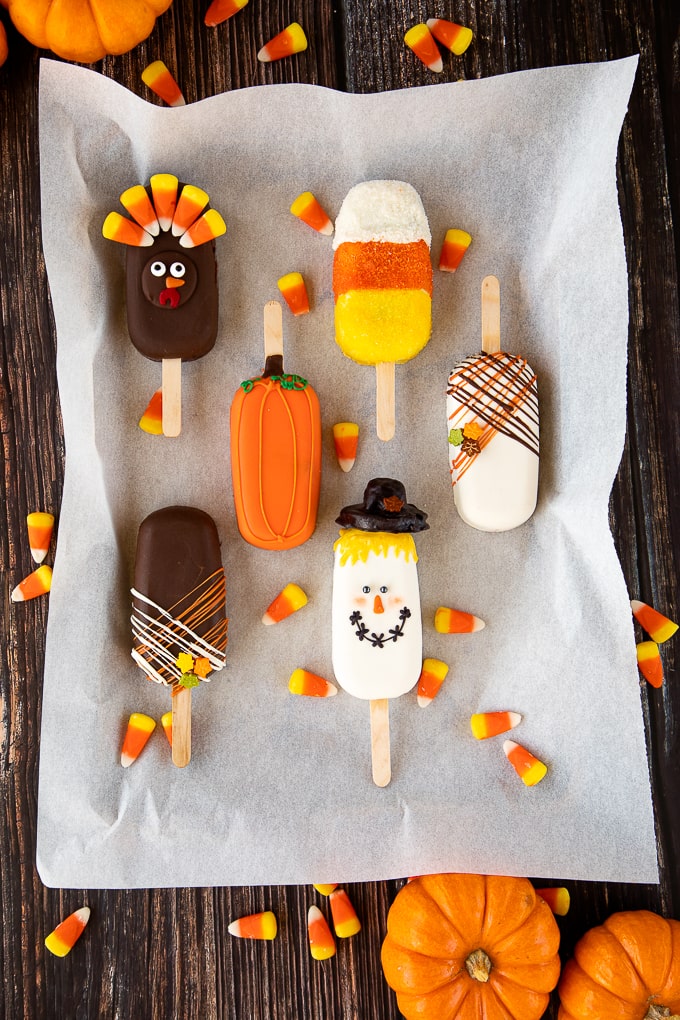
- Holidays: Thanksgiving, Valentines' Day, Easter, 4th of July, Christmas, Valentine's Day, St. Patrick’s Day, any fun holiday will work!
- Cartoons: Paw patrol, Mickey Mouse, Winnie the Pooh, Peppa Pig, etc.
- Superheros: Superman, Spiderman, Batman, Marvel
- Misc: Space or Galaxy, Mermaid, Tropical, Rainbow, Geode, or Unicorn Cakesicles
TIPS FOR DECORATING:
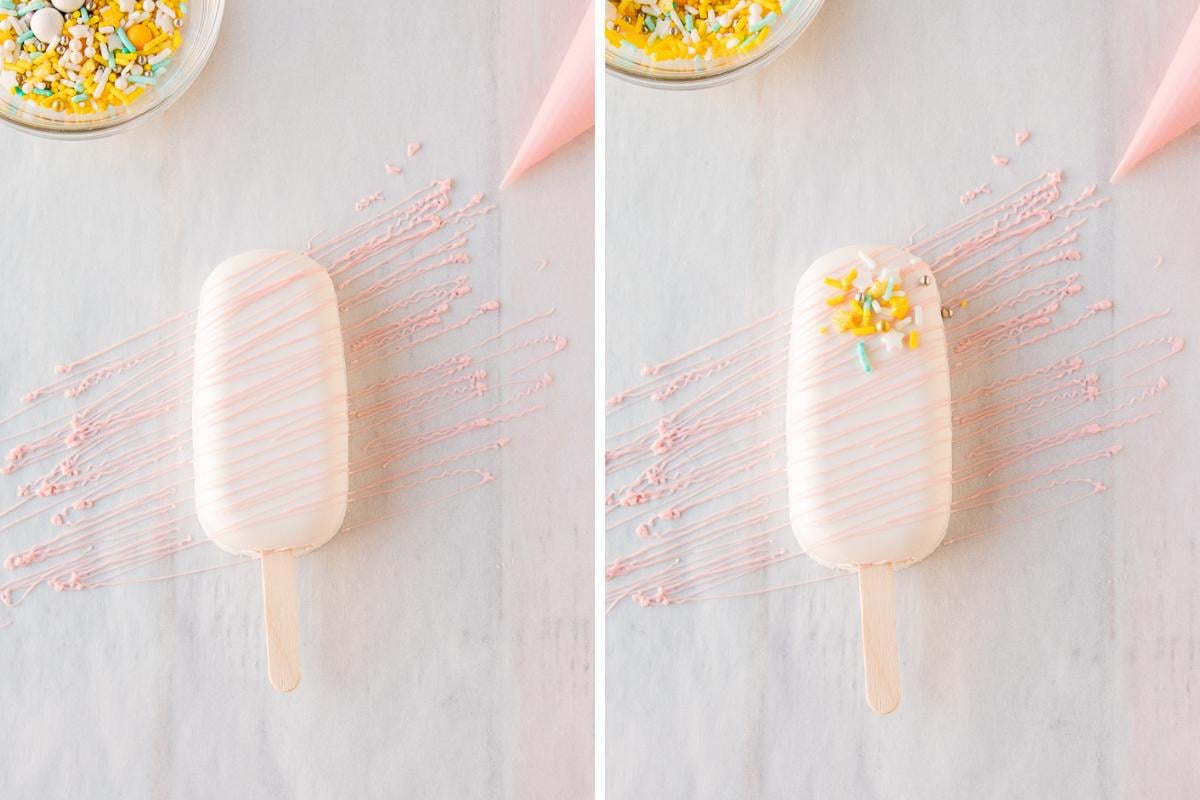
- For anything that needs to stick to the chocolate, like sprinkles, you must add it when the chocolate is wet or add a bit more melted chocolate as decorations will not stick as the chocolate starts to hardened.
- I like to use a paint brush to wipe away the excess sprinkles but you can use any similar tool or even your hand.
- Be careful when touching the hardened chocolate, it's easy to leave fingerprints. Food grade gloves go a long way in keeping fingerprints off the chocolate when decorating or moving them around, especially if you're making these for an event or selling them.
FAQ and Troubleshooting
Be very gentle when adding your cake mix to your molds and don't push down or overfill. You really don't need to push down hard or even at all.
Also, make sure the chocolate around the edges and top of the mold is thick enough. It can help to do a double coat of chocolate around just the edges of the molds.
If you're still having issues, letting the mold sit out at room temperature for a few minutes after removing from the fridge and before filling and un-molding can help combat cracking.
This is a common problem and it can help to make sure to clear out a space for the stick while the chocolate is still wet.
And, when adding your top layer of chocolate make sure the stick has been pushed in and add extra chocolate near where the stick enters the cakesicle.
You can use a knife to push it down to the bottom. The warm melted chocolate should re-melt cracked chocolate around the stick.
This often happens if you're adding shortening to thin the chocolate and/or the chocolate is too hot. Continuing to mix while letting the chocolate cool a bit should stop it from separating. Doing a few test dips on a spoon can help make sure your chocolate is the right dipping consistency and temperature.
Make sure there is no liquid added to the candy melts or else it will seize up and get grainy. Also, water based food coloring will cause the chocolate or candy melts to seize up. Instead, you must use oil based candy colors or buy candy melts in the color you want.
I have larger cakesicle molds, and I normally plan on using about ¼ cup candy melts per cakesicle, not including any chocolate for decorating. But, this can vary depending on the size of your molds.
More Tips and Tricks
- For ease, I used box cake mix and canned frosting. But, you can use any cake and frosting you like!
- I recommend melting or dipping chocolate such as candy melts. If you don't use some type of melting or dipping chocolate, it helps to temper your chocolate.
- You can not add regular or gel food coloring to chocolate or candy melts, you must use candy colors, which are oil based food colorings.
- If using the dipping method, you might need to thin it out the chocolate with vegetable shorting or coconut oil. The amount will vary depending on what brand and color you're using, but start with a teaspoon per ½ cup of melting chocolate until you get the desired consistency.
- Using a box cake mix and canned frosting, I made about a 12 to 14 - 2 x 3.5 inch cakesicles, but the amount will vary depending on the size of your cakesicle molds, the cake recipe you use, and the method you're using for covering them in chocolate.
Serving and Gifting Cakesicles
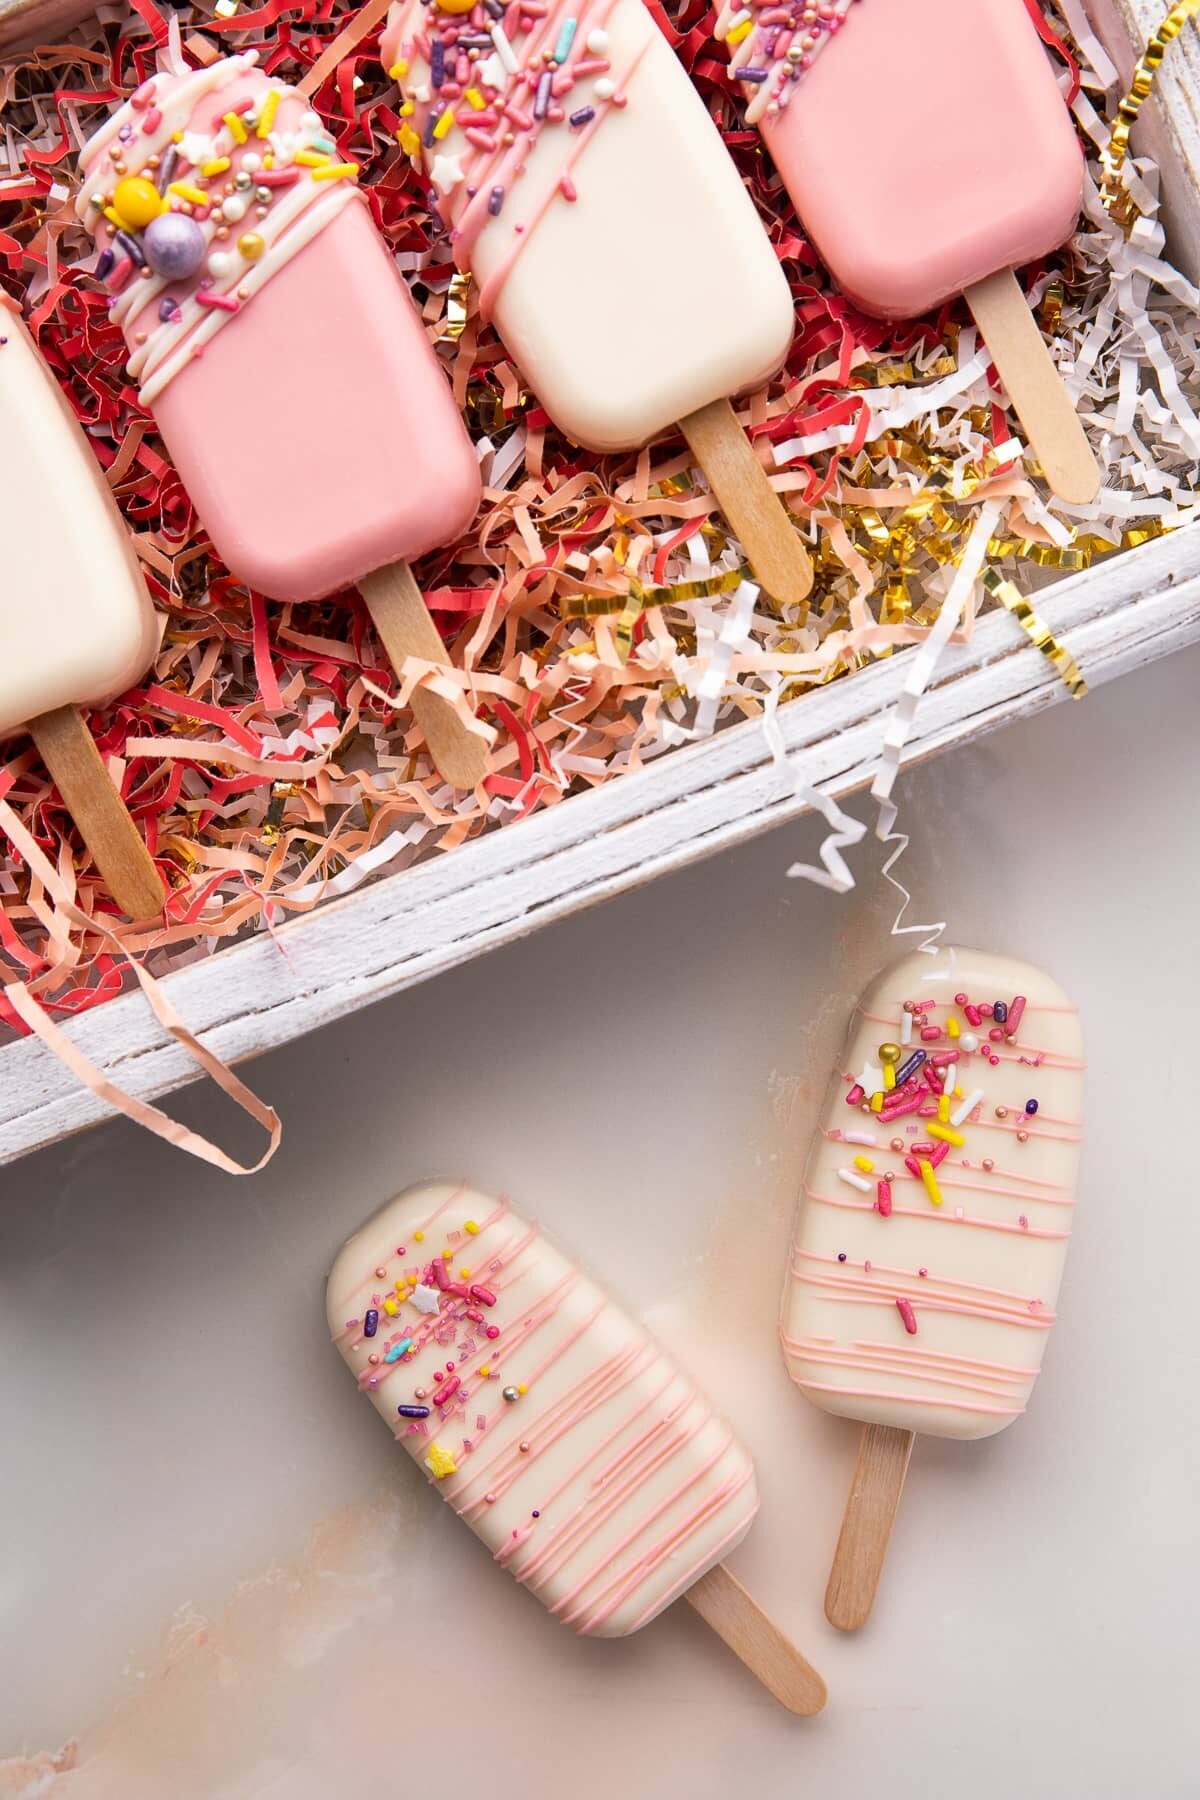
As mentioned, these are great for just about any occasion! They’re also a wonderful gift and often found in treat boxes and gift packages, or as favors for weddings and parties.
Here are some of my favorite ways to box them up and give them as gifts or serve them at events:
Paired with crinkle paper, you can match the theme of any event you like. You can also pair them in the gift box with other treats such as macarons, cookies, or chocolate covered strawberries.
Looking for more unique cake decorating tutorials? Check these out!
WANT TO JOIN THE PARTY? Subscribe to my newsletter and follow on Tik Tok, Pinterest, Instagram, and Facebook for all the latest recipes!
How to Make Cakesicles
Equipment
- Spatula or Knife
- Spoon, Paint Brush, or Pastry Brush
- parchment paper or a silicone baking mat
INGREDIENTS
- 1 9 x 13 inch prepared cake room temperature
- ½ cup frosting up to 1/4 cup more if necessary
- 24 oz candy melts or melting chocolate (2 bags) plus more for decorating
- Sprinkles optional
Instructions
Cake Filling
- Using your hands or a mixer, crumple cake in a bowl. Make sure the cake is at room temperature or it will melt your frosting.
- Add 1/2 cup frosting and mix until incorporated.
- If necessary, add additional frosting 1 tablespoon at a time and remix until desired constancy. The ideal filling will hold together when you pinch it, but not be gooey or sticky.
Dipping Method
- Fill the cakesicle molds with cake filling and put in the freezer for 20-30 minutes to firm up.
- When ready to dip, melt the chocolate melts according to the instructions on the package. It's really important to have the right consistency of chocolate, so depending on the brand of chocolate melts you might need to add some vegetable shortening to thin it out. Start out with 1/2 – 1 tsp of shortening per 1/2 cup of melts.
- You can test the chocolate consistency by dipping a knife or spoon in the chocolate - it should be thick enough to coat but thin enough that when you shake it any drips reincorporate back into itself.
- Then, quickly dip the frozen cakesicle in the chocolate and shake to reincorporate any drips back into the chocolate. You can either put the popsicle stick into a styrofoam board to dry upright, or lay on parchment paper or a silicone mat to harden.
Spreading and Filling Method
- And about a tablespoon of melted chocolate to the molds. The amount can vary depending on the size of your molds, but 1 tablespoon is a good place to start.
- Using a spoon, pastry brush, or paint brush, spread the chocolate around the sides of the mold, making sure it is thick along the sides and the chocolate goes all the way to the top. If it's too thin or doesn't cover everywhere, the chocolate can crack when you try to remove the cakesicle.
- Then, shake the mold to even out the chocolate. If there any air bubbles, pop them using a toothpick, scribe, or tip of a knife.
- While the chocolate is still wet, add and remove the popsicle stick to the mold to clear out any chocolate.
- Let the chocolate harden in the fridge for 5-10 minutes. If the chocolate isn't thick enough or is to thin around the sides, add another teaspoon or two of chocolate, spread around the edges and let harden in the fridge another 5 minutes.
- Remove from fridge and add 2 tablespoons of cake filling to the molds. This amount can vary depending on the size of your molds. Be very gentle when adding the filling, if you push down too hard you can break the chocolate. You want to leave some room on the top to add the top coat of chocolate. If you have problem with the chocolate cracking, let the chocolate rest at room temperature for a few minutes before adding the filling.
- After you've added the filling, gently push in the popsicle stick.
- Add another tablespoon of chocolate to the cakesicle. If the chocolate cracked around the popsicle stick, be sure to add more warm chocolate around the stick and push it down where it cracked. The warm chocolate should re-firm up the cracking.
- Using a knife, spoon, or cake spatula, drag the chocolate over the filling. Add more chocolate and re-scrape if needed.
- Let the chocolate harden, and then gently remove the cakesicle from the mold.
- Add any optional decorations and enjoy!
Notes
- If you’ve never made cakesicles, I recommend reading through the entire post and FAQs as there is a lot of information that will be helpful for first-timers.
- For this recipe, I used boxed cake mix and canned frosting, but you can use any cake and frosting you like! If using different recipes, you might need to alter the ratio of cake to frosting.
- Using a box cake mix and canned frosting, I made about a dozen 2 x 3.5 inch cakesicles, but the amount will vary depending on the size of your cakesicle molds, the cake recipe you use, and the method you’re using for covering them in chocolate.
- You can also try the no-frosting method! This is an Instagram and social media hack of crumbling the cake when it’s hot out of the oven and letting the steam bind the cake together.
- If you don't use some type of melting or dipping chocolate such as candy melts, I recommend tempering your chocolate.
- You can not use regular or gel food coloring to color chocolate, you must use candy melts in the desired color or white chocolate and oil based candy colors.
- These will last up to a day at room temperature and up to a week in the fridge.


Kim Palfenier says
How do you stop the cake from falling off the stick when pulling it out of the chocolate mixture?
Carol Zell says
Can you make these a few days ahead of time and how do you store them if so ?
777Cb says
I absolutely loved this cakesicle recipe! The step-by-step instructions were so easy to follow, and the tips on decorating were super helpful. I can’t wait to try these for my next party – they look adorable and delicious! Thank you for sharing!
Maureen Godfrey says
I’ve never made cakesicles before, but cant wait to make them
Mariana Malpartida Perez says
Maravilloso se ven deliciosos y delicaditos.Eres una artista.
Morgen says
I love the individual molds, I did a quick Amazon and Etsy search but am not finding any. Do you have a link?
Thank you,
Morgen
Sophia says
Hi, I got mine on Amazon but unfortunately I no longer see them being sold. Sorry!