Learn how to use a piping bag with our step-by-step guide covering prep, filling, and techniques for perfect dessert decorations every time.
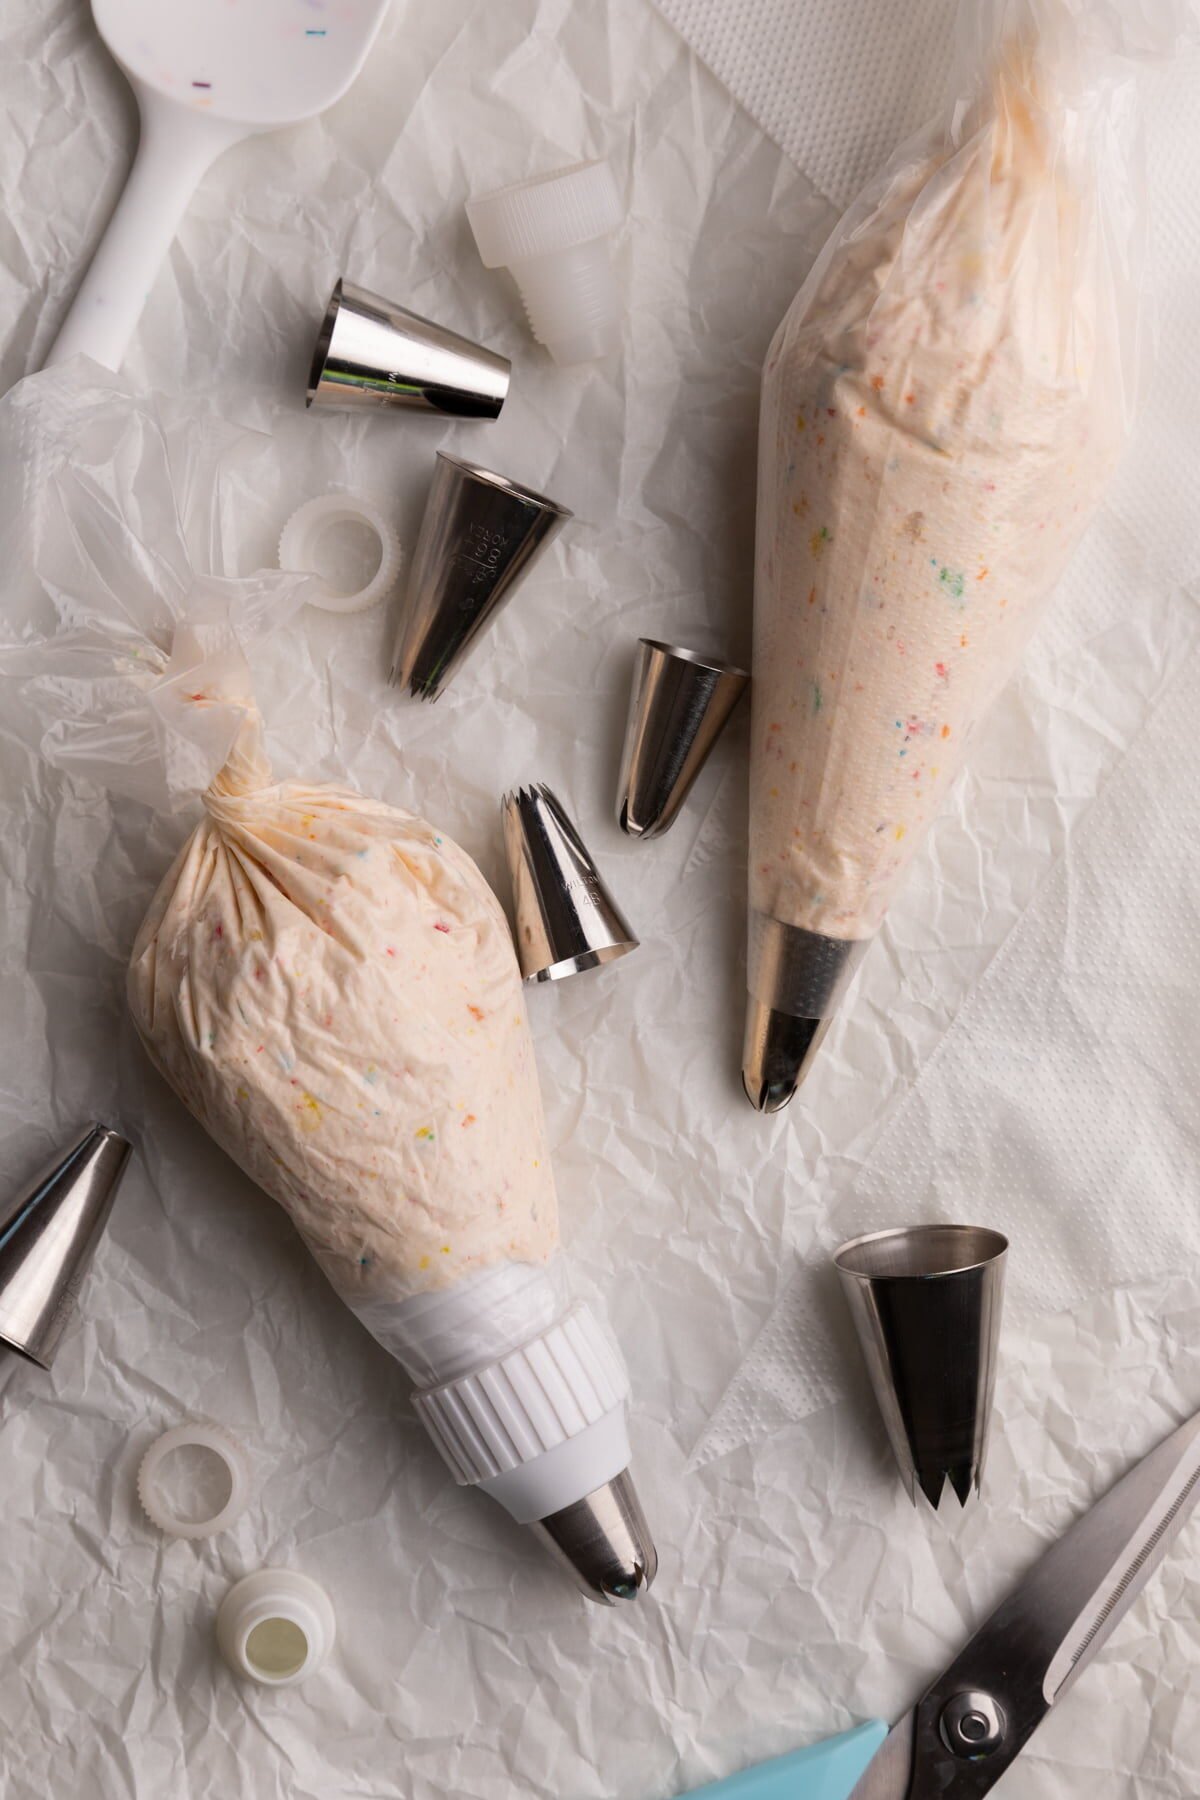
Okay, let's talk piping bags! Also known as pastry bags, they are one of my favorite tools for decorating cakes, cupcakes, and other desserts. And, while they're super easy to use, they do take a little bit of getting to know.
So, skip using a social media hack of clipping off the edge of a ziplock bag and instead start using pastry and piping bags for your dessert decorating.
They're fun, easy, and much cheaper than using ziplock bags all the time! (seriously, you can get a pack of 200 for $8 on Amazon).
Ingredients and Tools
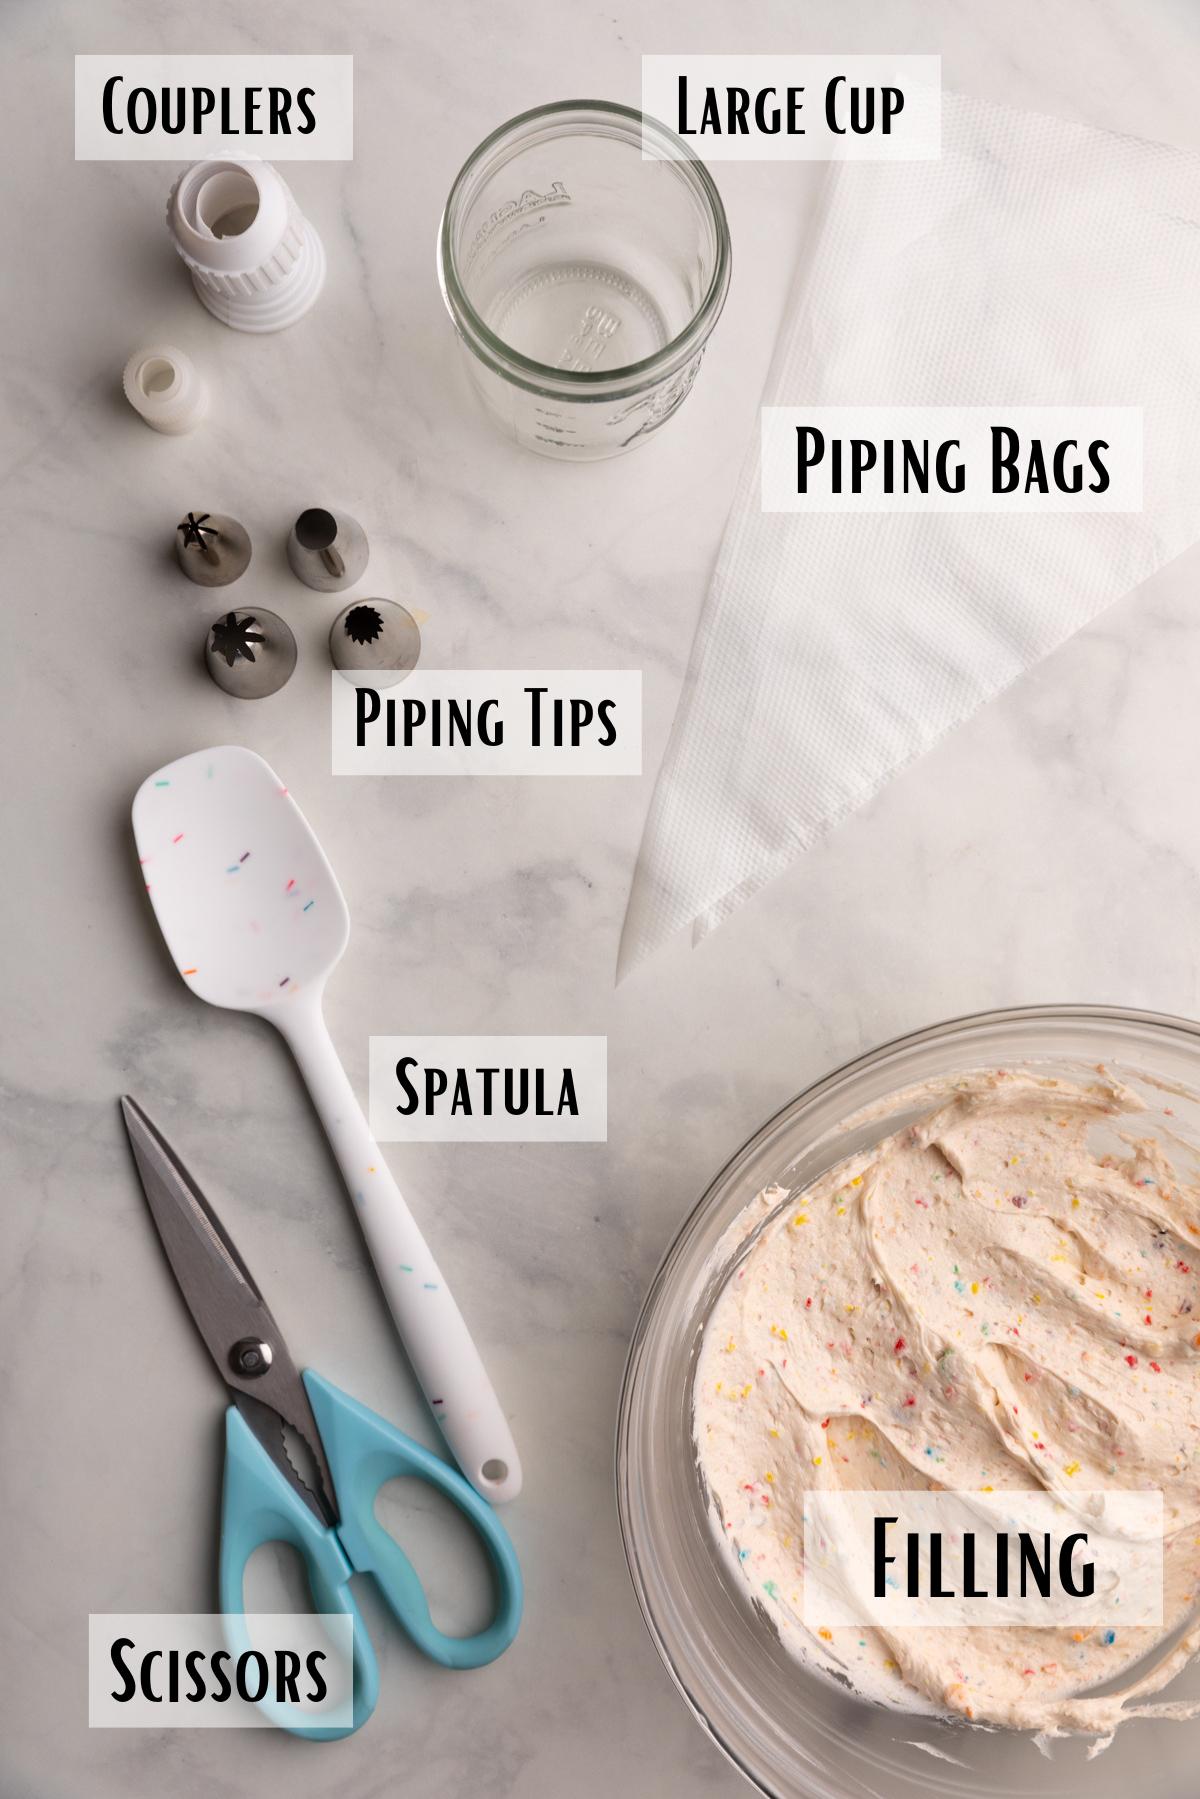
Fillings
When talking about piping bags, most people think of two types of fillings for them:
- Frosting: For cakes and cupcakes. This is by far the most common use for piping bags and piping tips!
- Royal Icing: using piping bags for royal icing cut out sugar cookies is also really common.
But, there are many other uses for piping or pastry bags:
- Melted Chocolate: For chocolate-covered strawberries, Halloween pretzels, unicorn popcorn, cakesicles, marshmallow pops, etc. This allows us to get super fine drizzles of chocolate (no piping tip needed).
- Choux Pastry: for piping profiteroles, cream puffs, churros, and eclairs.
- Macarons: when piping macarons, you want a large piping bag with a large round tip.
- Stabilized Whipped Cream: for piping on desserts, stabilized whipped cream will hold its shape better than regular whipped cream.
Piping Bags
When it comes to piping bags, you have two different kinds- disposable, and reusable. They both have pros and cons:
- Reusable Piping Bags: These are usually made from durable materials like silicone or fabric-coated plastic. They're eco-friendly and great for those who bake frequently.
- Disposable Piping Bags: These are made from lightweight plastic and are perfect for quick clean-ups. They're convenient, especially when you're using multiple colors or types of icing or frosting. Just snip the tip, insert your piping tip, fill, and toss when you're done. These are also great for doubling up so you don't have to use a coupler (more on that below). But, they're also more likely to burst than using reusable bags.
They also come in a variety of sizes:
- Small (8-10 inches): Perfect for detailed work and small batches of icing. These are great for writing, intricate designs, and small decorations on cakes, cookies, and cupcakes.
- Medium (12-14 inches): The most versatile size, ideal for general decorating purposes. These bags are perfect for piping borders, rosettes, and swirls on cakes and cupcakes.
- Large (16-18 inches): Best for macarons, choux pastry, or large batches of icing. Or, for crumb coating or filling in between layers of cake.
Piping Tips
Piping tips are the metal tips that go into the piping bag. Below are the most common, but there are many more like basketweave tips and Russian tips!
- Round Tips: Perfect for writing, outlining, and creating dots. Great for basic lines and lettering.
- Star Tips: Ideal for stars, rosettes, and borders. The ridged edges create texture and dimension.
- Petal Tips: Used to make flowers and ruffles. The narrow opening helps create delicate, petal-like shapes.
And, like piping bags, these come in different sizes. Smaller sizes are used for intricate details like lettering on cakes, or for royal icing.
Medium or large tips are often used for piping frosting on cupcakes or for borders on cakes. They're also the tips used for piping macarons and choux pastry.
Couplers
Couplers allow you to switch piping tips without changing the bag. They consist of two parts: the base and the ring.
- Base: Fits inside the piping bag and holds the piping tip.
- Ring: Screws onto the base over the piping tip to secure it in place.
And, like piping bags and piping tips they come in small, medium, and large sizes. Both Ateco and Wilton make their own coupler to fit exactly to their piping tips, but I've found you can interchange the brands as long as you stick with large tips on large couplers and small tips on small couplers, etc.
Other Tools:
- Tall Glass or Cup: This is the secret to filling a piping bag without making a mess. The cup helps hold the piping bag open while you fill it, making the process much easier.
- Spatula or Spoon: You'll need these to fill your piping bag with icing or batter.
- Scissors: for cutting off the tip of the pastry bag.
How to use
Step 1: Trim the Bag
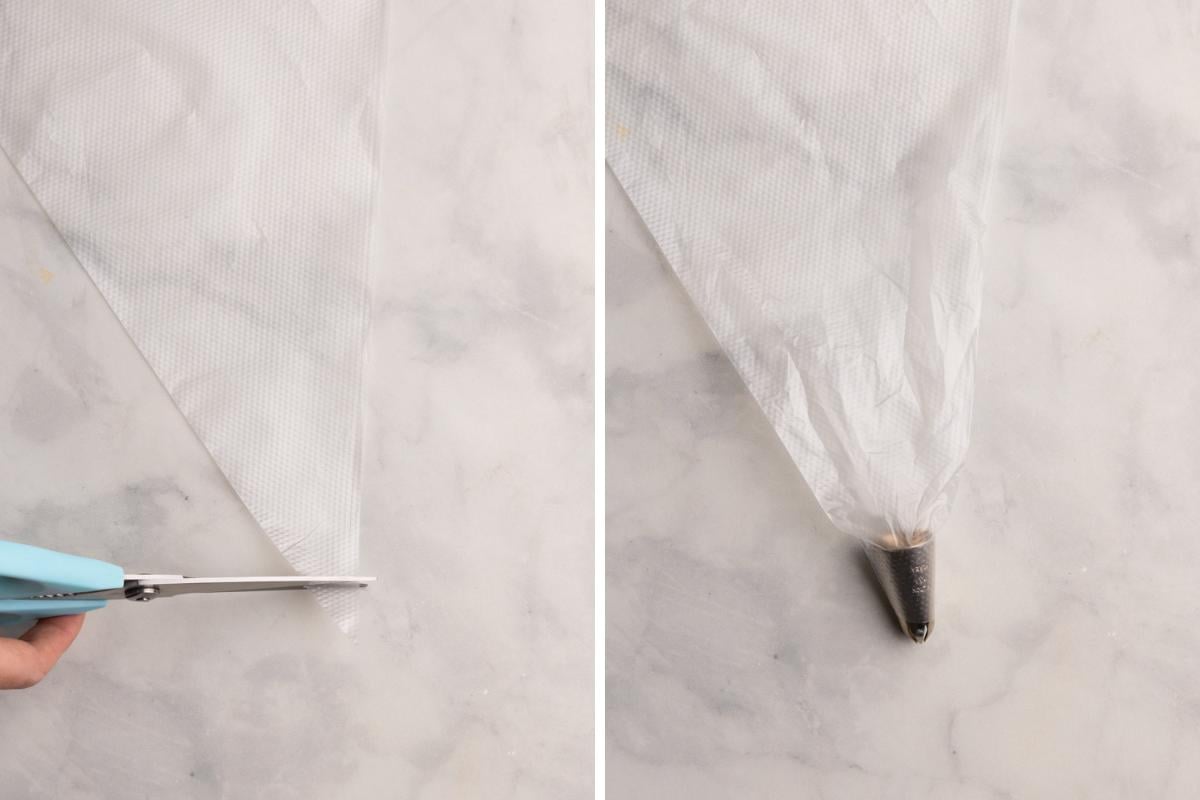
For piping bags without a coupler: trim the bag so the tip fits snugly on the tip, but doesn’t overlap the opening of the tips. You want to trim just as shown:
For couplers: Trim the end of the bag to fit the coupler base. This is the most important part to ensure the bag doesn’t burst. If you trim too high, the piping tip or the couple will slip through, or the filling will leak out:
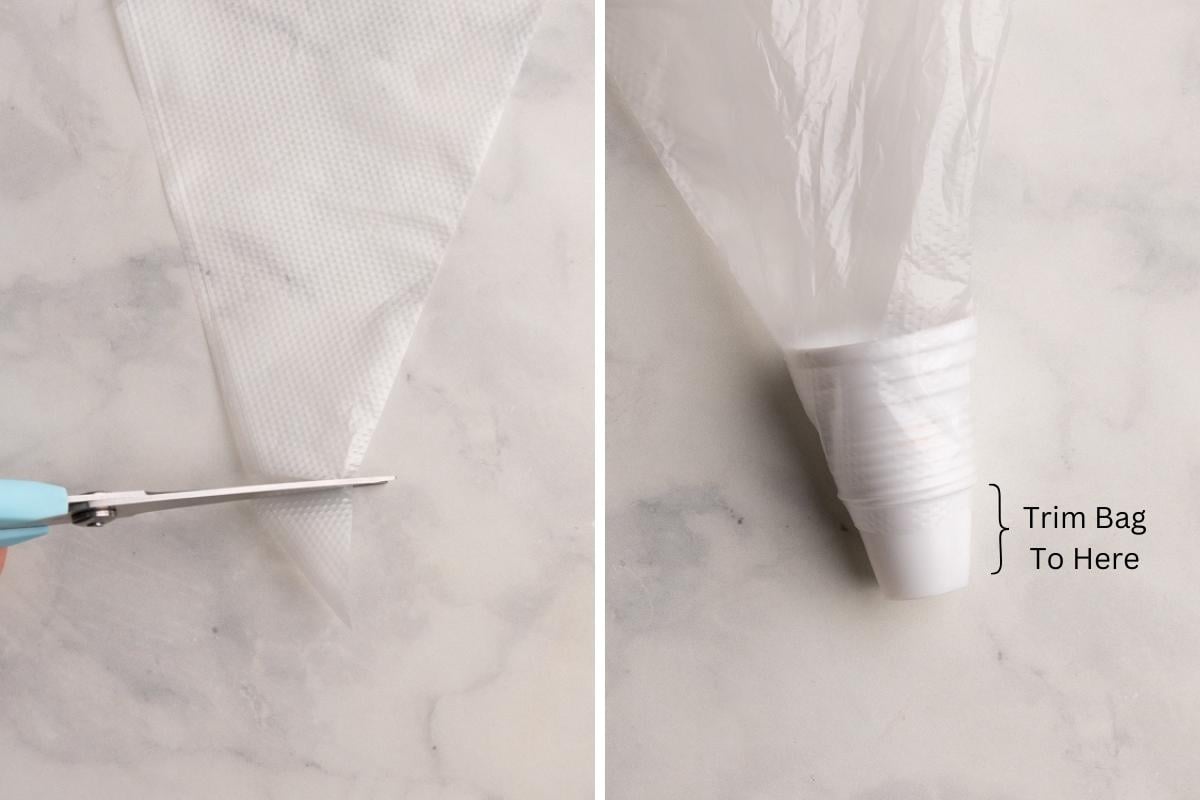
Push the coupler base or the piping tip into the bag until it reaches the trimmed tip and sticks out the edge.
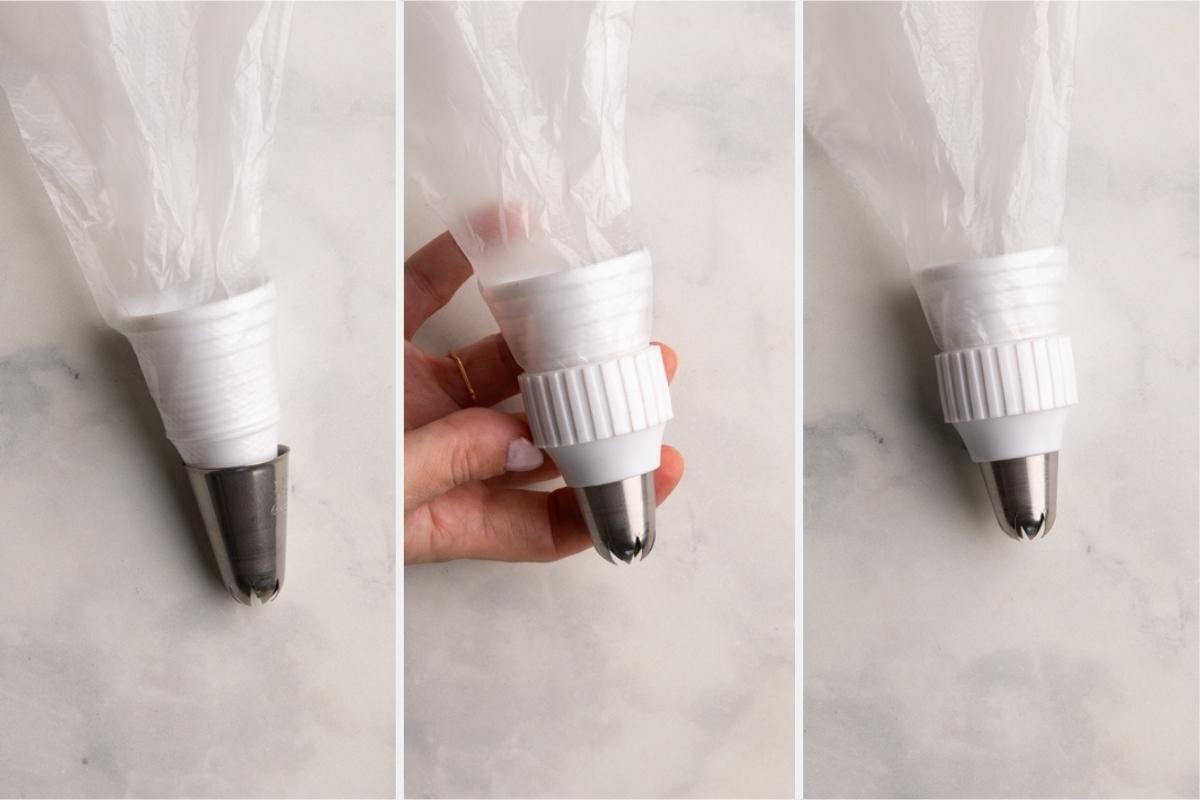
For couplers, place the tip over the exposed end of the coupler base. Screw the ring over the tip and base to secure them in place. To change tips, unscrew the ring, replace the tip, and re-secure the ring. That’s it!
Filling the Piping Bag
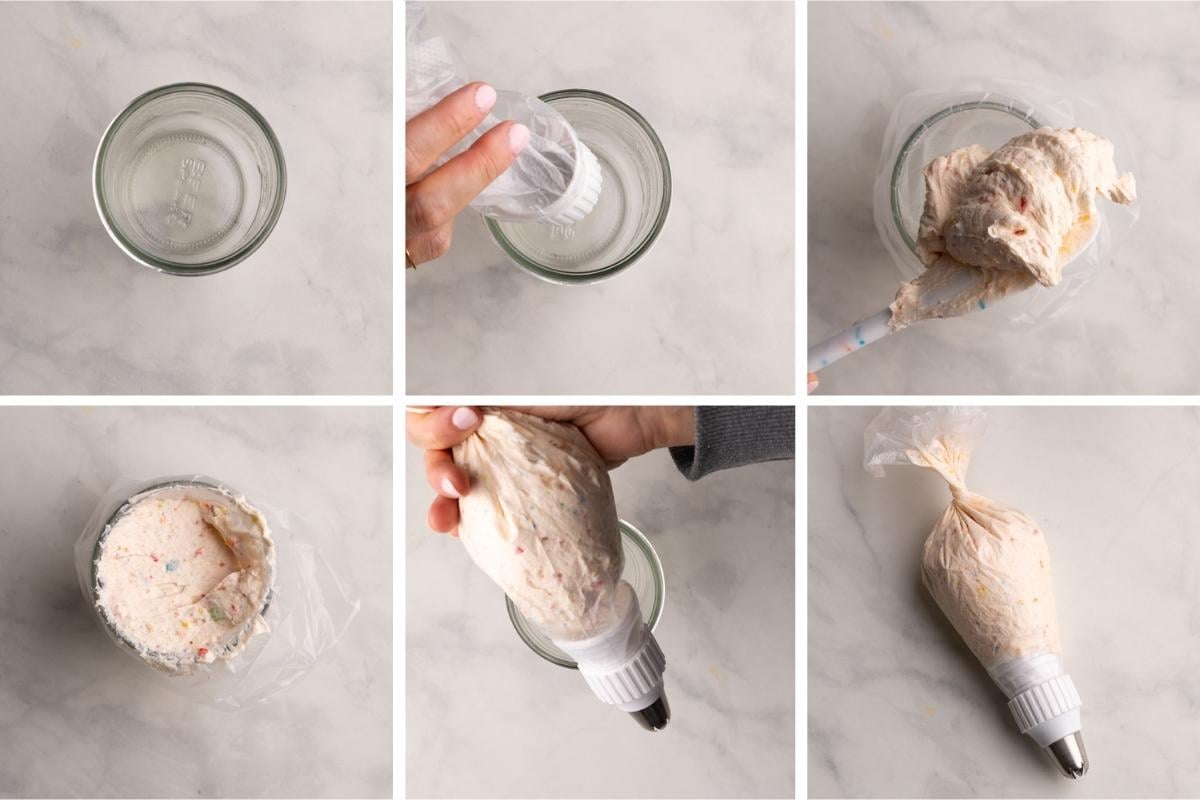
Fold the Top: Fold the top of the piping bag over your hand or the rim of a tall glass to keep it open.
Add the Filling: Use a spatula or spoon to fill the bag with icing or batter. Fill the bag about halfway to avoid overfilling.
Remove and Twist: Lift the bag out of the cup and squeeze the filling towards the tip, twisting the top to close the bag. This helps to remove any trapped air bubbles. Twist the top of the bag to close it securely, ensuring consistent pressure when piping.
Tips and Tricks
- No Coupler, no problem! With disposable bags you can use two pastry bags – the first holds the coupler and the second the frosting or filling. That way you can easily change the tips, by removing the second bag, shaking out the tips, and adding another one. This method is a little more messy, but works well.
- The piping bags can leak out of the bottom of your pastry bag if you trim the end of the bag too high on the coupler or piping tip. This can also cause disposable bags to burst. That's why it's important to trim to where it shows in the picture above (right between the opening of the coupler and where the ring screws on.
- To ensure the filling doesn't leak out the top of the bag, fill piping bags about halfway with filling, and twist the top and fold down. You can also, hold the top against the piping bag while piping.
- Using disposable bags with thick frosting or filling can also lead to the piping bags bursting if you add too much pressure when piping. So, be gentle! And, if you have a problem with bursting bags, try reusable bags instead.
- Buttercream frosting in particular can become really soft when piping because the warmth from your hands melts the frosting. You can combat this by filling the bags with a smaller amount of frosting and re-filing as needed.
Cleaning and Storing
For disposable bags, push out the couple and/or piping tip, toss the bags and clean the tips and coupler in soapy water.
For reusable bags remove the coupler and/or tips, and wash the tips, bags, and couplers in soapy water, and let dry completely before storing.
That’s it! That’s it! The best tips for using piping bags and couplers for your favorite desserts!
Want more cake and dessert decorating tips? Check these out!


How to Use a Piping Bag
Equipment
- no special equipment
INGREDIENTS
- Piping Bags
- Coupler optional
- Piping Tips
- Scissors
- Spatula
- Large Cup
- Filling frosting, royal icing, etc.
Instructions
- Using scissors, trim the end of the bag to fit the coupler base or piping tip.
- Insert the coupler base into the bag, pushing it down to the tip.
- Place the piping tip over the coupler base and secure it with the ring.
- If not using a coupler, push the tip directly into the bag and trim the bag to fit snugly.
- Fold the top of the bag over the edges of the cup or glass to keep it open.
- Using a spoon or spatula, fill the bag with icing or batter. Do not overfill, you want to fill about half of the bag (or less for buttercream frosting).
- Remove the piping bag from the cup and squeeze the filling down towards the tip, removing any air bubbles.
- Twist the top of the bag to close it securely and its ready to pipe.
- To switch tips with a coupler, unscrew the ring, replace the tip, and re-secure the ring.
Notes
- With disposable bags you can use two pastry bags – the first holds the coupler and the second the frosting or filling. That way you can easily change the tips, by removing the second bag, shaking out the tips, and adding another one. This method is a little more messy than couplers, but works well.
- For drizzling chocolate, adding frosting in between cake layers, flooding cookies, or really anything where it doesn’t matter how the piped filling looks, you can skip piping tips all together and just snip the end of the piping bag.
- Buttercream frosting in particular can become really soft when piping because the warmth from hands melts the frosting. You can combat this by filling the bags with a smaller amount of frosting and re-filing as needed.


Carrie says
Thank you so much for your detailed descriptions of how to put together and use piping bags! I’m looking into trying it and I greatly appreciate your descriptions nd pictures! 😌