How to Use a Piping Bag
Learn how to use a piping bag with our step-by-step guide covering prep, filling, and techniques for perfect dessert decorations every time.
Servings: 1
Cost: varies
Equipment
- no special equipment
Ingredients
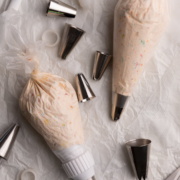
- Piping Bags
- Coupler optional
- Piping Tips
- Scissors
- Spatula
- Large Cup
- Filling frosting, royal icing, etc.
Instructions
- Using scissors, trim the end of the bag to fit the coupler base or piping tip.
- Insert the coupler base into the bag, pushing it down to the tip.
- Place the piping tip over the coupler base and secure it with the ring.
- If not using a coupler, push the tip directly into the bag and trim the bag to fit snugly.
- Fold the top of the bag over the edges of the cup or glass to keep it open.
- Using a spoon or spatula, fill the bag with icing or batter. Do not overfill, you want to fill about half of the bag (or less for buttercream frosting).
- Remove the piping bag from the cup and squeeze the filling down towards the tip, removing any air bubbles.
- Twist the top of the bag to close it securely and its ready to pipe.
- To switch tips with a coupler, unscrew the ring, replace the tip, and re-secure the ring.
Notes
- With disposable bags you can use two pastry bags - the first holds the coupler and the second the frosting or filling. That way you can easily change the tips, by removing the second bag, shaking out the tips, and adding another one. This method is a little more messy than couplers, but works well.
- For drizzling chocolate, adding frosting in between cake layers, flooding cookies, or really anything where it doesn't matter how the piped filling looks, you can skip piping tips all together and just snip the end of the piping bag.
- Buttercream frosting in particular can become really soft when piping because the warmth from hands melts the frosting. You can combat this by filling the bags with a smaller amount of frosting and re-filing as needed.
