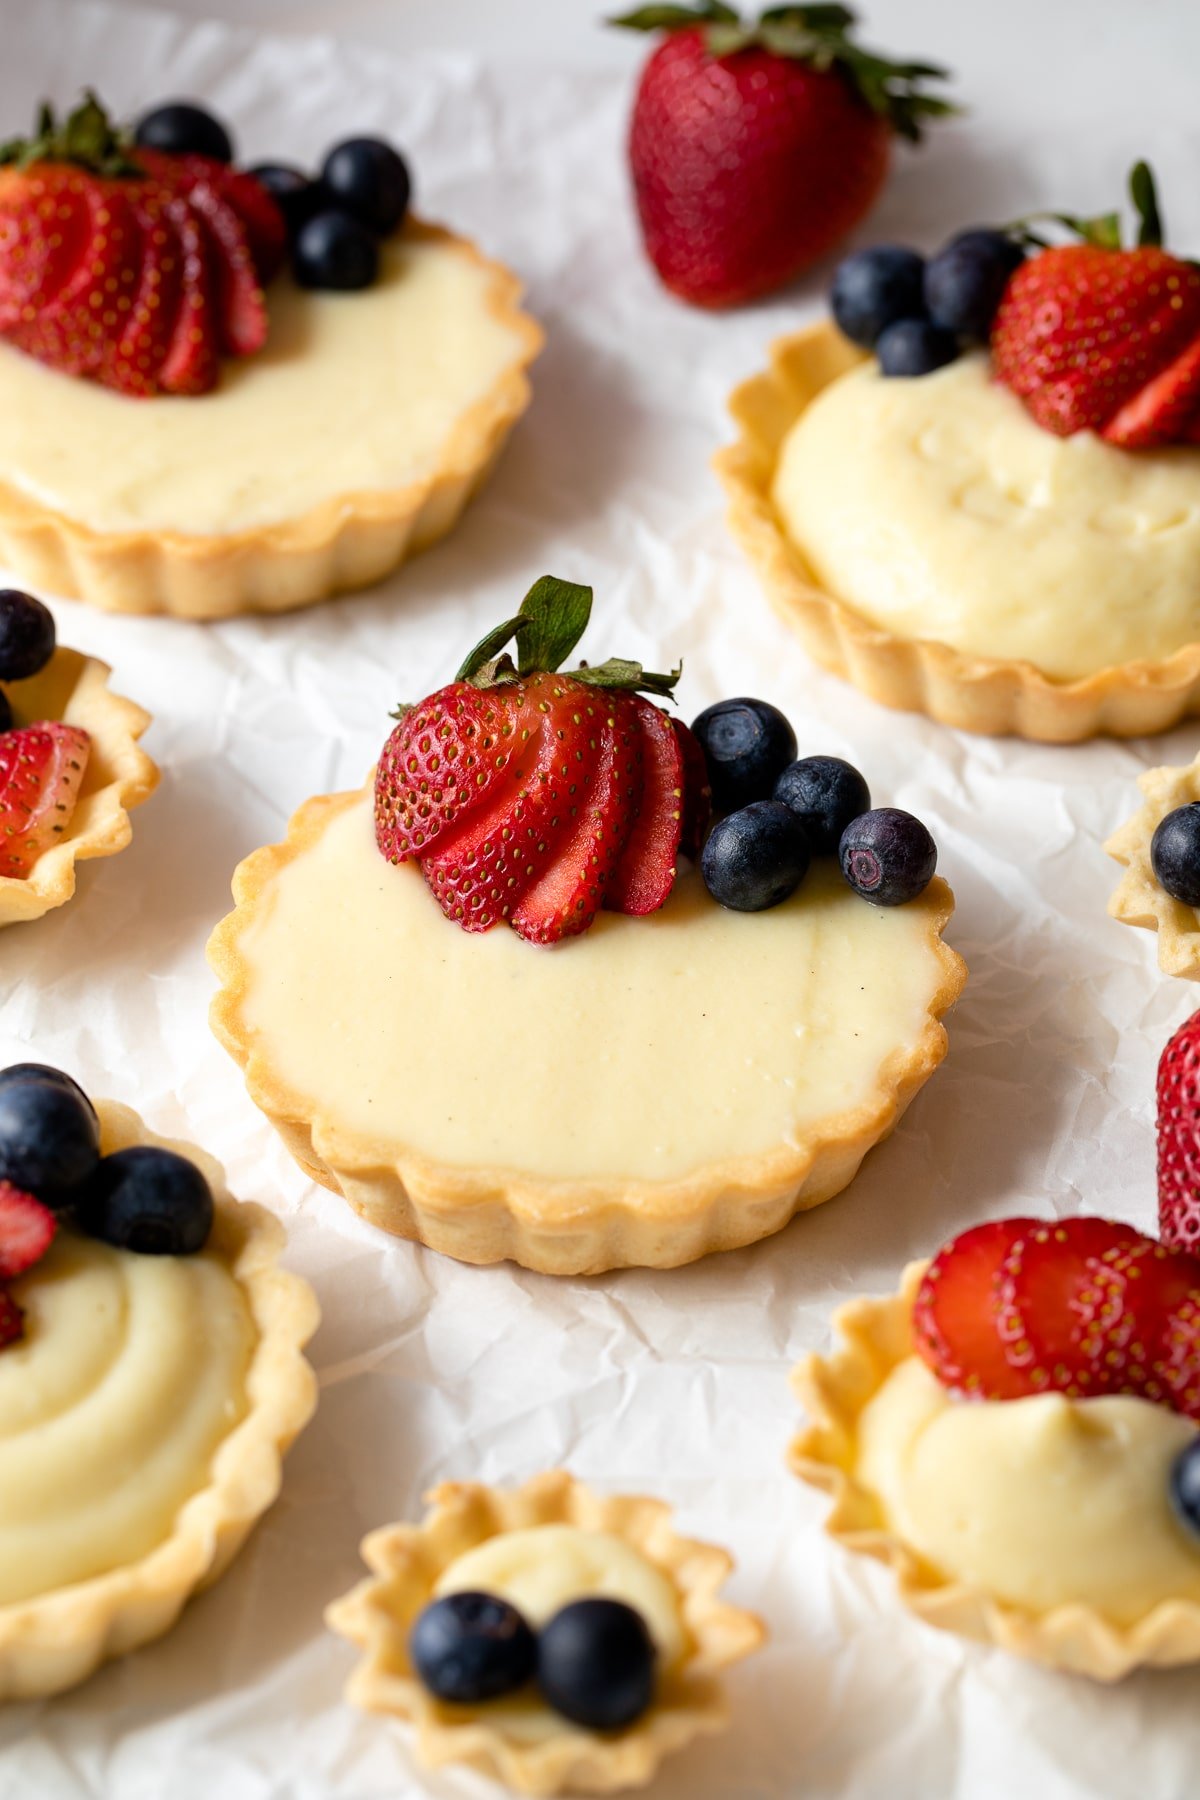
This pretty mini fruit tarts are the perfect dessert for Mother's day, tea parties, bridal and baby showers and other holidays and parties!
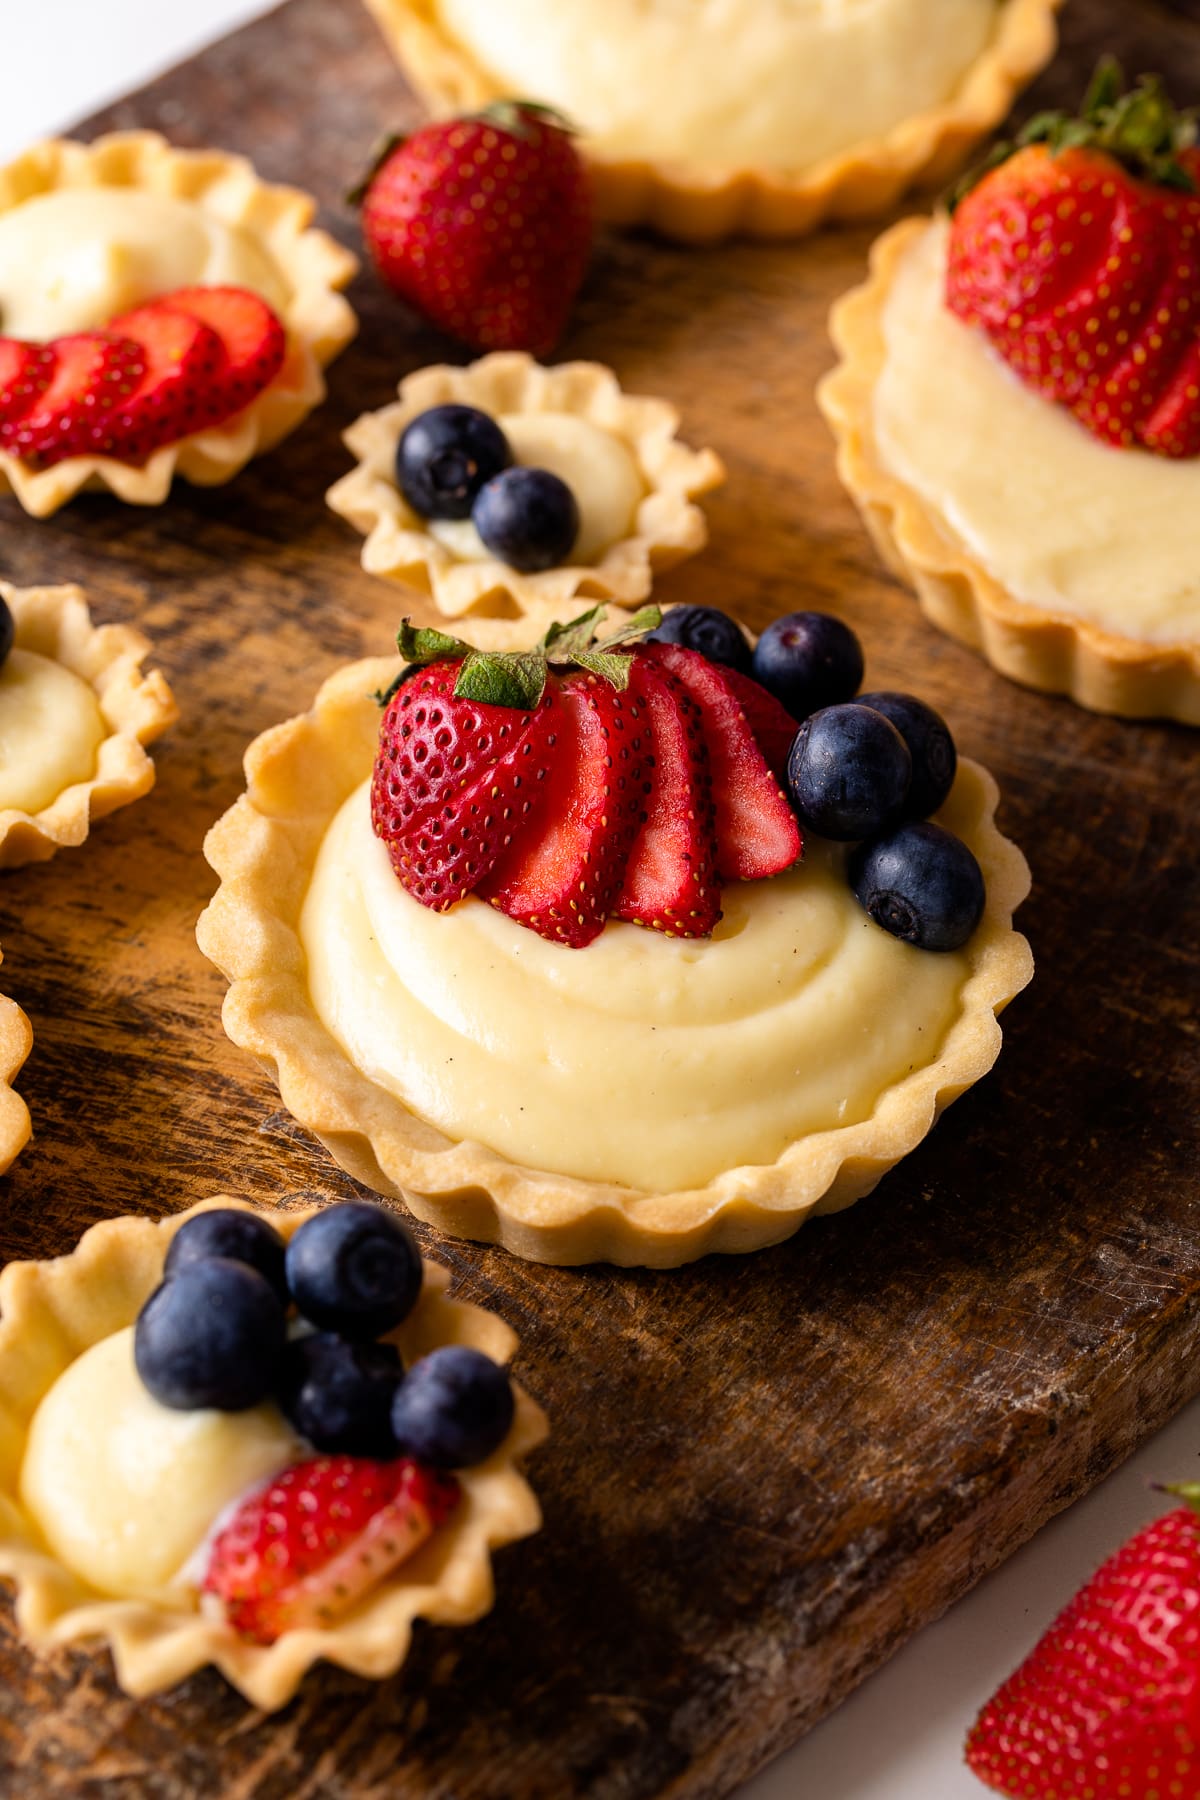
Okay, let's talk mini fruit tarts! These beautiful tarts are such a fun treat to make and perfect for so many occasions. Easter, Mother's Day, Baby Showers, Bridal Showers, Summer BBQs, Potlucks, Thanksgiving, Christmas, Tea Parties, you name it!
There are a few reason why this is the perfect dessert all year round:
- Individually Sized Portions (seriously, so party ready!)
- Easily Made Ahead (either fully or partially)
- Completely Customizable
Made with a sugar cookie like Pâte Sablée crust, vanilla pastry cream, and covered in fresh fruit, these bite size treats are sure to be a hit at your next dinner party or event and go great on a dessert board.
Ingredients:
- Pastry Cream: Whole Milk, Egg Yolks, Cornstarch, Salt, Sugar, Vanilla
- Tart Dough: All-Purpose Flour, Egg, Granulated Sugar, Butter, Salt
- Fruit: I used strawberries and blueberries but you can top your mini fruit tarts with whatever fruit you want! Raspberries, blackberries, kiwi, oranges, peaches, it will all be delicious. You can also add some herbs like a sprig of mint or lavender.
HOW TO MAKE
Step 1: Make Tart Dough
Make the dough at least 3 hours (and up to 24 hours) in advance as it needs to chill for 2 hours before baking.
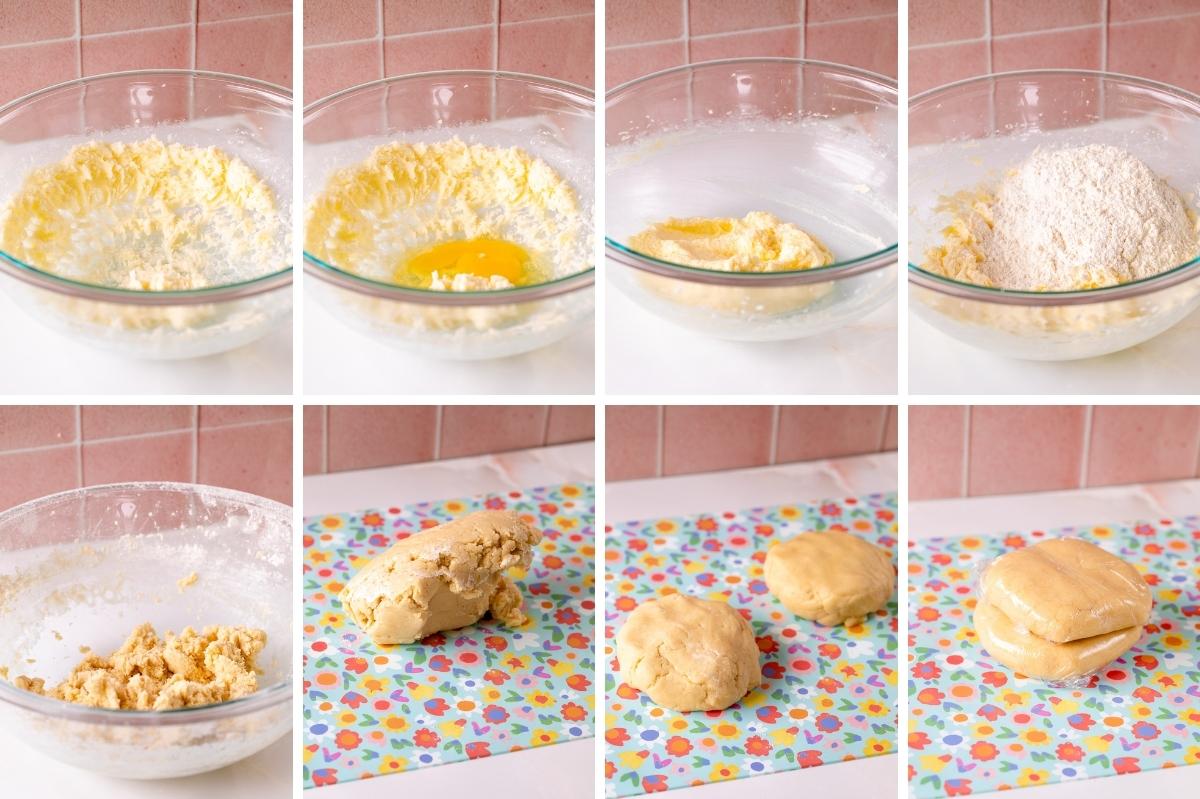
Using a standing mixer with a beater attachment or a hand held mixer in a large bowl, cream butter and sugar until light and fluffy, about 2 minutes.
Mix in egg, scraping down the side of the bowl as needed.
Mix in flour until just combined. Do not over mix the dough.
Form the dough into two disks and wrap tightly in plastic wrap. Chill the dough for at least 2 or up to 24 hours.
Step 2: Make Pastry Cream
Make the filling at least 2 hours (up to 2-3 days) in advance as it need to chill in the fridge before filing the mini fruit tarts. If you’ve never made pastry cream before, check out this pastry cream recipe for tons of tips and tricks so you get it perfect the first time!
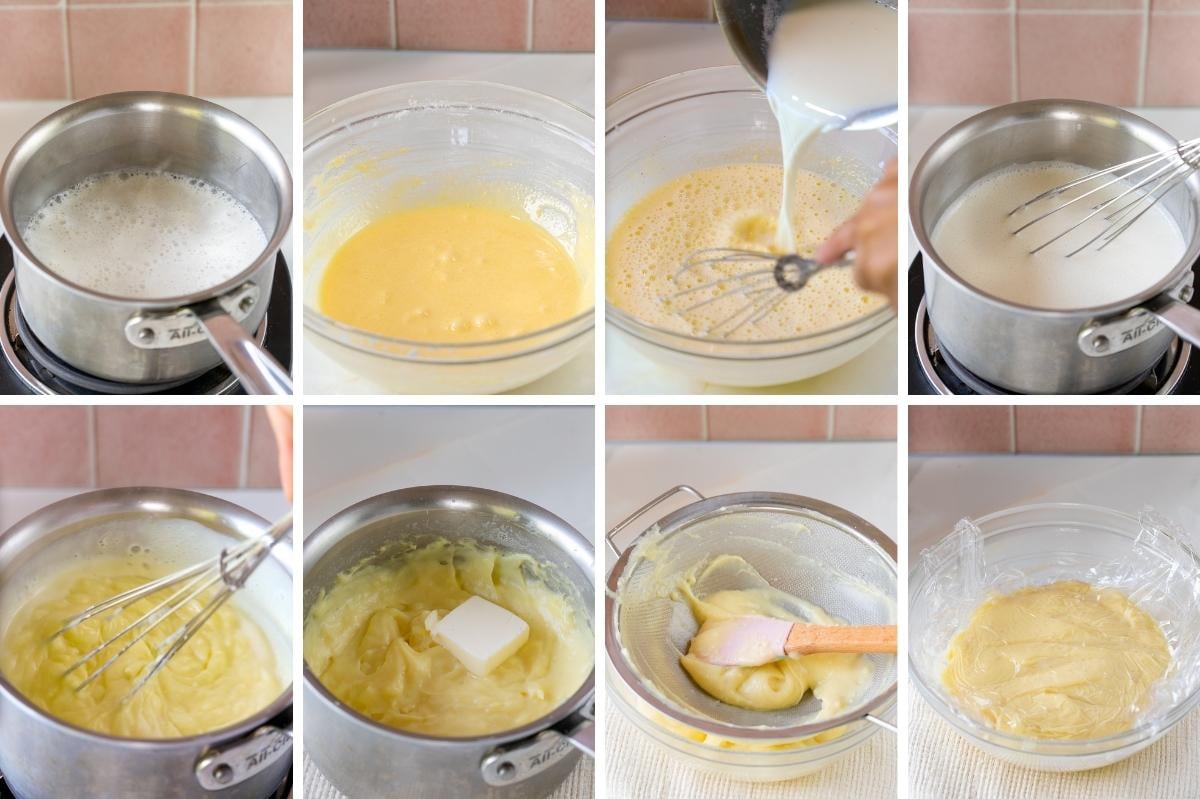
In a medium saucepan over medium heat, heat whole milk, vanilla, and salt until just simmering. In another large bowl, mix egg yolks, cornstarch, and sugar until pale yellow.
Slowly add warm milk to the egg mixture about ½ cup at a time in order to temper it. Make sure the milk is not too hot or it can overcook the egg yolks. Return the milk/egg mixture to the saucepan and heat over medium heat until it starts to boil.
Once it boils, remove from heat, stir in butter, strain using a fine mesh strainer, and put in bowl and cover with plastic wrap, placing the wrap directly against the filling so it doesn't form a skin.
Chill for at least 2 hours. The filling can be made 2-3 days in advance.
Step 3: Roll out and Bake Mini Tarts
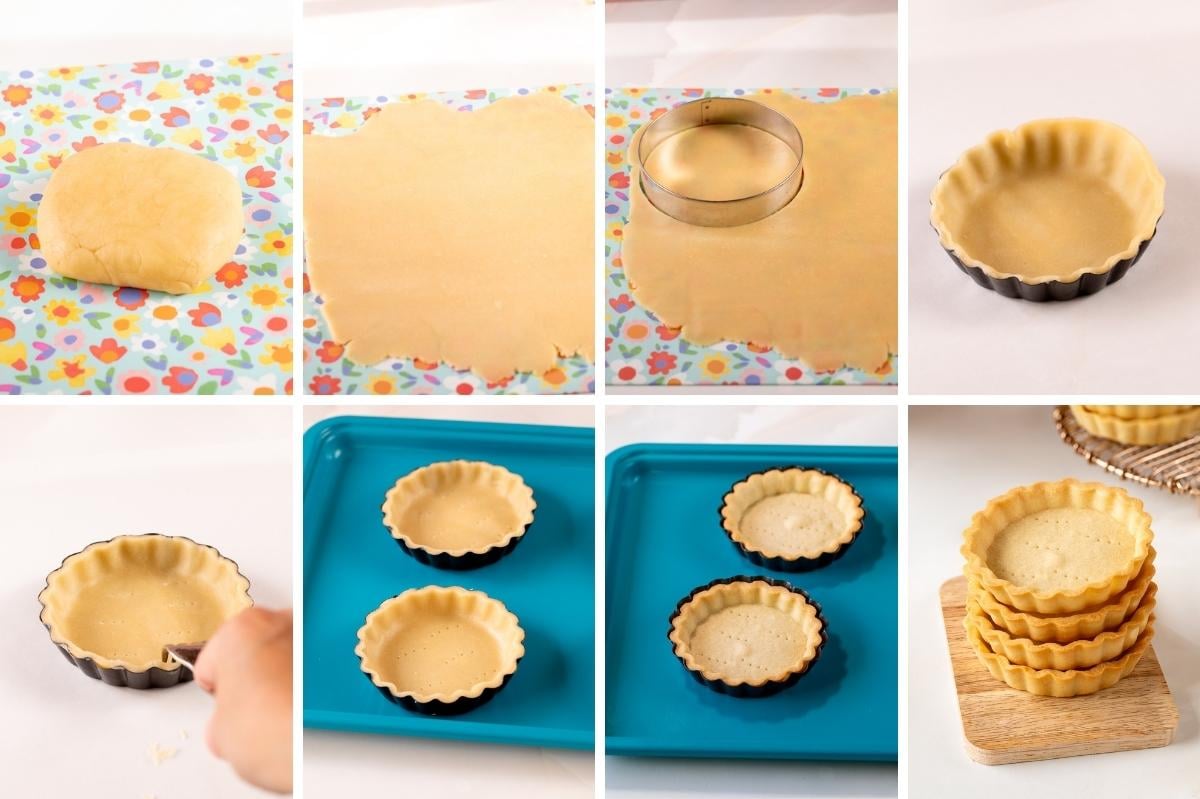
Preheat over to 325℉. When ready to bake the tarts, roll out the dough to about ⅛ thick and using a large round cookie cutter, cut circles out of the dough and gently place in the mini tart pan, being careful not to stretch out the dough. I used this tart pan and these cookie cutters.
Cut off any excess and score the bottom of the tarts with a fork. Chill in the fridge or freezer for 15 minute before baking. Similar to sugar cookies, this helps the tarts keep their shape when baking.
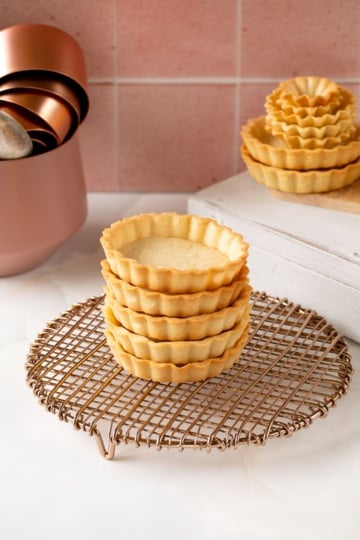
Then, add the chilled tarts to a baking sheet and bake for 14-18 minutes for 4 inch mini tarts. Bake until golden brown. Note – baking times can vary depending on the size and depth of your mini tart pan. You can read more about bakings times for smaller tart pans in this mini tart shell recipe.
Let tarts cool completely before removing from tart pans and filling. The baked and unfilled tarts can be make up 3-5 days in advance and kept in a container at room temperature or in the fridge.
Step 4: Filling Tarts
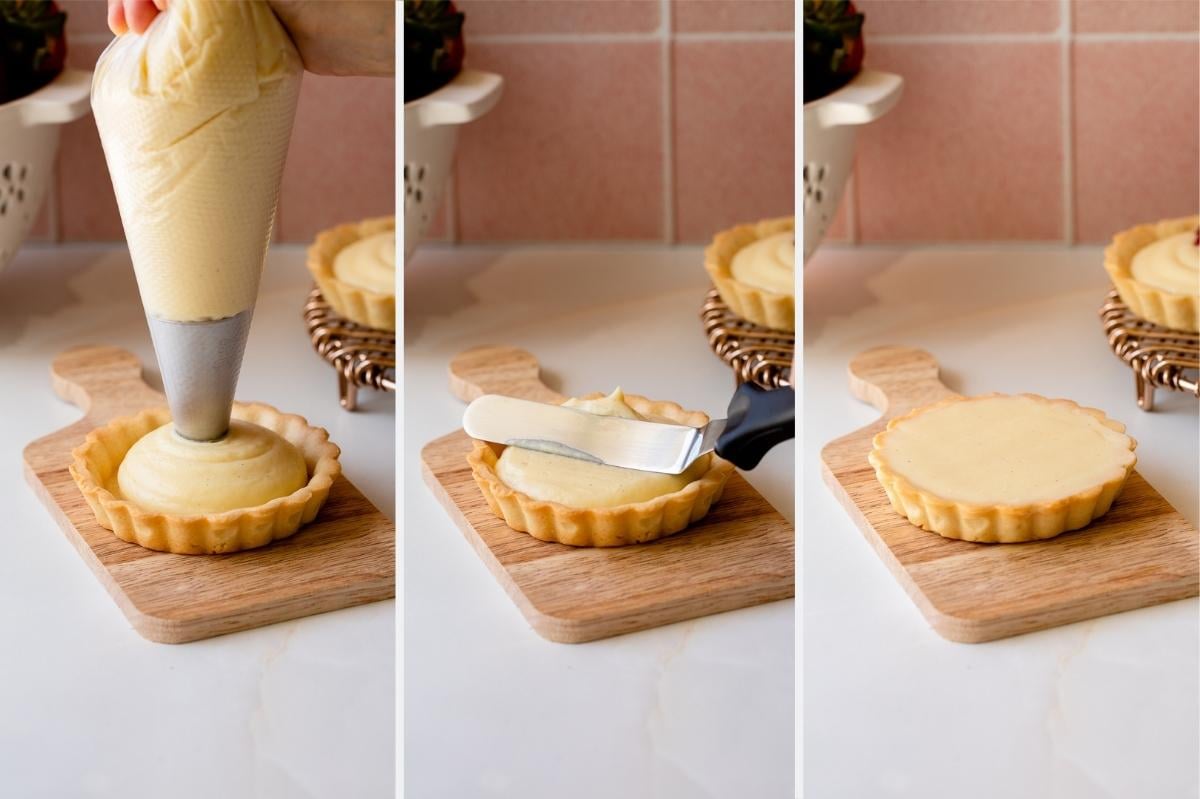
Remove the filling from fridge and remix. Then add to a pastry bag fit with a large tip.
Pipe the cream to your baked and cooled mini tarts.
Once you pipe the cream you can either leave it as is if you're going to be covering the tart with lots of fruit, or smooth the cream with an off-set spatula. You can also spoon the cream into the tarts.
Step 5: Add Fruit
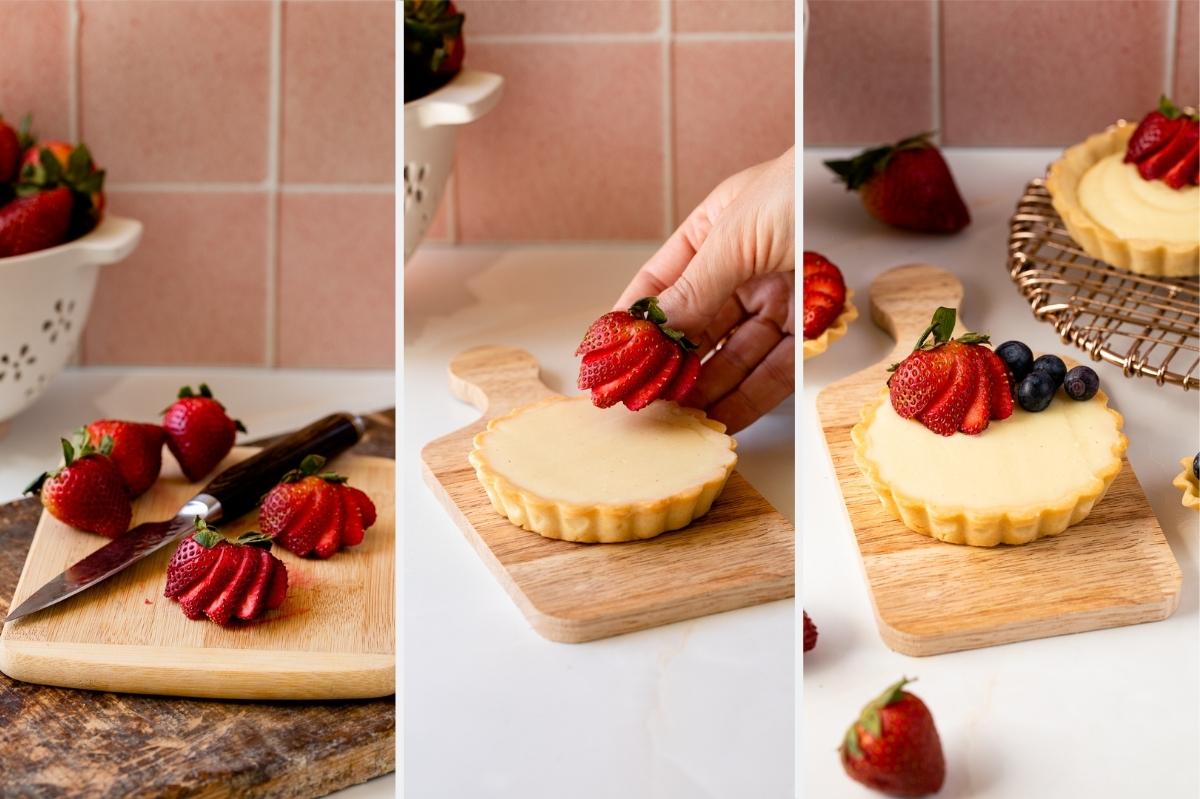
While the tarts are baking, you can prep and cut up your fruit. Again, you can really go crazy with the type of fruit you want to add. But, basic strawberries and blueberries are super simple and delicious. But, you can add kiwi, sliced oranges or lemons, raspberries, blackberries, really whatever fresh fruit you want!
To glaze or not to glaze
Often bakery tarts will have a glaze on the fruit. This is completely optional, but if you want to do a fruit glaze mix a tablespoon or so of water with few tablespoons of a light colored jam such as apricot, peach, or marmalade.
If necessary, heat in the microwave to get it to fully mix together. Use a pastry brush to brush the glaze over the fruit before serving.
Tips for Perfect fruit tarts
- If you've never made pastry cream or tart shells ahead of time, check out this pastry cream recipe and this tartlet shell recipe with tons of tips and tricks so it all turns out perfect the first time you make it!
- Make these fruit tarts even easier by using pre-made tart shells rather than making your own!
- Keep the dough cold and firm when filling the tart pans. This will keep it from shrinking or changing shape.
- Both the mini tart shells and filling be made a few days ahead of time and then assembled the day of.
- If you're making and assembling these more than 24 hours in advance, brushing the bottom of the tart shells with melted white chocolate can keep them from getting soggy.
- Baking times and the number of tarts will vary depending on your size and depth of your mini tart pans.
- This recipe makes about 8-10 four inch mini tarts. I've found these 4 inch tart pans with this cookie cutter fit really well.
Flavor Variations
Pastry cream is the most common filling for these mini fruit tarts. But, you can really mix it up!
The process for filling the tarts and adding the fruit is the same, but instead of pastry cream you could use diplomat cream, which is a mix of stabilized whipped cream and pastry cream. It's not as thick so it won't hold as much fruit, but it’s a light and delicious filling that pairs so well with the fresh fruit.
In addition to or instead of pastry or diplomat cream, you can also use homemade lemon curd, panna cotta, lemon posset, strawberry cake filling, or even chocolate ganache.
To top off the tarts in addition to the fruit, you could add a touch of whipped cream (this chocolate whipped cream version is really fun!) marshmallow fluff, and/or a drizzle of fruit sauce like strawberry coulis, blueberry coulis, or raspberry coulis.
Make Ahead
These are a great make ahead dessert because you make each part in advance. The filling can be make 2-3 days ahead of time and the tart dough up to 24 hours in advance. You can also bake the tart shells up 3-5 days in advance and store at room temperature or in the fridge in an airtight container.
The tarts can be assembled up to 24 hours in advance. While optional, if assembling early, brushing the bottoms of the tart shell with melted white chocolate can help ensure they don't soggy.
WANT TO JOIN THE PARTY? Subscribe to my newsletter and follow on Pinterest, Instagram, and Facebook for all the latest recipes!
Mini Fruit Tarts
Equipment
- Medium Saucepan
- Hand Held or Standing Mixer
- Piping Bags and Piping Tips
- Mini Tart Pans
- Large Cookie Cutters
- Off-set Spatula optional
INGREDIENTS
Tart Dough
- 8 tbsp unsalted butter see notes for using salted
- ½ cup granulated sugar
- ⅛ tsp salt
- 1 egg
- 250 g all-purpose flour 2 cups spooned and leveled
Pastry Cream
- 2 cups whole milk
- 1 tsp vanilla extract or vanilla bean paste
- pinch of salt
- 5 large egg yolks
- 3 1/2 tbsp cornstarch
- ½ cup granulated sugar
- 2 tbsp unsalted or salted butter optional
Fresh Fruit
- Strawberries, blueberries, kiwi, peaches, etc.
Instructions
Pastry Cream
- In a saucepan bring milk, vanilla, and salt to a simmer over medium heat. Do not boil the milk as it can overflow the pan and also overcook the eggs when tempering.
- In a separate bowl, whisk together the egg yolks, sugar, cornstarch. It should be thick, creamy, and pale yellow.
- While whisking, slowly add ½ cup of the hot milk mixture to the egg yolk mixture to temper it. This insures that the eggs don’t overcook and curdle.
- Add the remaining milk mixture half a cup at a time, while continuously mixing.
- Return to saucepan and cook over medium low to medium heat until the mixture is thick and bubbling. Remove from heat once the mixture boils.
- If adding butter, add one tablespoon at a time and mix until fully incorporated before adding the next. Sometimes the butter separates a bit and makes the mixture greasy. If this happens, whisk continuously for a few minutes until it’s fully combined and cooled down a bit. It should recombine and no longer be greasy.
- Once everything is fully combined and slightly cooled but still warm, pour the mixture through a fine mesh strainer into another bowl. This will make for a very smooth filling.
- Cover with plastic wrap, placing the wrap directly on top of the pastry cream so it doesn’t get a film on top.
- Then chill until ready to use, at least two hours or up to 2-3 days in advance.
Tart Dough
- Using standing mixer with paddle attachment, or using a land held mixer with a large bowl, cream butter, sugar, and salt and medium speed until combined.
- Mix in the egg, scraping down the bowl to ensure it is fully incorporated.
- Add the flour and mix on low until just incorporated, scraping down the bowl as necessary. Do not overmix.
- On lightly floured surface, divide dough into 2 balls and shape each into a dish ½ inch thick.
- Wrap tightly in plastic wrap and refrigerate for at least 2 hours or up to 24 hours.
Baking Tarts
- When ready to bake, preheat oven to 325 ℉.
- Remove the dough from the fridge and roll out to about ⅛ inch thick.
- Working quickly so the dough stays cold, cut out circles about ½-1 inch larger than the sides of the mini tart pans and gently place the dough into the pans, being careful to not stretch it out as want it to stay in place and not shrink back to it’s original size when baking. Re-roll remaining dough and repeat.
- If mini tarts need more dough, add more dough and press into place. If dough gets too soft, put it back in the fridge or freezer for 10-15 minutes. Do not add more flour.
- Once you’ve filled the tart shells, cut off an any excess using a knife. Then, score the bottoms of the tarts by gently poking the bottom of the tart shells with a fork about 2-5 times, depending on the side of your shells.
- Before baking, chill or freeze the the mini tart shells for 15 minutes.
- Place the chilled tarts on a baking sheet and bake in the pre-heated oven for 14-18 minutes (for 4 inch tarts), turning pan half way in between. Baking times will vary depending on size of tart shells.
- When tarts are golden brown, remove from oven and let cool.
Assembling Mini Fruit Tarts
- When ready to assemble, cut up fruit.
- Remove pastry cream from fridge and stir to combine. Add to a pastry bag with a large tip. Pipe the pastry cream into the tarts, about ¼ cup per tart if using 4 inch tart shells.
- You can leave the pastry cream as is if you want it slightly bubbled in the middle, or you can use an offset spatula or knife to smooth out the tops as shown in the post.
- Add the fruit.
- If you want to glaze the fruit, mix jam (typically apricot but you want use whatever your wish) with a tablespoon or so of water and use a pastry brush to brush all over the fruit.
Notes
- If you’ve never made pastry cream or tart shells ahead of time, check out this pastry cream post and this tartlet shell post with tons of tips and tricks so it all turns out perfect the first time you make it!
- Make these fruit tarts even easier by using pre-made tart shells rather than making your own!
- Keep the dough cold and firm when filling the tart pans. This will keep it from shrinking or changing shape.
- Both the mini tart shells and filling can be made a few days ahead of time and then assembled the day of.
- If you’re making and assembling these more than 24 hours in advance, brushing the bottom of the tart shells with melted white chocolate can help keep them from getting soggy.
- Baking times and the number of tarts will vary depending on your size and depth of your mini tart pans.
- This recipe makes about 8-10 four inch mini tarts. I’ve found these 4 inch tart pans with this cookie cutter fit really well.



Kevin says
Why don’t you do this in metric. Converted to #18, using 18 tbls butter! 🤣🤣🤣🤣