This step by step tutorial will show you how to frost a layer cake just like a professional – with perfectly smooth, even sides and sharp edges!
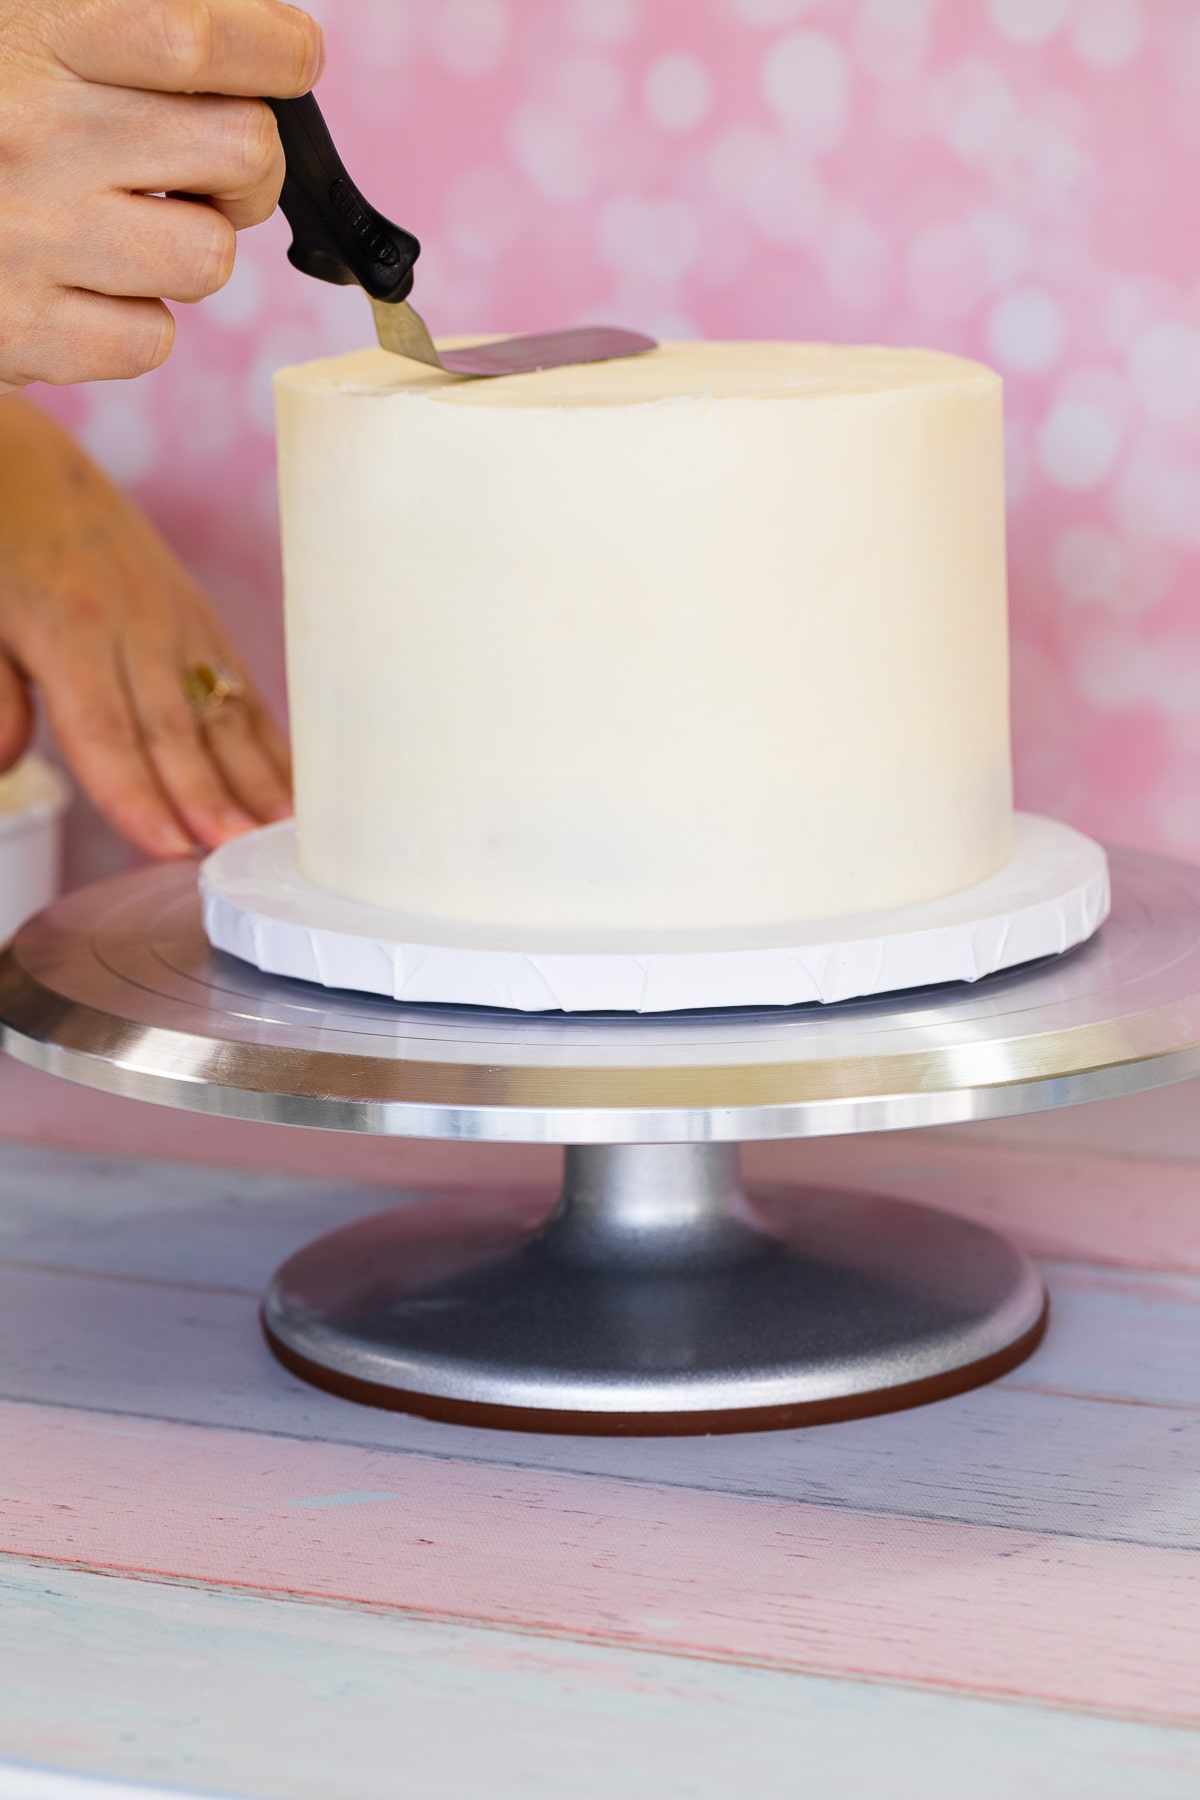
This tutorial is for frosting a basic layer cake using buttercream frosting. You can use any cake and frosting recipe you like. We're looking to frost a cake with even sides and smooth edges and I have some tips and tricks to get a perfect professional cake at home, every time!
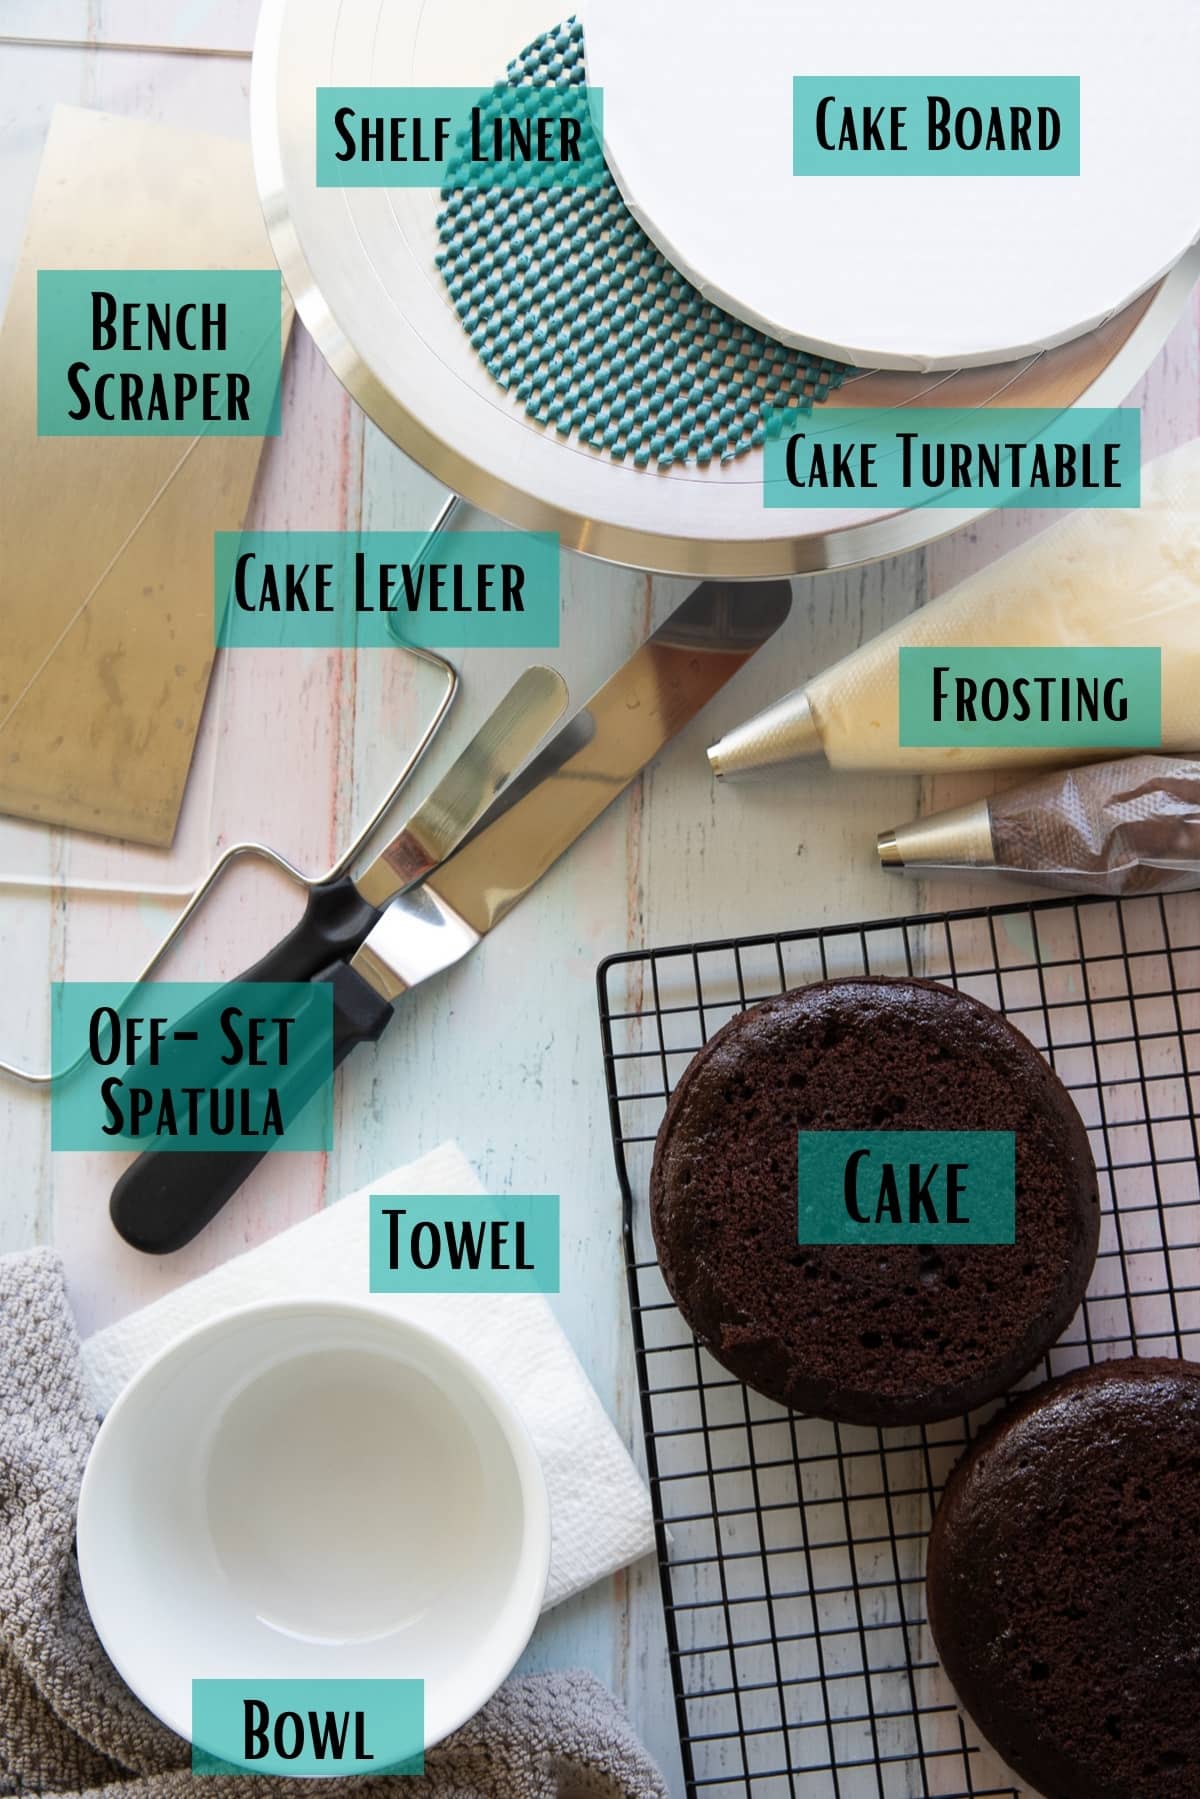
INGREDIENTS AND TOOLS
Ingredients:
- Cake: You can frost a layer cake with pretty much any cake recipe. Make sure your cake is room temperature before trying to frosting. You can also chill the cake to make it easier to frost.
- Frosting: for this tutorial, buttercream frosting is the way to go. American buttercream and Swiss meringue buttercream both work great.
Tools:
- Cake Turntable: This is what allows you to frost smooth sides. There are a bunch on Amazon that really affordable. If you want a professional cake, it really helps to have a cake turntable.
- Shelf Liner/Non-Stick Pad: While it's not mentioned often or included in cake decorating kits, it's very helpful and this goes under your cake board to keep it from slipping around while you scrape the icing. Simple cut shelf liner to a circle or square smaller than your cake board.
- Cake Board: this is so you can move around the cake.
- Bench Scraper: There are so many bench scrapers available. It's really a matter of preference what type you prefer.
- Offset Spatula: this is for spreading the frosting on the cake and cleaning the edges.
- Knife or Cake Leveler: to ensure even cake layers before you start frosting.
- Bowl (optional): for scraping off excess frosting from bench scraper
- Towels: Either regular or paper towels, to clean your bench scraper and offset spatula
Temperature of Cake
While you can definitely decorate room temperature cakes with out an issues, if you're just starting out it can really help to frost a chilled cake.
You can do this by:
- making the cake a day in advance and keep it in the fridge
- After baking, let come to temperature and then place in the freezer for 30 minutes prior to frosting.
And no matter what, do not try to decorate a warm cake! It will melt the frosting and you will have will have a sloppy sticky mess.
Types of Frosting
The most common types of frosting for frosted layer cakes are buttercream frosting. Mainly, American Buttercream and Swiss Meringue Buttercream.
You can use any flavor – Lemon frosting, Strawberry frosting, Chocolate frosting, whatever you want!
Just make sure there is nothing like sprinkles or chocolate chips as you won't be able to get a smooth coat of frosting on the outside of the cake. Save those for the filling.
You also frosting using ermine frosting, chilled chocolate ganache and chocolate cream cheese frosting.
Frosting Consistency
I think when just starting out, using a thinner consistency frosting can be helpful. Basically, if using this American Buttercream frosting recipe, use the full ¼ cup of cream or 2 tbs of milk.
This helps the frosting glide and spread more easily along the sides of the cake.
That being said, different people have difference preferences on how they prefer their frostings for cakes. Some people prefer a thicker consistency, some a thinner. It is really is a matter of personal preference that will come with experience.
Not only that, but there are many factors that contribute to how frosting behaves. If you're in a very warm climate or warm kitchen you might want a thicker consistency to start as the butter will stay malleable. If it is winter and cold the thinner consistency will help.
And, if using jams or a loose filling like lemon curd in between the layers, be sure to create a boarder of buttercream frosting around the edges then add the filling in the middle. This is important to keep the loose filling from spreading out in between the layers.
HOW TO MAKE
Leveling Cake Layers
The first step to having a professionally decorated cake is to make sure your cake layers are level and even.
This is especially true if your cake recipe tends to dome up in the middle. There are a few main ways to level a cake:
- Use a serrated knife
- Cake Leveler
You can also methods like putting toothpicks into the cake at the desired hight and then using a knife to get it perfectly even.
Cake baking strips also really help keep cakes level while baking. These wrap around the cake pan and help distribute heat so you get evenly baked cakes. I personally love these and use them every time I make a cake.
Assemble and Fill
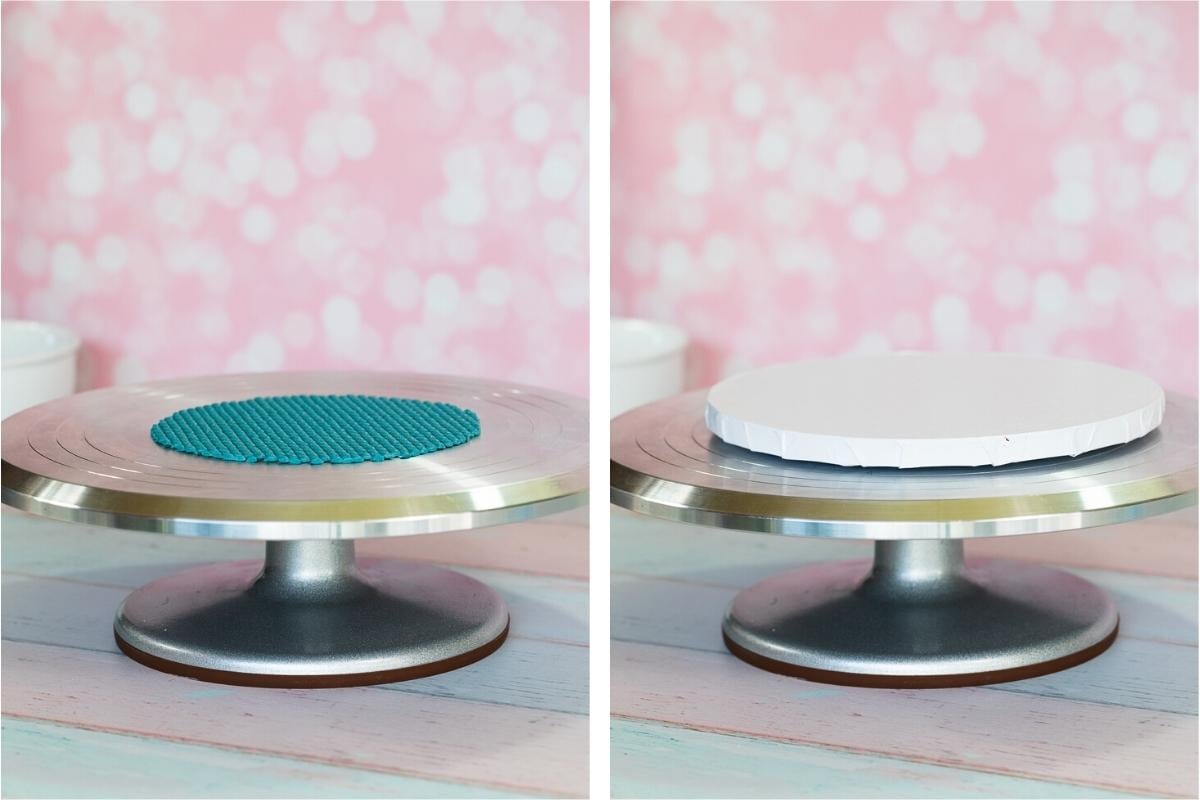
Step 1: Add non-stick pad and Cakeboard to Turntable
Place your non stick pad on your turntable and then place the cake board on top. This prevents your cake from slipping all around while you frost it.
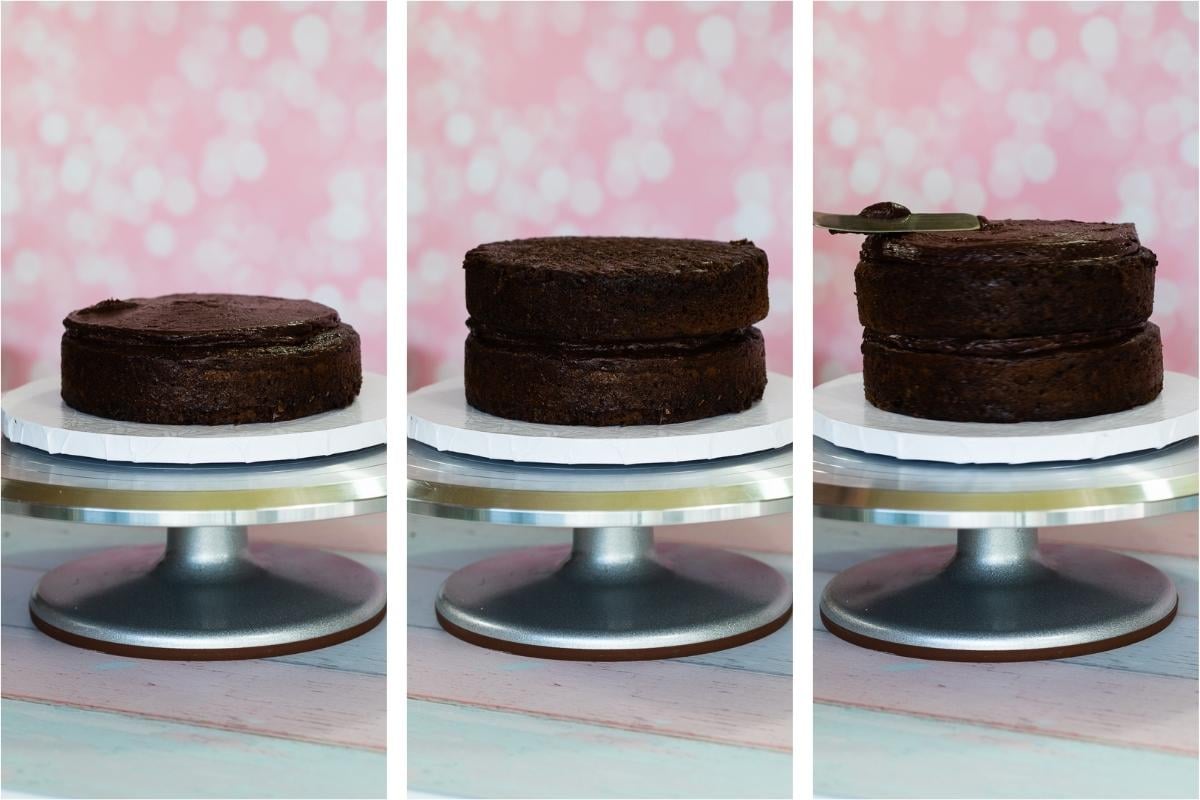
Step 2: Add Cake Layers and Fill
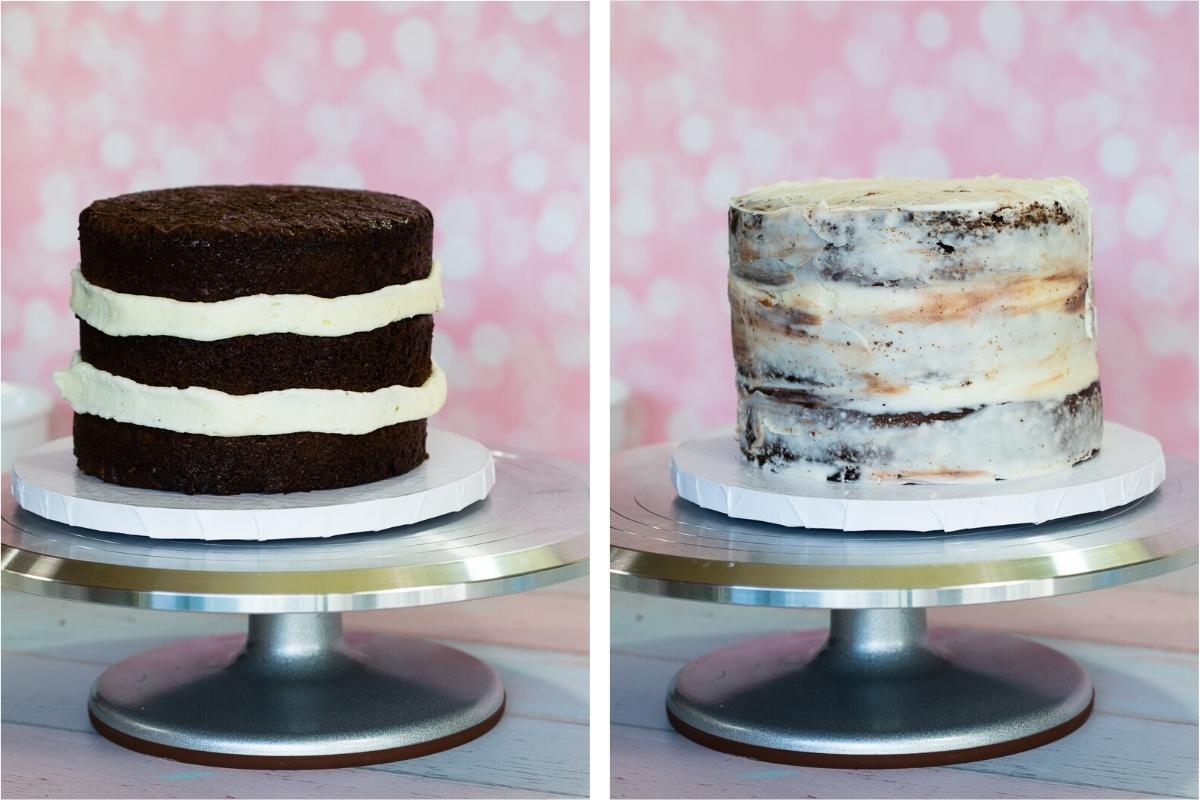
Place a bit of frosting in the middle of the cake board and place cake layer one on the cake board.
Add frosting on top of the first cake layer. You'll be using about ½ cup of frosting per layer (can vary depending on size and number of layers in cake). Use an offset spatula and smooth the frosting before adding the next layer.
Place next layer of cake on top and repeat adding frosting and cake with number of layers.
TIP: if using a soft filling for the cake, such as homemade lemon curd or jam, be sure to pipe a boarder of buttercream frosting around the edge before you add the filling. If you don’t do this the softer fillings will spread out of the cake.
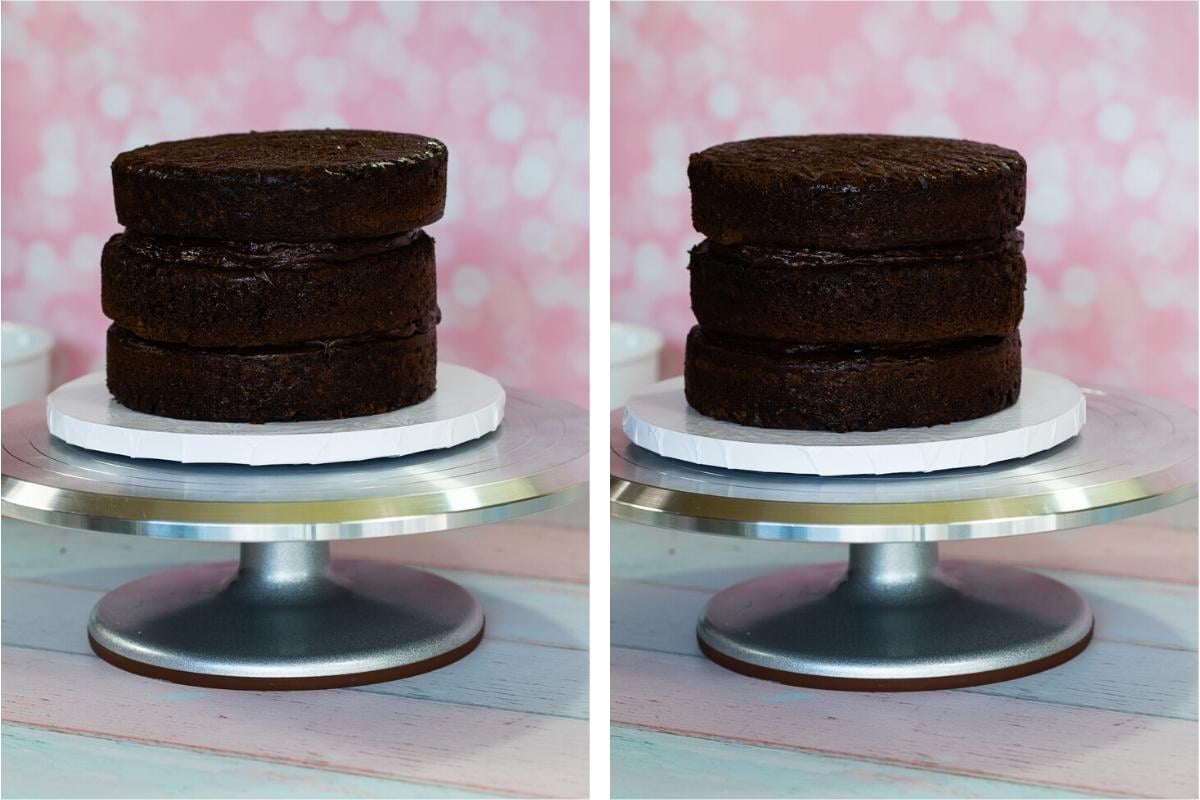
Step 3: Make sure layers are even
Make sure cake levels have not slipped and are straight. It helps to get down to eye level with the cake and slowly turn it around to make sure all sides are even and straight. If uneven, gently move into place.
Crumb Coat
Once all the layers are assembled and even, it's time to lock in the crumbs using a crumb coat.
Depending on how close to the edges you've added your filling, go around in between each layer and add extra frosting.
Then, use a pastry bag or an offset spatula add a thin coating of frosting all around the cake to lock in any potential stray crumbs. It does not need to look pretty or be perfect. But, you do want to make sure the cake stays even.
Once you've smoothed the entire cake with thin layer of frosting, chill in the fridge or freezer for at least one hour.
Frost Cake
Once the crumb coat has chilled, you can add the next layer of frosting.
Step 1: Frost Top of Cake
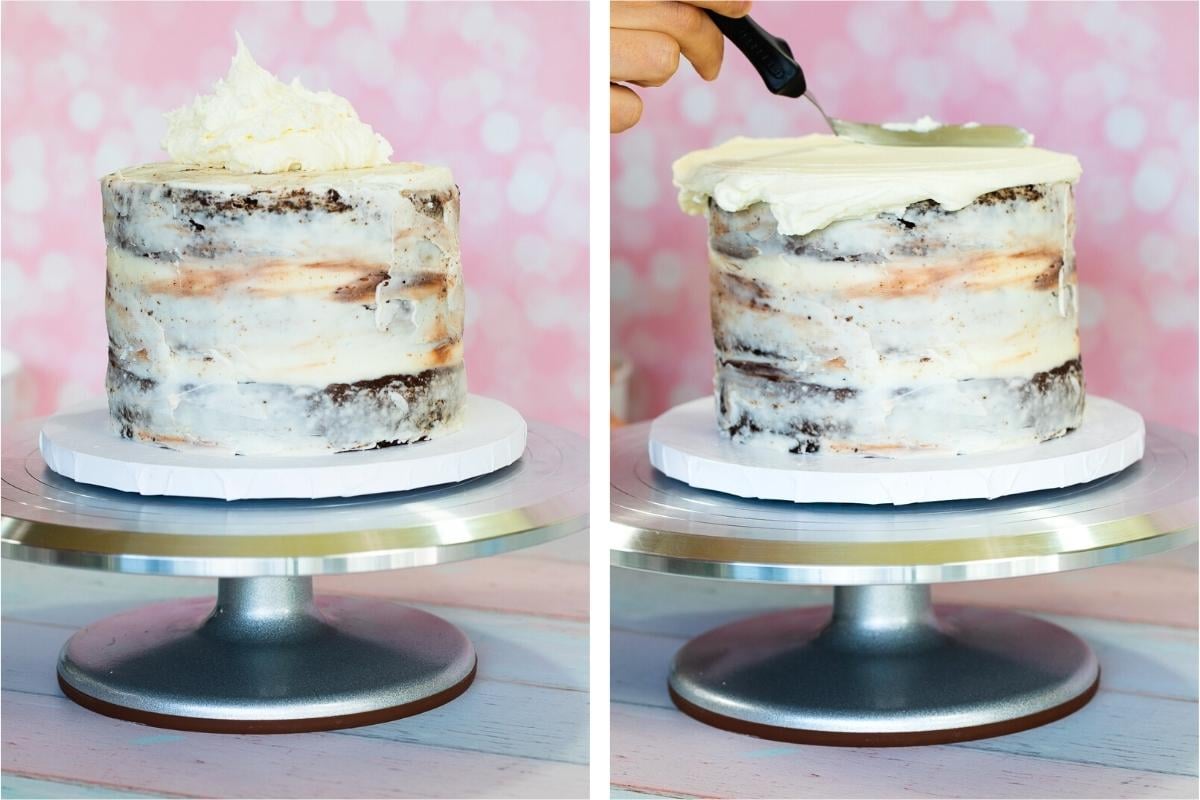
Step 2: Frost Sides
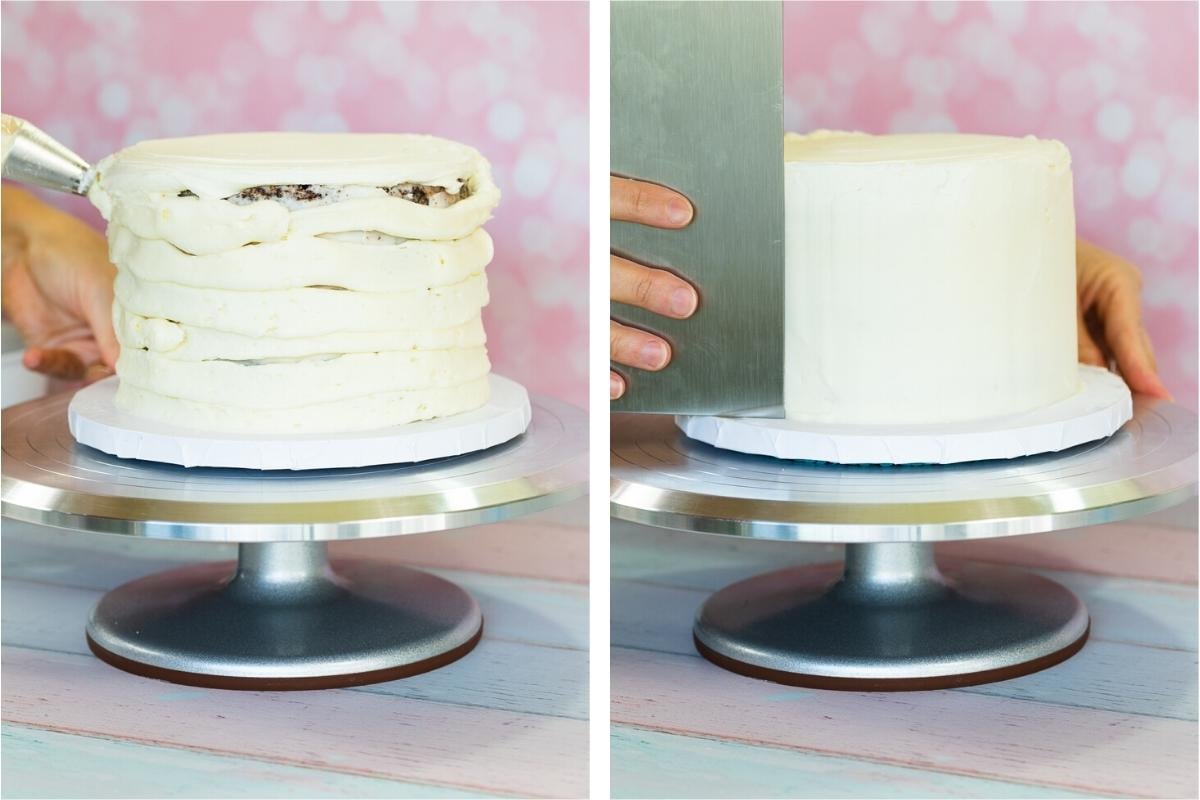
Then, once the top is smooth go around with a pastry bag and add frosting to the sides. While you don't need to use a pastry bag, I think it really helps with keeping the edges straight and even new to frosting cakes.
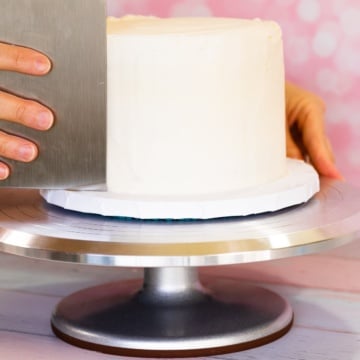
Then, go around the cake with a bench scraper, slowly making the sides even and smooth. I recommend keeping the bench scraper at a 45-90 degree angle, depending on your preference and the type of bench scraper you have. Practice both angels and see what you prefer.
When starting out, go around a full rotation and then clean off the bench scraper with a towel. This helps keep the cake clean.
This is the part that takes some practicing. Going around a full rotation and then cleaning the bench scraper is great technique for beginners to get a clean and sharp cake.
It helps to try to start and stop the rotation in the same spot. That also helps keep the frosting smooth and make sure there are no vertical divots in the frosting from the bench scraper.
Tips: get at eye level with the cake and make sure all the sides and top are even. If any spots looks uneven either add or remove the frosting to get them even.
Step 3: Fill in Gaps and Re-smooth
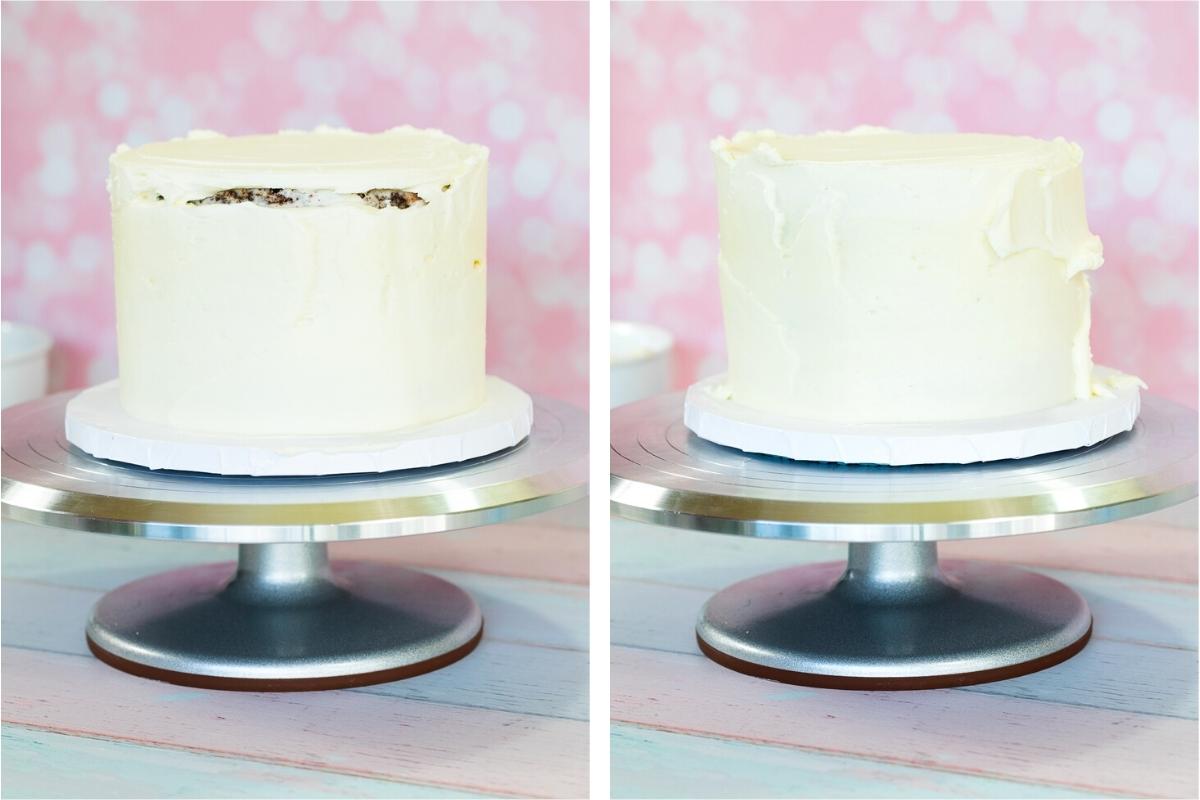
You can all chill the cake for 20-30 minutes, fill gaps and re-scrape. This can really help get the cake smooth.
It can also help to warm the bench scraper under hot water. Be sure to dry it completely before using it on the cake, but the extra warmth will slightly melt the frosting giving it a very smooth finish.
Step 4: Smooth Top
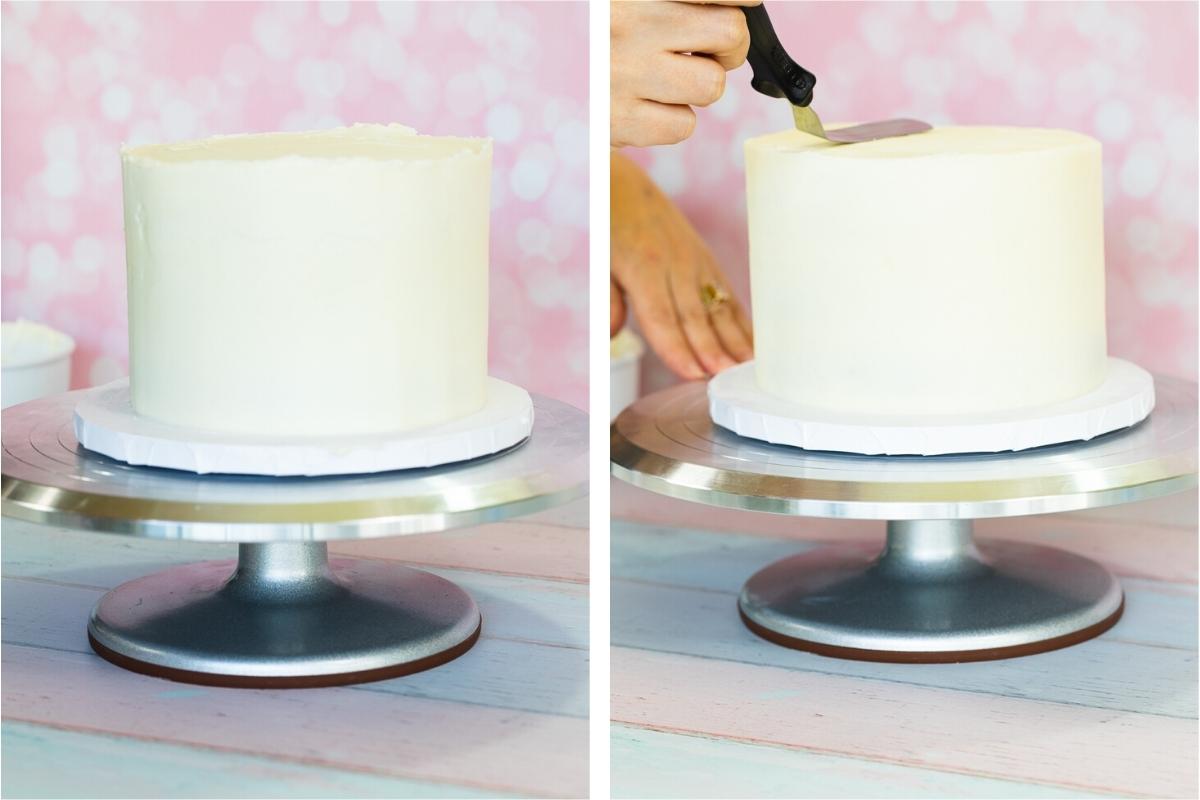
Once you're happy with the sides of the cake, smooth out the top. You can add more frosting to the top of it needs to be evened out.
Then, smooth the edges by taking either an off-set spatula or bench scrape and gently pulling the rough edges of the cake towards the middle of cake. You don’t need a lot pressure when doing this. You’re basically pulling the frosting inward to get rid of the edges.
You can also chill the cake and cut off the edges, then smooth inward for super sharp edges.
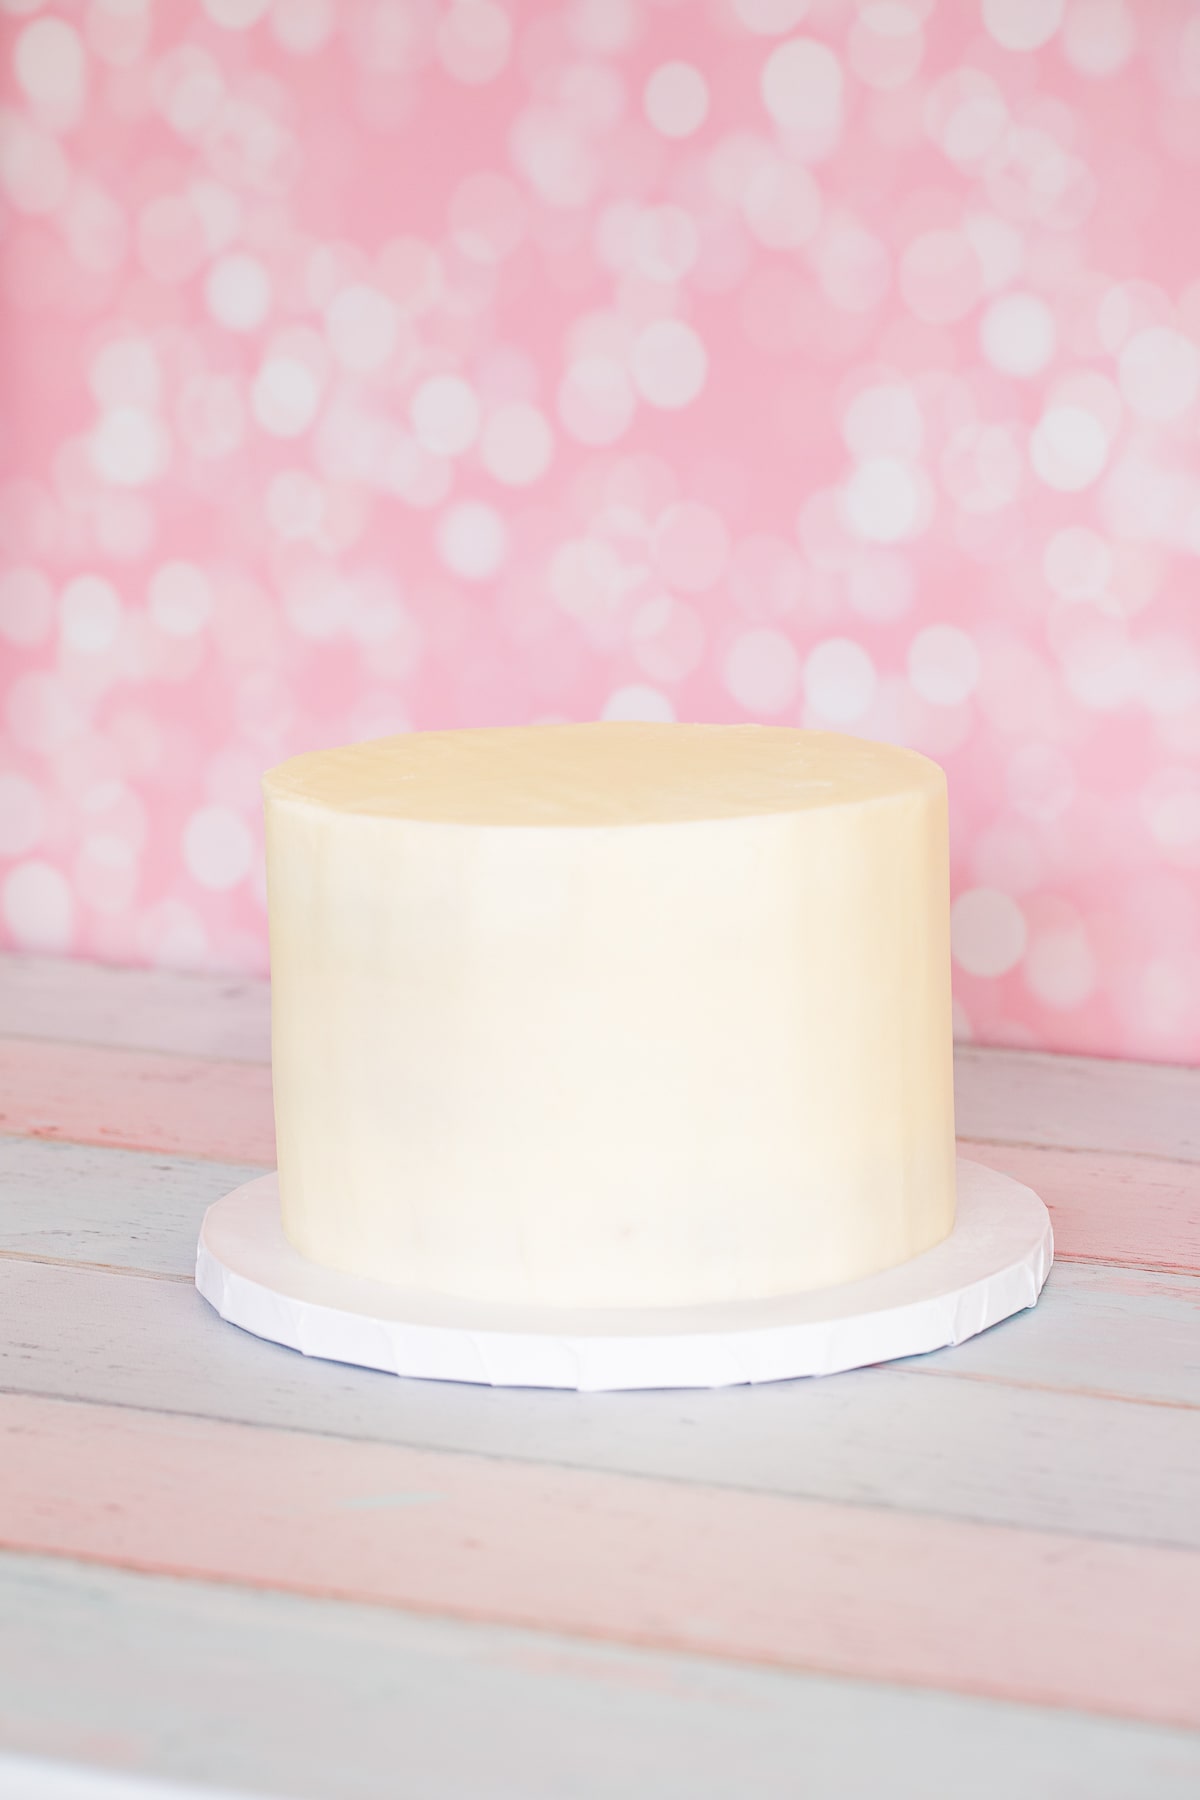
Viola, a professionally frosted cake ready to be decorated! This frosting method also works great under fondant.
Looking for ideas on how to decorate frosted Layer cakes? Check these out!
How to Frost a Cake
Equipment
- Shelf Liner/Non-Stick Pad
- Bench scraper
- Offset spatula
- Knife or cake leveler
INGREDIENTS
- Cake baked into layers, cooled or chilled
- Frosting buttercream frosting preferred, room temperature
Instructions
Assemble and Fill Layers
- Using a serrated knife or cake leveler, cut or level the top/dome part of the cake off, to make the cake layers even.
- Place a non-stick pad on your turntable and then place the cake board on top. This prevents your cake from slipping all around while you frost it.
- Place a bit of frosting in the middle of the cake board and place a cake layer on the cake board.
- Add frosting on top of cake layer 1. You’ll be using about ½ cup of frosting per layer (can vary depending on size and number of layers in cake).
- Use an offset spatula and smooth the frosting on the cake layer.
- If using a thin cake filling like jam, pipe a boarder of buttercream frosting around the edge of the cake layer and fill with the thinner filling to ensure the filling doesn't spread out of the cake.
- Place next layer of cake on top and repeat adding frosting and cake with number of layers.
- Once you've added all the layers, check to make sure the cake is even. If the layers are uneven, gently adjust until it is straight. It helps to get down to eye level with the cake and slowly turn it around to make sure all sides are even and straight.
Crumb Coat
- Depending on how close to the edges you’ve added your filling, go around in between each layer and add extra frosting.
- Then, use a pastry bag or an offset spatula add a thin coating of frosting all around the cake to lock in any potential stray crumbs. It does not need to look pretty or be perfect. But, you do want to make sure the cake stays even.
- Once you’ve smoothed the entire cake with a thin layer of frosting, chill in the fridge or freezer for at least one hour.
Frost Cake
- Once the crumb coat has chilled, you can add the next layer of frosting to the top by adding about ½ to 1 cup of frosting along the top and smoothing it out with an offset spatula or bench scraper.
- You want the frosting to go a bit off the sides of the cake. You’ll be adding more frosting to the top later so it doesn’t need to be perfect.
- Once the top is smooth, add frosting to the sides of the cake using a pastry bag.
- Using a bench scraper at a 45 - 90 degree angle to cake (depending on preference and type of bench scraper) slowly rotate the cake to smooth out frosting.
- When starting out, it can help to slowly go around a full rotation and then clean off the bench scraper with a towel. This helps keep the cake clean. Try to start and stop the rotation in the same spot, that helps keep the frosting smooth and make sure there are no vertical divots in the frosting from the bench scraper.
Fill in Gaps
- Once the the frosting is some what even, fill in any gaps or bubbles and rescrape.
- You can all chill the cake for 20-30 minutes, fill gaps and rescrape. This can really help get the cake smooth.
- It can also help to warm the bench scraper under hot water. Be sure to dry it completely before using it on the cake, but the extra warmth will slightly melt the frosting giving it a very smooth finish.
Smooth the Top
- Once you’re happy with the sides of the cake, smooth out the top. You can add more frosting to the top of it needs to be evened out.
- Then, smooth the edges by taking either an off-set spatula or bench scraper and gently pulling the top edges towards the center of the cake.
- Now the cake if ready for final decorations such as adding fondant, more frosting piping, sprinkles, or chocolate drip.
Notes
- Make sure the cake is room temperature or chilled. If you frost a warm cake it will melt the frosting.
- Use a non-stick slip mat under the cake board to keep the cake from sliding all over the place when you frost it.
- Using a pastry bag with a wide tip to apply the frosting helps ensure an even coat of frosting.
- Get eye level with the cake every so often and slowly turn it around to ensure it is even on all sides.
- If using a soft filling in between the layers such as jam, be sure to add a coat of buttercream or other stiff frosting around the edges to keep the soft filling from leaking out or cause the cake to bulge.
- For a 6 inch 3 layer cake I recommend a double batch this buttercream frosting recipe. But, the amount of frosting needed can vary depending on the size of the cake, number of layers, and thickness of frosting.

Sophia Assunta says
I hope everyone enjoys this recipe! You can read more user reviews on this Pinterest Pin for frosting a layer cake!
Tavo says
wao, this is a helpful guide! I’ll sure be coming back to this post often!
Claudia Lamascolo says
these were great instructions and tips thanks for taking the time to teach us, I love how much easier it will be now
Emily says
I usually end up with crumbs peaking out of the frosting, but not anymore!! I will be using all of these tips and tricks next time I make a cake! Thank you!
sara says
I’ve never known to make a “crumb coat” before fully frosting the cake!!! I always end up with crumbs in my frosting. Can’t wait to try this method!
Beth says
This is totally what I needed for the cake I’m making this weekend! My frosting jobs look like a three year old did it! Thanks!