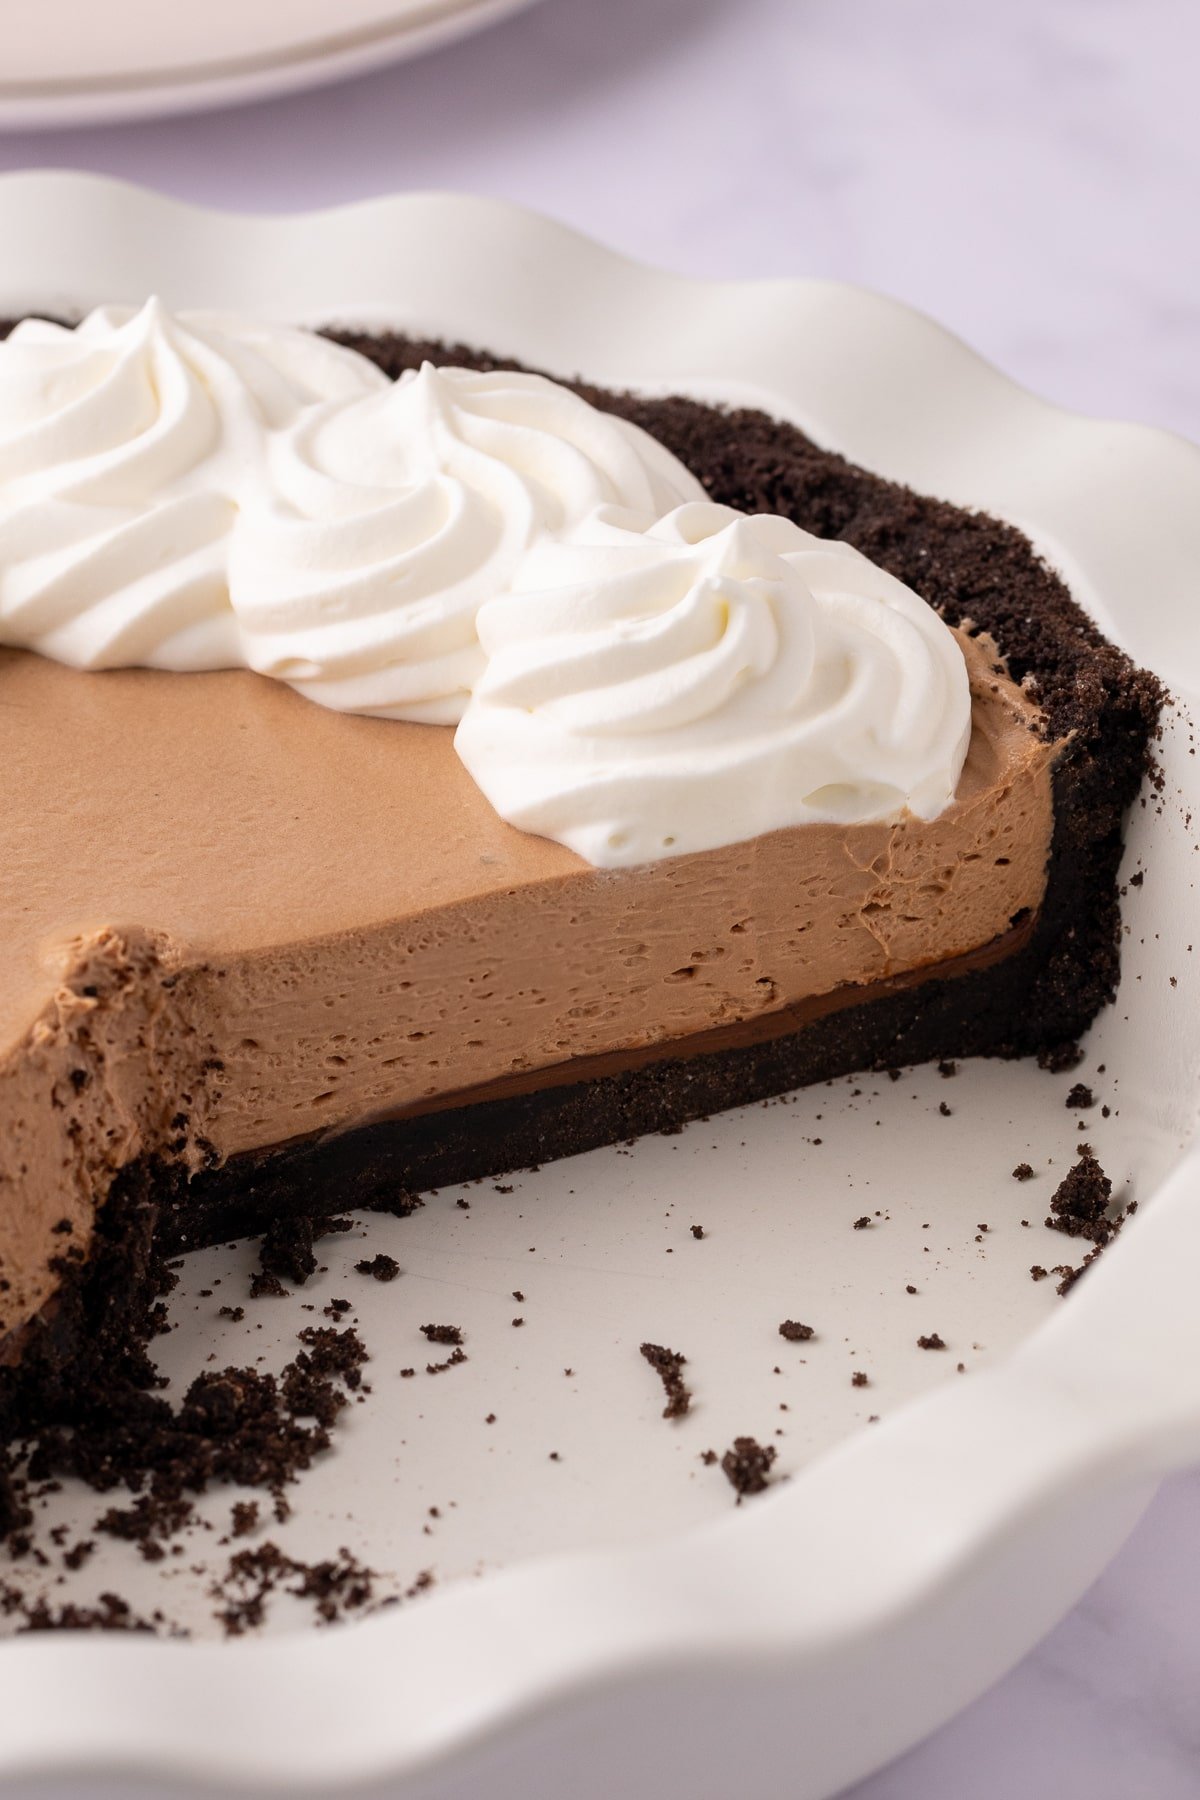
This easy Oreo pie crust is made with just two ingredients and works perfectly for cheesecakes and no-bake pies!
Oreo pie crust is such a classic pie crust, and the base of recipes like No-Bake Peanut Butter and Nutella Pie. It's rich, crumbly, and pairs really well with a ton of pies and cheesecake recipes.
While the store-bought version used to be a quick go-to for a chocolate pie crust, Oreo sadly discontinued its pre-made crust in 2023. We can still buy other chocolate crusts, but they are kind of expensive and for the same price you can have a homemade one that is way thicker and tastes a million times better (the pre-made ones are so small and thin!). Plus, unlike a traditional vodka pie crust, this recipe has only two ingredients and is super simple to make.
Ingredients
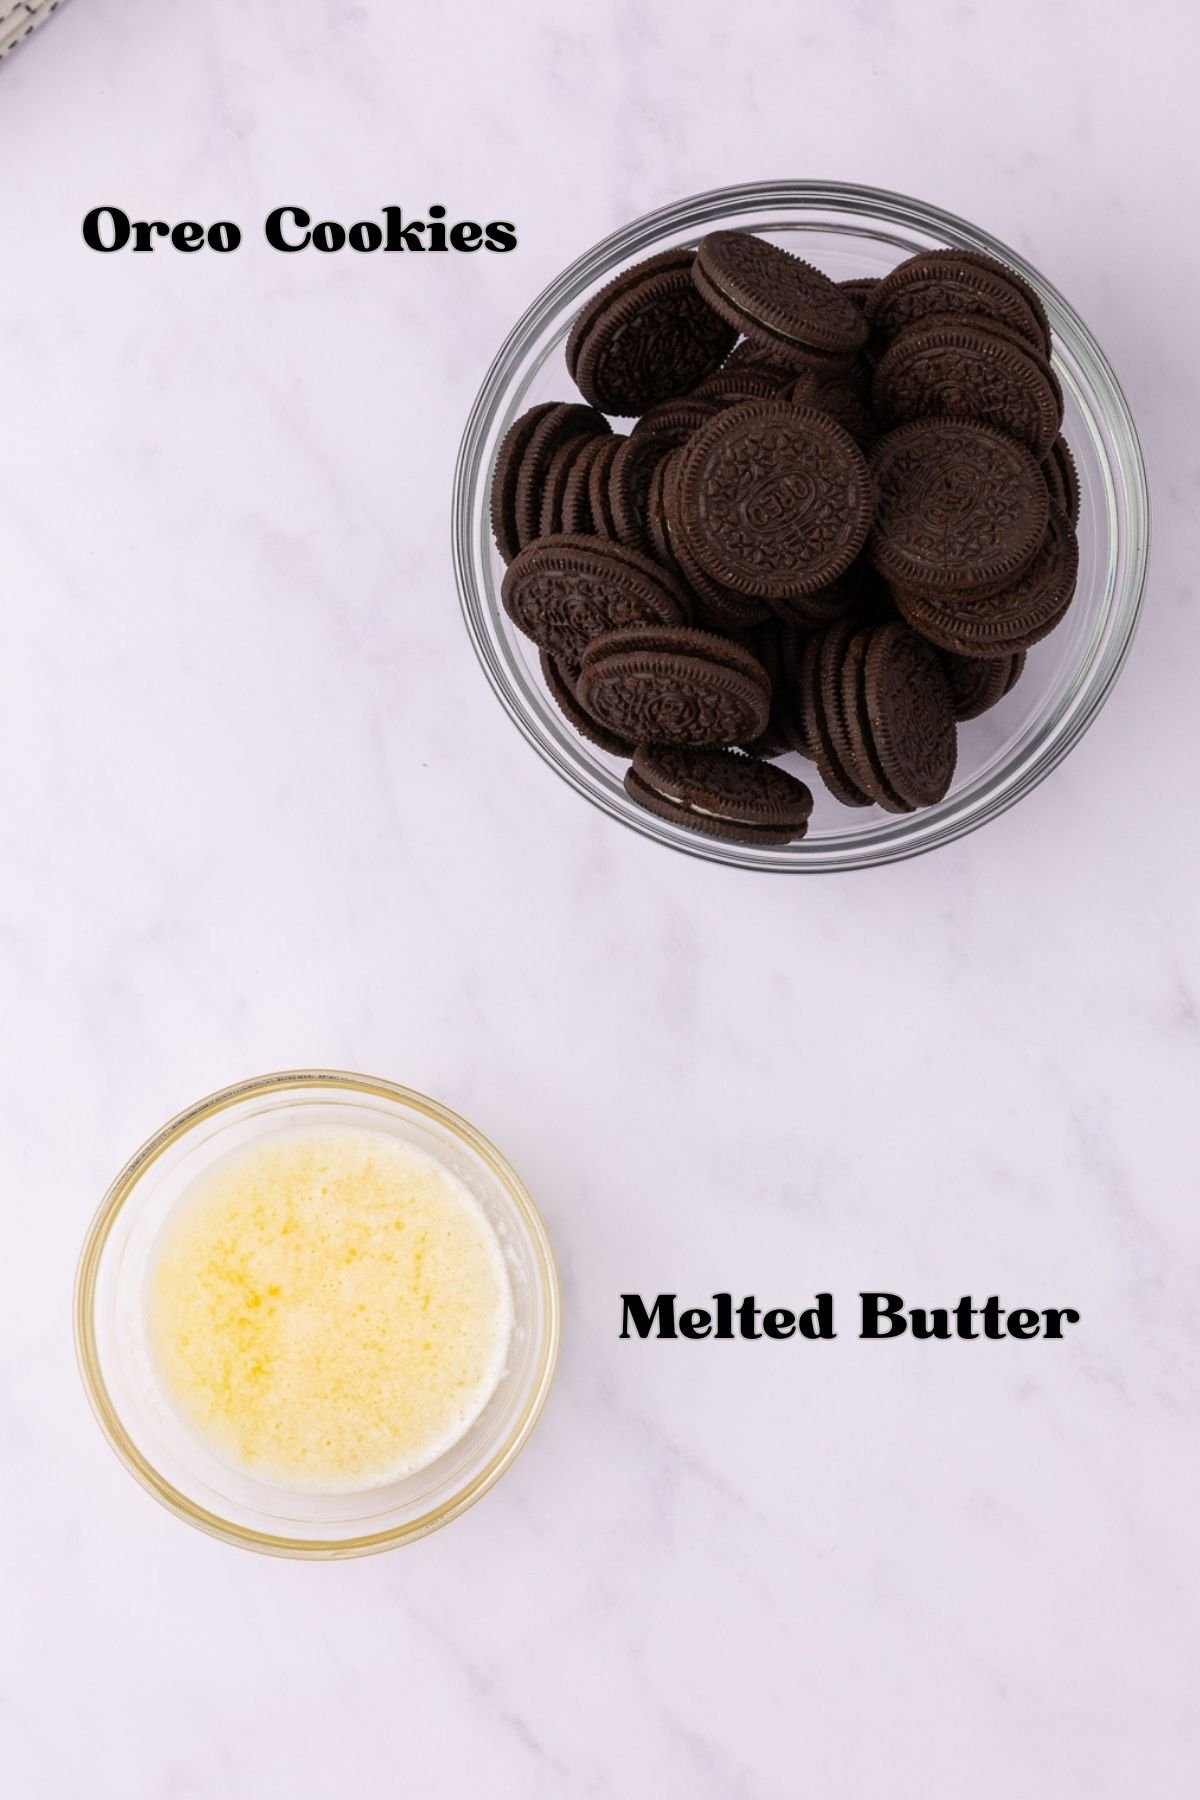
- Oreo Cookies : Use regular Oreos, filling included. You can also use other flavors of Oreos or similar brands of sandwich cookies.
- Melted Butter: Helps bind the crushed cookies together and gives the crust a rich, buttery finish. Both Salted or Unsalted work.
How to Make
Step 1: Crush Oreos
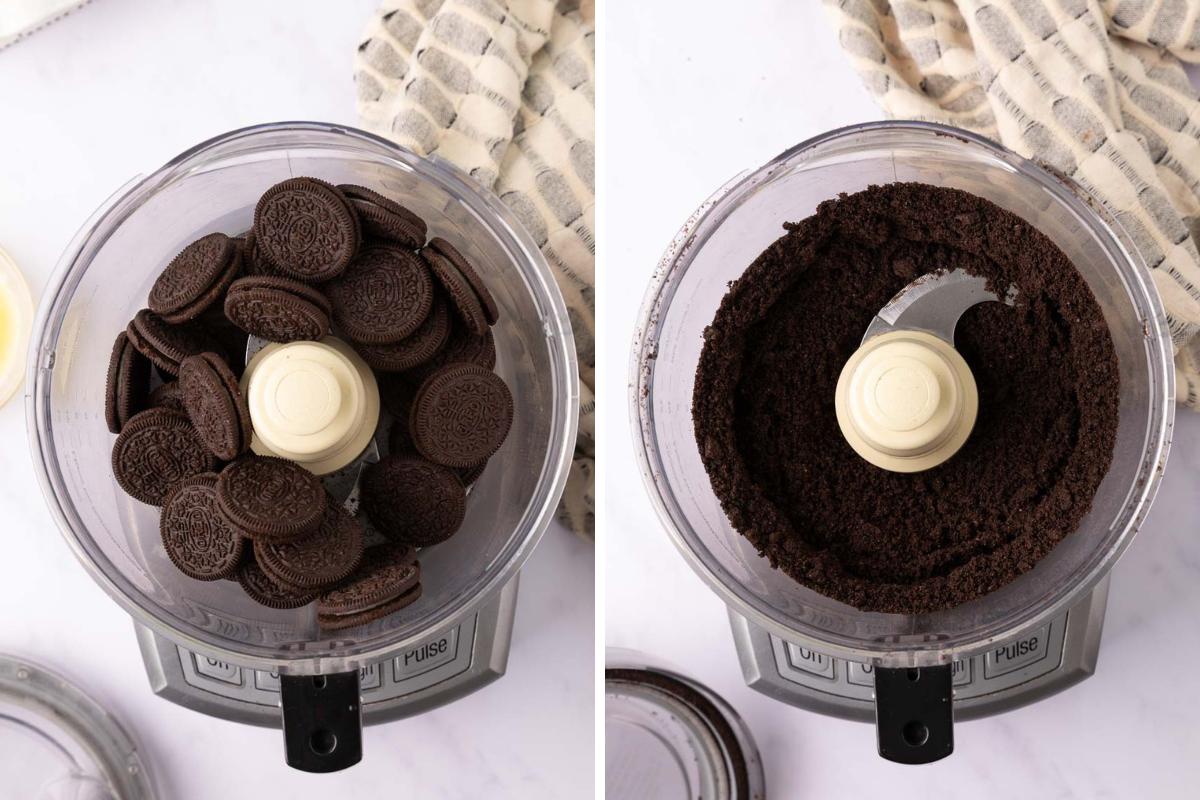
Pro Tip: No food processor? Place them in a sealed ziplock bag and crush with a rolling pin or other heavy object.
Step 2: Add Melted Butter
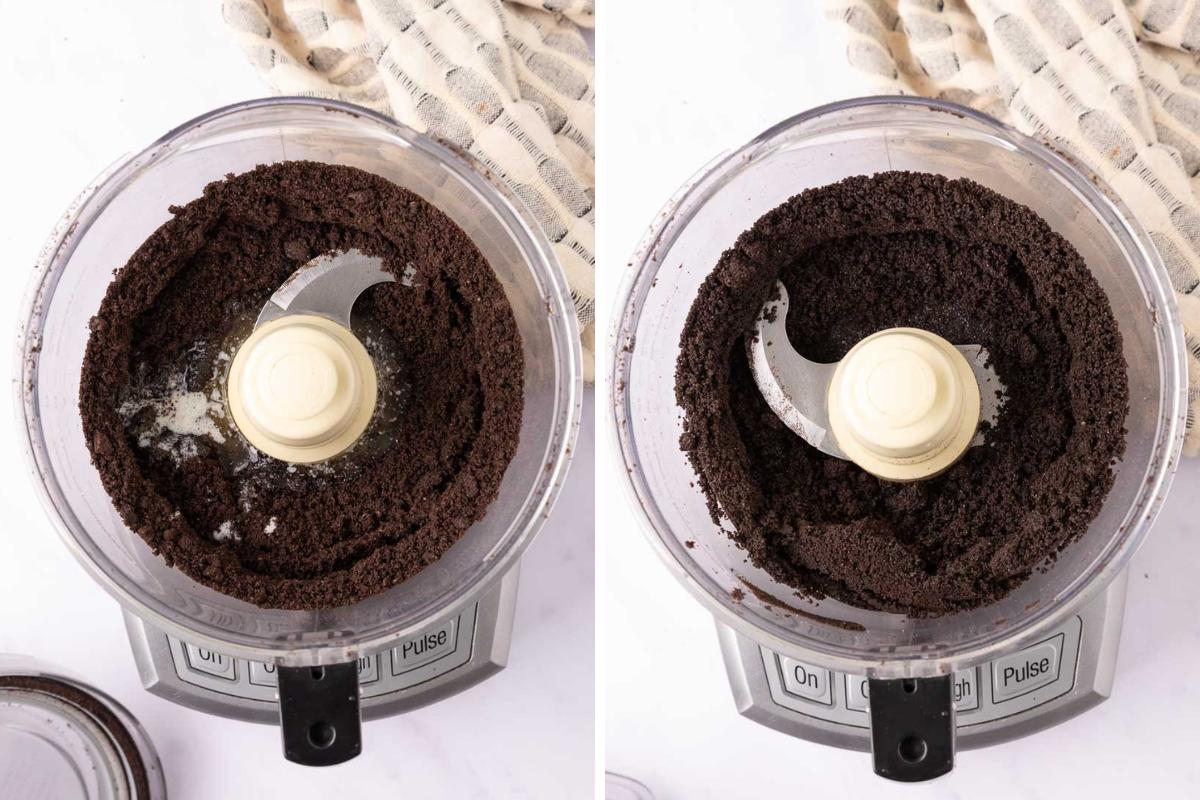
Pro Tip: If using a food processor to mix, be sure to scrape down with a spatula to make sure the butter is fully incorporated and doesn’t pool at the bottom. You can also mix everything in a large bowl (but why dirty another dish if you’re already using a food processor).
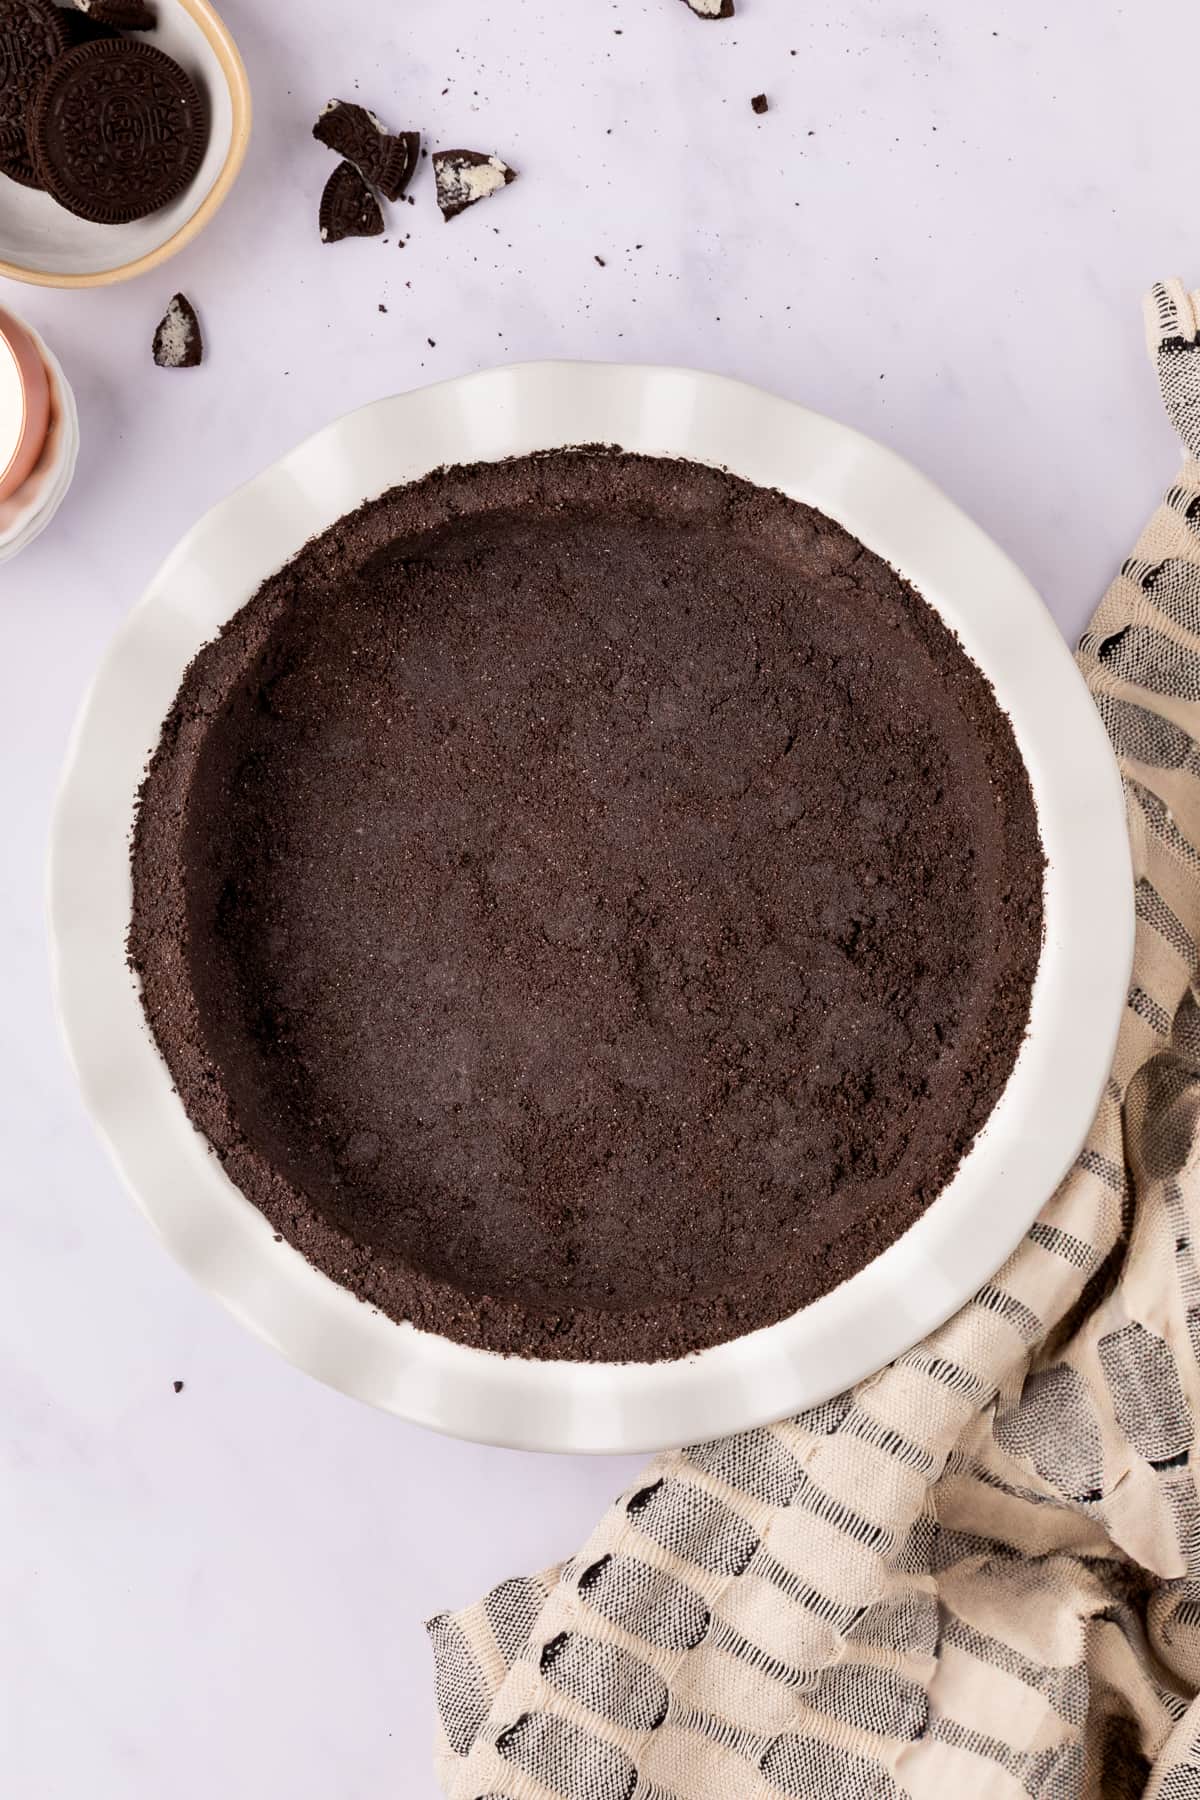
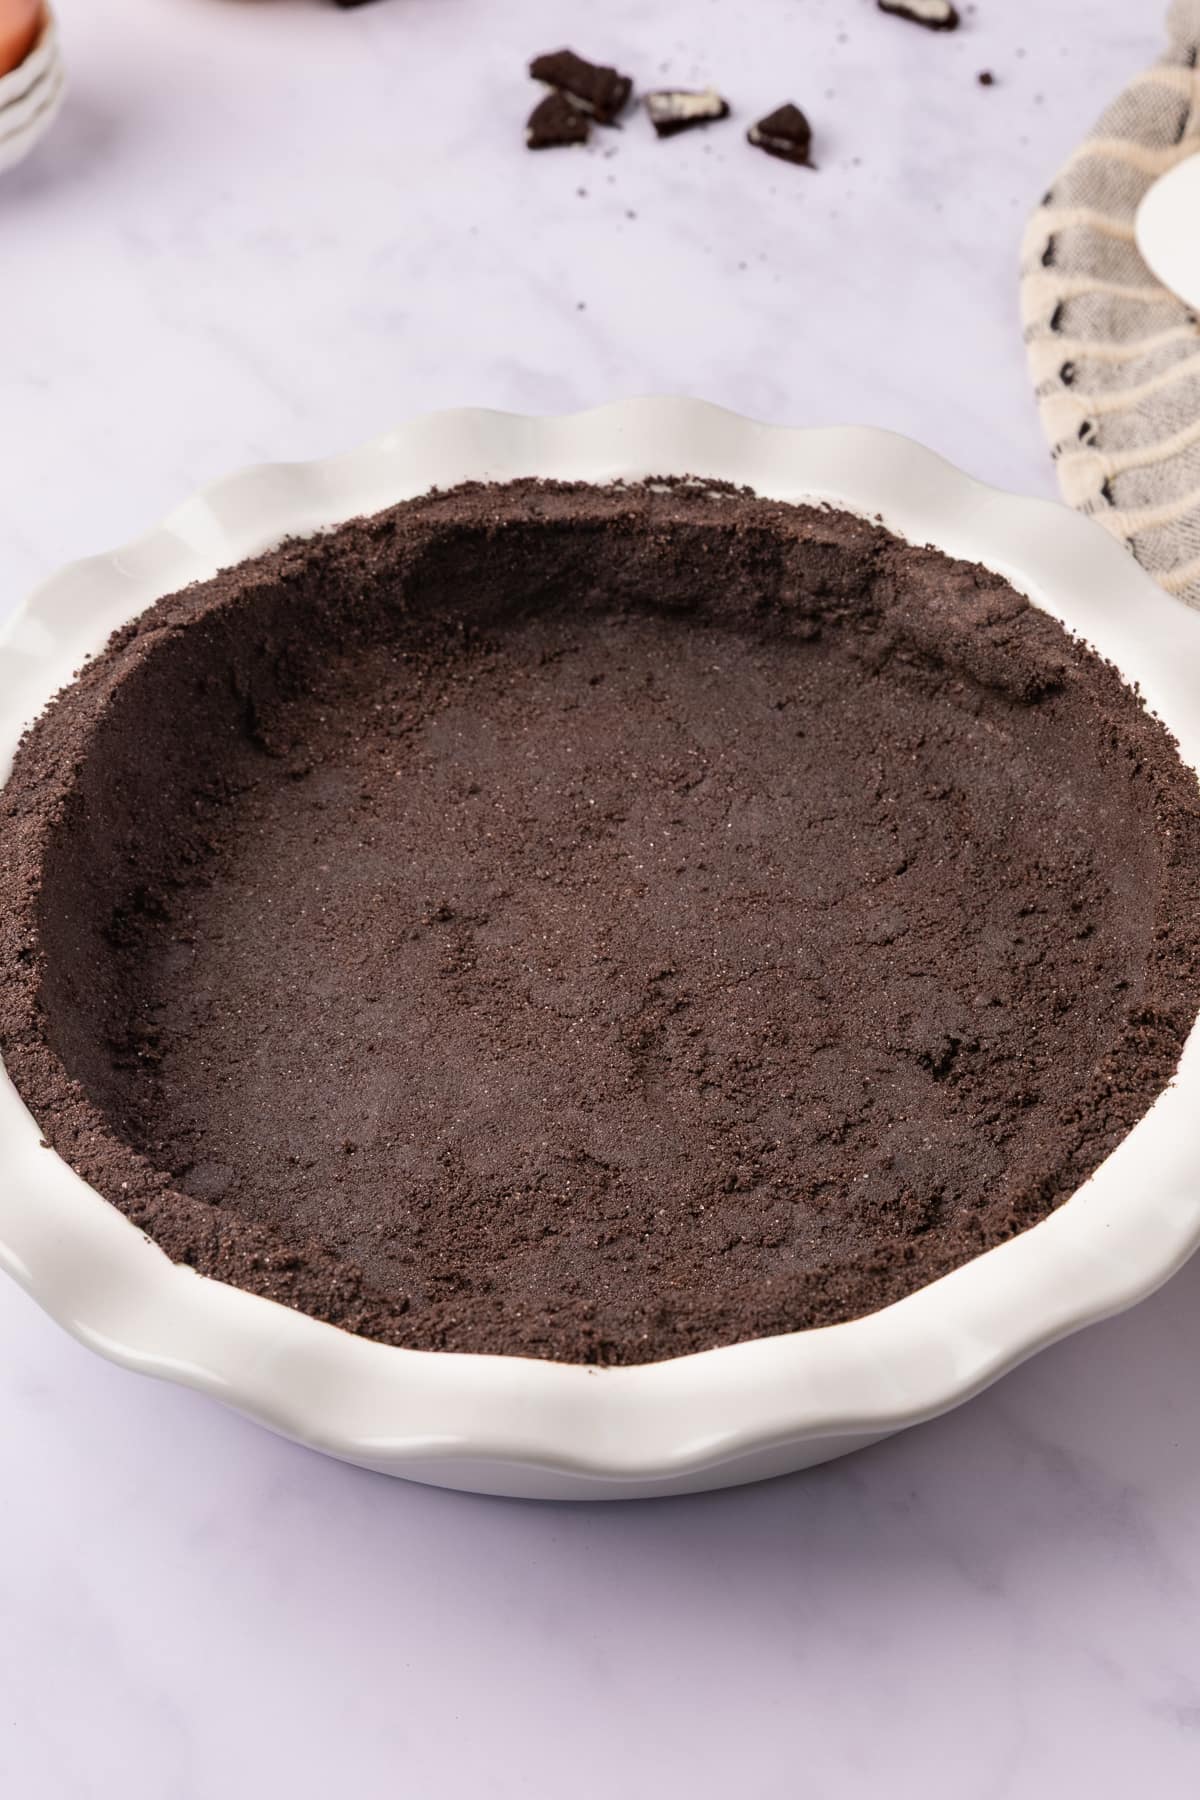
Step 3: Press into Pie Dish
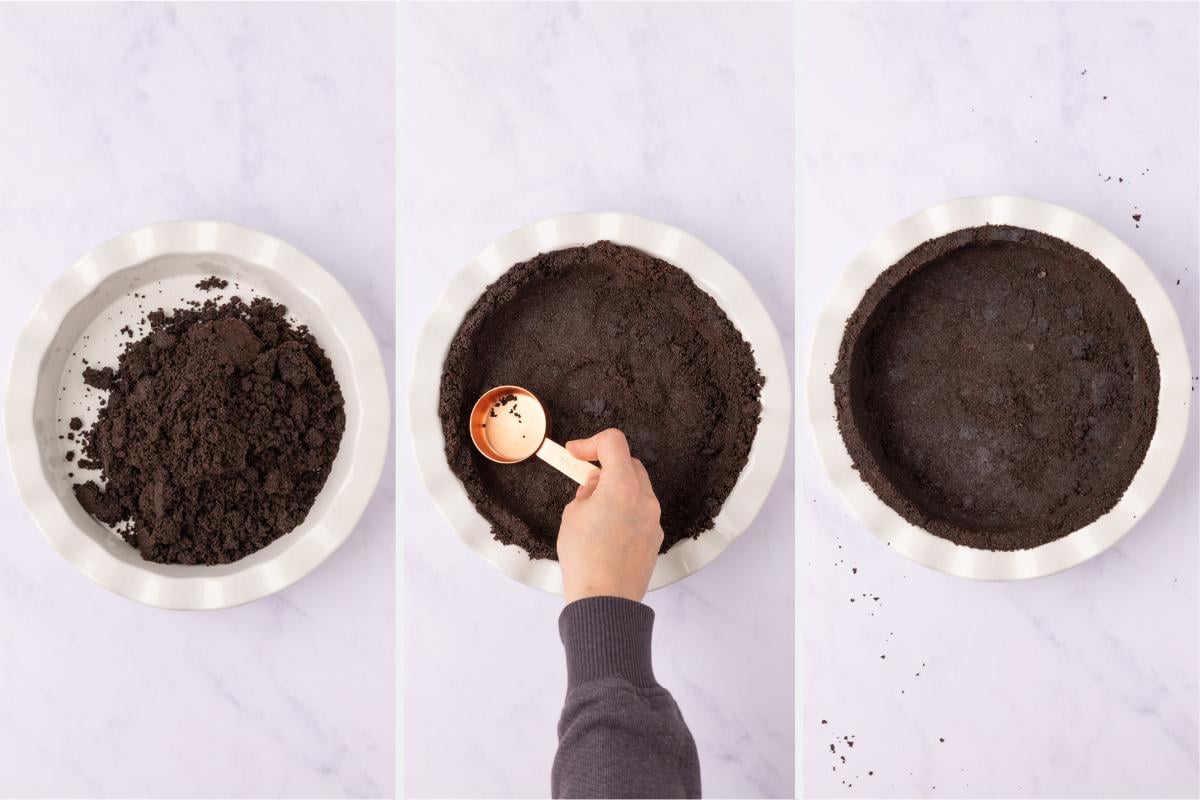
Pro Tip: Press, press, press! I like using a measuring cup to press into the sides and bottom of the pie dish, but remember the harder you press and compact the cookie mix, especially on the sides, the less likely the crust will break or crumble when slicing.
Step 4: Chill or Bake
- Chill: Place in the fridge for at least 30 minutes to set.
- Bake (preferred method): For a firmer and more sturdy crust, bake in a preheated oven at 350°F for 8-10 minutes, then let it cool completely before filling.
FAQ
Nope, do not remove the filling from the cookies, it helps to bind the crust.
I do not recommend using double stuff Oreos. They can make the crust really soft.
Sure! You can use generic or store brand cookies, or any flavor of Oreo cookies, including Gluten Free Oreos.
Yes!! Just divide the crust mixture among smaller pans or muffin tins and press firmly into the tins. They would be really good in these mini fruit tarts instead of tart dough, and paired with chocolate ganache and blackberries or strawberries, yum!!
Nope! You can chill the crust instead. But if you want a firmer, crisper texture baking is the way to go.
Storing and Making Ahead
- Storing: Once made, the Oreo pie crust can be stored in the refrigerator for up to 3 days, either unfilled or after baking.
- Freezing: You can also freeze the crust (baked or unbaked) for up to 1 month. Just wrap it tightly in plastic wrap and foil to prevent freezer burn. Let it thaw in the fridge before filling.
- Making Ahead: This crust is perfect for making ahead. You can prepare it the day before and keep it chilled or frozen until you’re ready to fill and serve. It's a great time-saver for holidays or party prep!
Looking for More Oreo Recipes? Check These Out!

2 Ingredient Oreo Pie Crust
Equipment
- 9-inch Pie Pan
INGREDIENTS
- 28 Oreo Cookies see notes
- 5 Tbsp Melted Butter unsalted or salted
Instructions
- Place the whole Oreo cookies (filling included) in a food processor and pulse until they're fine crumbs.
- If you don't have a food processor, you can place them in a sealed ziplock bag and crush with a rolling pin.
- Add the melted butter to the mixer and pulse or mix until the crumbs are evenly coated and resemble wet sand. Be sure to scrape the bottom of the mixer with a spatula to make sure it is fully incorporated.
- Alternatively, you can add it all to a large bowl and mix with a spatula.
- Pour the cookie mixture into a 9-inch pie dish. Use the back of a spoon or the bottom of a measuring cup to press the crumbs firmly into the bottom and up the sides of the dish. You're looking to really compact the cookies into the pie dish. The harder you press, especially on the sides, the less likely the crust will break when slicing.
- Bake the crust in a preheated oven at 350°F for 8-10 minutes, then let it cool completely before filling.
- Alternatively, you can chill the cookie crust in the fridge for 30 minutes to set it, but I do recommend baking as it creates a firmer more crisp crust.
- Once cooled or chilled, use as directed in your favorite pie or cheesecake recipe. Enjoy!
Notes
- Regular Oreos (not double-stuffed) work best in this recipe. You can also use any flavor Oreos and the store/generic brands works well to!
- I personally think 28 Oreo cookies is the sweet spot for a cookie crust, but you can use as little as 24 cookies or as many as 30, and it will still turn out delicious.
- This crust will last up to three days in the refrigerator or can be frozen up to two months.


Cathy Paetz says
What kind of pies would you recommend for this kind of crust? Thank you
Sophia says
I have a peanut butter pie recipe and a Nutella pie recipe that would both be delish with this crust!!