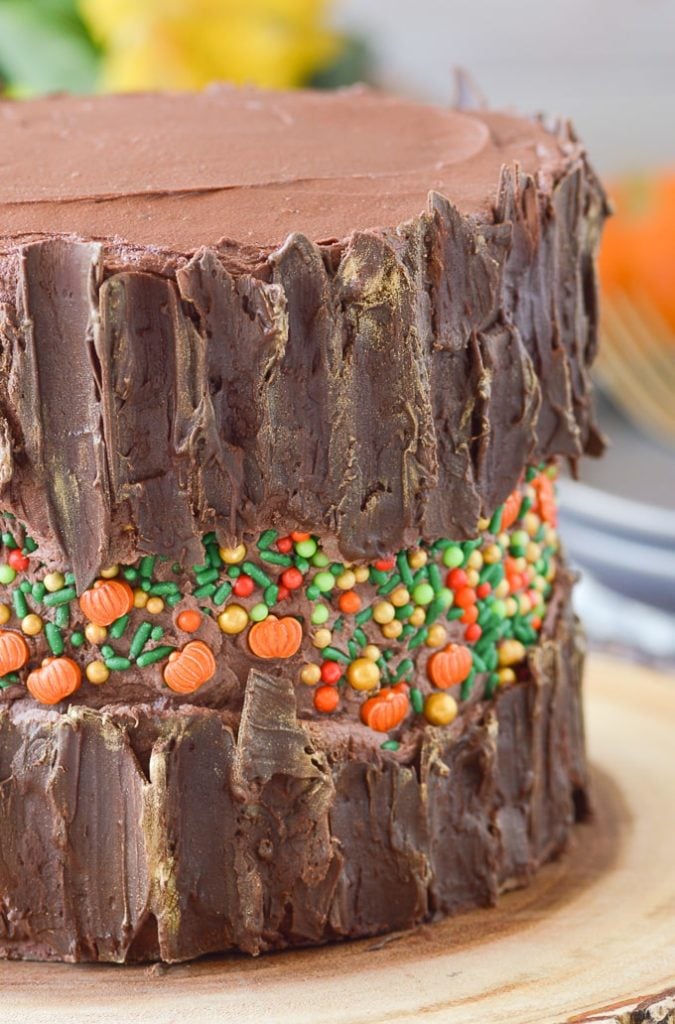
This tutorial shows you how to frost a very trendy fault line cake, a fun dessert idea straight from Instagram! This fall themed cake uses sprinkles, and painted chocolate to look like bark. It's a perfect cake decorating technique for the Thanksgiving holiday or your next autumn party.
Looking for more fun cake decorating techniques? Try painting a cake with buttercream or making a rosette cake!
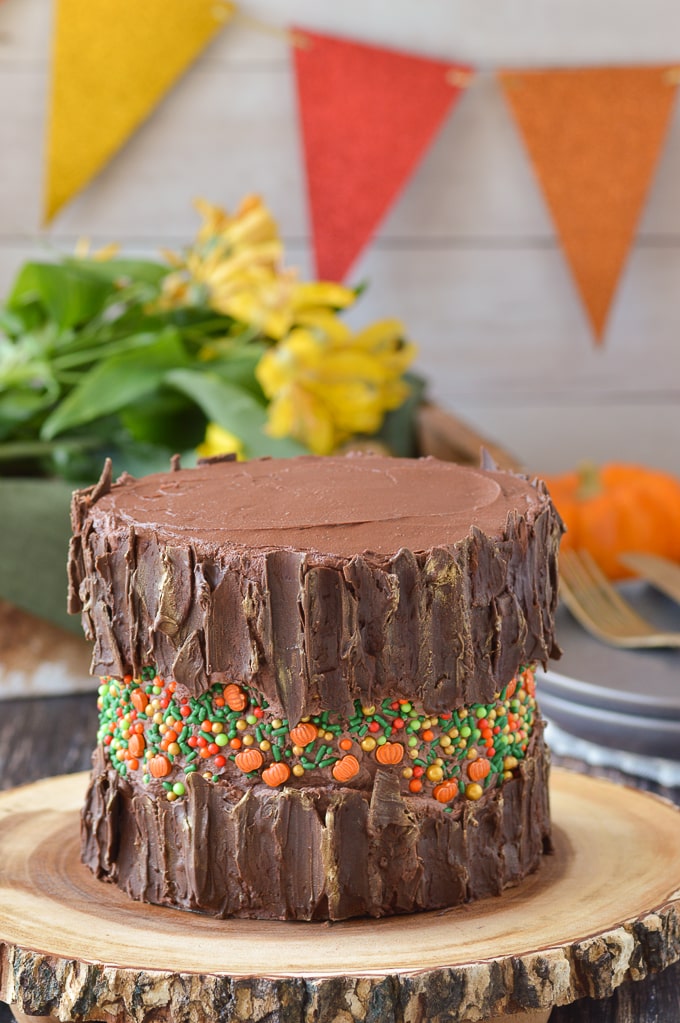
Happy fall ya’ll! Today is officially the start of the fall season and to celebrate here is a fall themed fault line cake tutorial. Fault line cakes are very trendy and all over Instagram. They are when a cake has frosting on the top and bottom, but also has a space in between, like the frosting opened along a fault line. The middle often has sprinkles, another frosting design, fondant, or even another dessert. Fault line cakes are fun and surprisingly easy if you're familiar with frosting a layer cake.
How to make a fault line cake
To make a sprinkle fault line cake, you'll start with a crumb coated and chilled three layer cake. For this fall cake, I went with double chocolate, using Chocolate Buttercream and easy Devil's Food Cake. But, you can use any cake and buttercream frosting recipes you want. For the fault break in the cake, I used a fall sprinkles mix, which you can find on Etsy. Depending on your sprinkle mix, you might need to separate out any large sprinkles as they can make it difficult to smooth out your frosting.
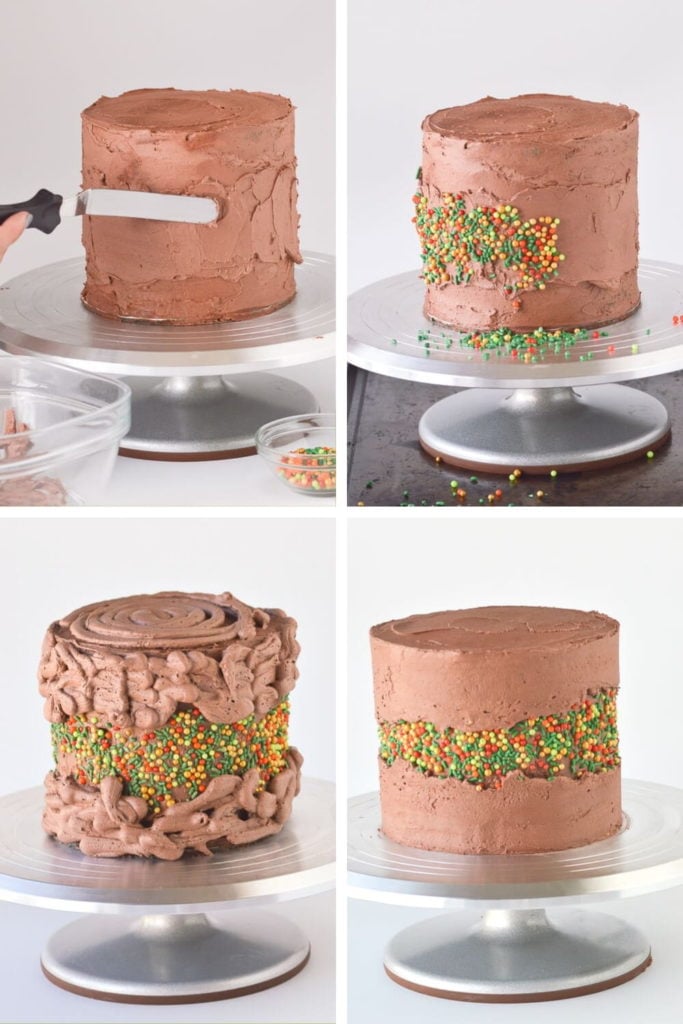
Once you’ve got your chilled crumb coated cake, spread a layer of frosting around the middle so your sprinkles can stick to it. Then, gently press the smaller sprinkles into frosting. I like to place the entire turntable on a baking sheet to help catch the extra sprinkles. After you've covered the middle with sprinkles, add the top and bottom layer of frosting. I used a pastry bag, but you can also spread it on with an icing spatula. Make sure to leave more room for the center fault than you think, the fault in the middle will get smaller as you scrape the frosting.
Then, smooth out the frosting using a cake scraper as you would a normal cake. Just like frosting a regular cake, when you're finished, look at it at eye level and slowly turn the cake all the way around to make sure the sides and top are even. If they are not, add more frosting in the spots that are sparse, and then re-scrape using your cake scrubber until smooth. Then, you an add back your larger sprinkles and any other decorations for your cake.
Fall Fault Line Cake
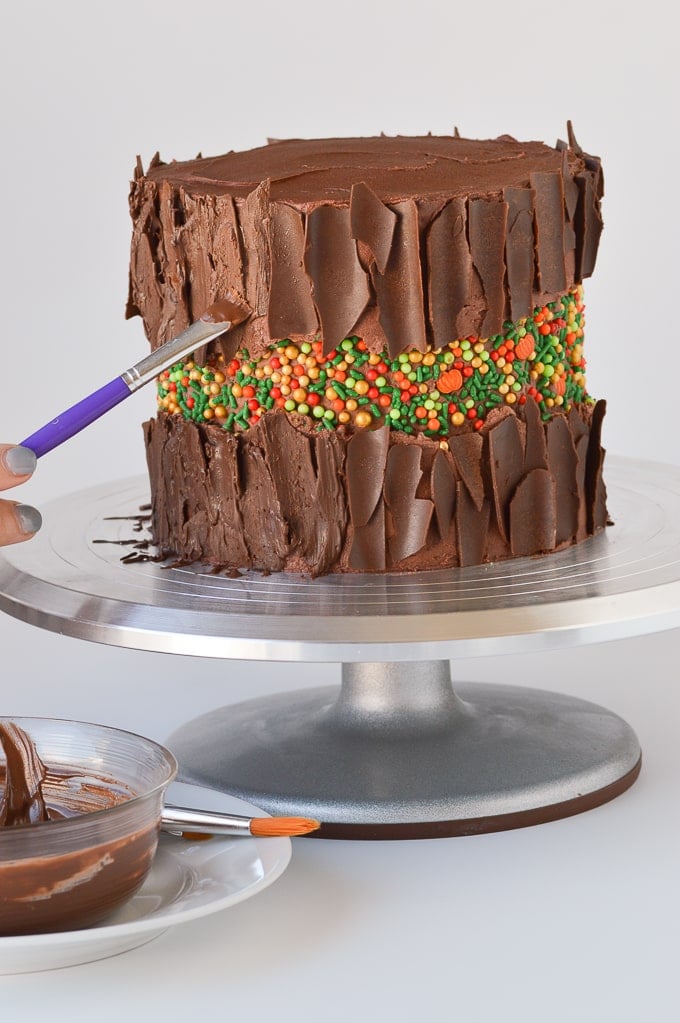
For this fall themed cake we have a couple more steps of adding a chocolate bark to the frosting. I recommend making the chocolate bark prior to frosting your fault line cake.
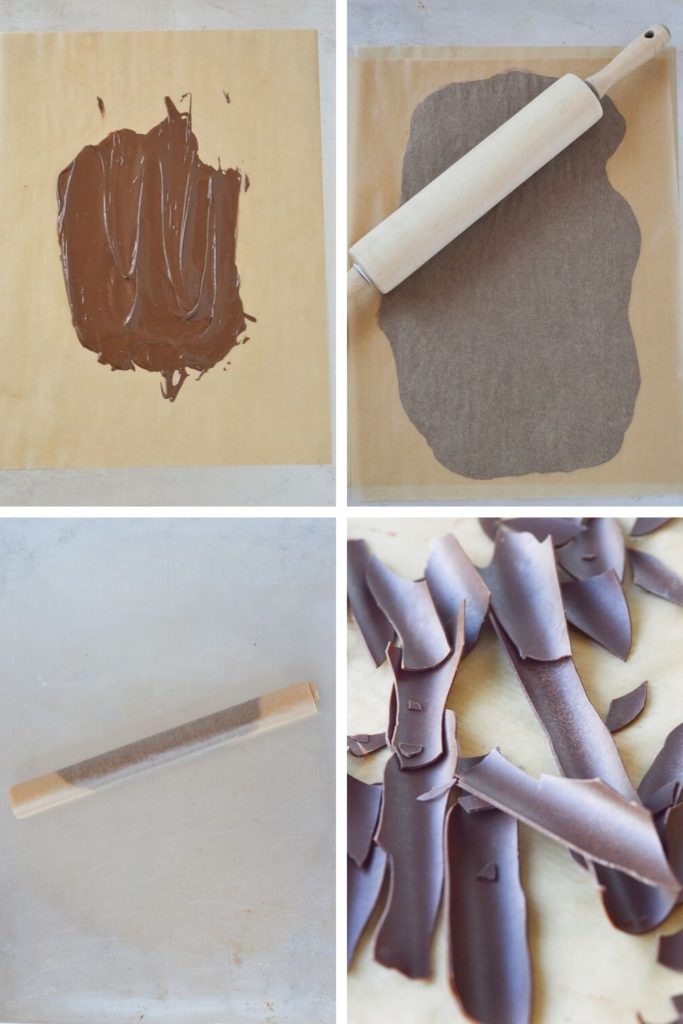
For the bark, melt chocolate candy melts and spread it out on parchment or wax paper. Cover with another sheet of parchment and then smooth it out using a rolling pin, cake scraper or anything you have that will get it to about ¼-⅛ inch once spread out. Then, roll the parchment paper. You can secure it with tape or a rubber band and place it in the fridge to firm up. After it's hardened, unroll it and break it into pieces that will fit onto each frosted part of the cake.
Go around and add the broken pieces of chocolate close together all around the top and bottom of the frosted cake. It is supposed to be bark and organic so it does not need to be perfect. After you've added the bark place the cake the fridge for about 20 minutes to set.
Melt the remaining chocolate. Using a paint brush, brush the chocolate onto the bark. Let the chocolate dry completely and then gently brush on cocoa powder and gold luster dust in the highlight and lowlights of the bark. If you haven't already added the larger sprinkles, add those back into the middle of the cake and then you're done!
Tips for fault line cake:
- You can use any cake and buttercream frosting recipe, but I do recommend at least three layers to ensure you have enough room for the break in the middle.
- If your sprinkle mix has larger sprinkles, separate them out and only add the smaller sprinkles to the middle of the cake in the beginning. Otherwise, the large ones can get caught when you try to smooth out your frosting. Don't worry, you'll add the large sprinkles back when you're done frosting!
- When adding sprinkles, place the cake turntable on a rimmed baking sheet to catch the extra sprinkles that fall off the cake.
- Add both the sprinkles and the bark right after frosting each part so they stick.
- If after frosting the top and bottom, the cake frosting bulges in the middle, trim off the extra frosting near the middle, or add more frosting near the top and bottom to even it out. When you look at the cake at eye level, you want the sides to be at a 90 degree angle.
- I highly recommend using chocolate candy melts rather than bagged chocolate chips for the bark as they harden better than chocolate chips.
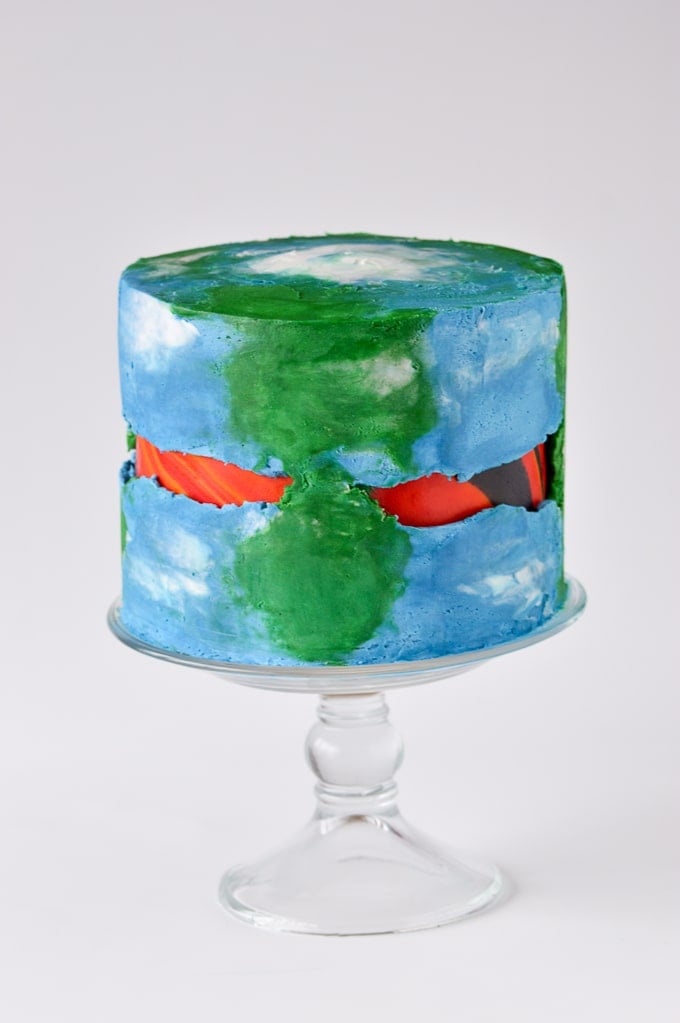
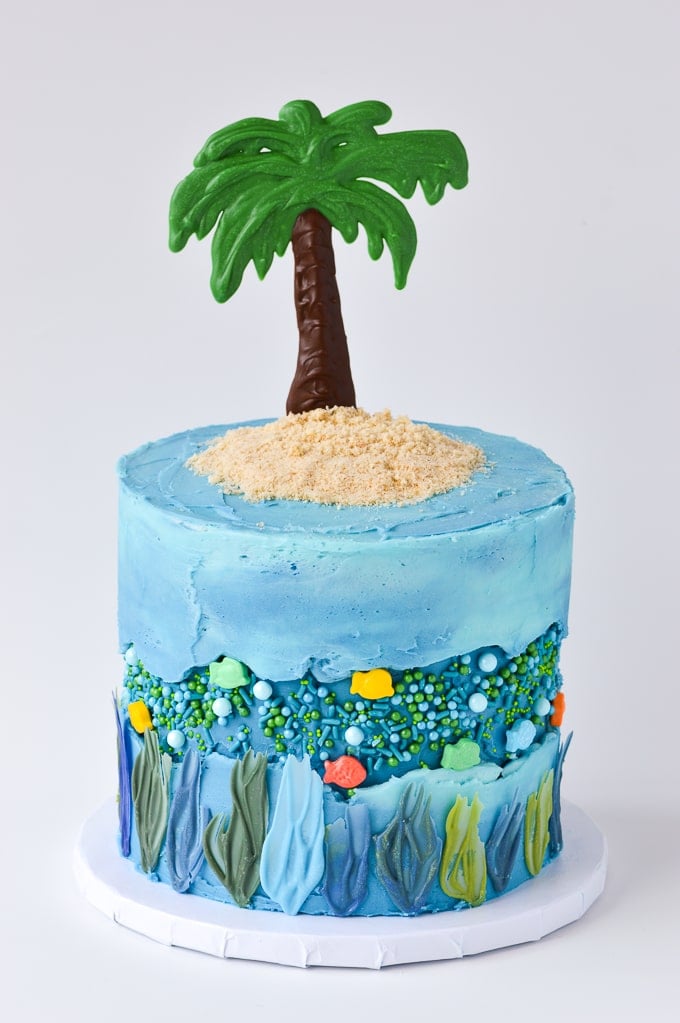
Now that you know the basics of making Fault Line Cakes, here are some more ideas to try! Enjoy!
This post may contain affiliate links. If you purchase through the link, Partylicious may be compensated at no additional cost to you. This has no impact on our recommendations and this income helps to keep this site running! Thanks for your support!

Fault Line Cake
Equipment
- Parchment or wax paper
- Bench/Cake Scraper
- Paint Brush
- Icing Spatula or Pastry Bags
INGREDIENTS
- 1 6 inch 3 Layer Cake crumb coated and chilled
- Chocolate Buttercream Frosting
- Sprinkles Mix
- Chocolate Candy Melts 6 oz
Optional
- Cocoa Powder
- Edible Gold Luster Dust
Instructions
Chocolate Bark
- Melt half of the chocolate melts according to instructions
- Once melted, spread out onto a piece of parchment or wax paper. Cover with another piece of parchment and spread the chocolate into a thin layer using a rolling pin or cake scraper.
- Roll the parchment into a tube and place in the fridge to harden, at least 30 minutes.
Frosting a Sprinkle Fault Line Cake
- If necessary, separate any large sprinkles from your sprinkle mix
- Take your chilled crumb coated cake and use an icing spatula or knife to frost just the middle of the cake with frosting. Immediately after frosting the middle, add sprinkles (minus the larger sprinkles) to the newly frosted area. This part can get messy as sprinkles will fall off the cake. I recommend place the entire turntable on a rimmed baking sheet to help catch the extra sprinkles so you can reuse them.
- Add your upper and bottom frosting using either a pastry bag filled with buttercream or an icing spatula, leaving a break in the middle. Leave the break a little bigger than what you’d like your final break to look like as it will get smaller as you smooth out the frosting.
- Using your cake scraper, smooth out the frosting until even. Be sure to look at the cake at eye level to make sure all the sides and top are even, adding additional frosting to any sparse areas and re-smoothing to try to get straight sides.
- Add back any larger sprinkles to the fault line break. If you’re adding bark for this fall themed cake, move on to the next step, otherwise you can add any other decorations to your cake and that’s it for a regular sprinkle fault line cake!
Adding Bark to your Fall Fault Line Cake
- Remove the chocolate bark from the fridge and unroll. It should start to break apart, but break it apart even more to sizes that fit your cake.
- Add pieces of the bark along the tops and bottoms of the newly frosted fault line cake. It helps to add the bark right after you frost it so it sticks. You want it to look organic and natural so it doesn’t need to be perfect.
- Chill the cake in the fridge for 20 minutes.
- Melt the other half of the chocolate melts. Using a paint brush, paint the chocolate onto the bark that you have placed on the cake. This helps it to look like wood.
- Let the chocolate dry. If necessary, you can go over the bark a second time with another layer of chocolate.
- If you haven’t done so already, add back any larger sprinkles. If the frosting starts to harden or crust over and the sprinkles don’t stick, add a tiny bit of frosting to one side of the sprinkle and place on the cake so they stay.
- Optional, but adds a really nice fall touch is to brush on cocoa powder and edible gold luster dust in the highlights and lowlights of the chocolate bark.
- That’s it! A simple and fun fall themed fault line cake perfect for your next Autumn dinner party or Thanksgiving holiday.
Notes
These instructions are for a 6 inch cake. If you’re making a 8 or 9 inch cake you might need more frosting and chocolate melts.
More Cake Decorating Ideas:


Leave a Reply