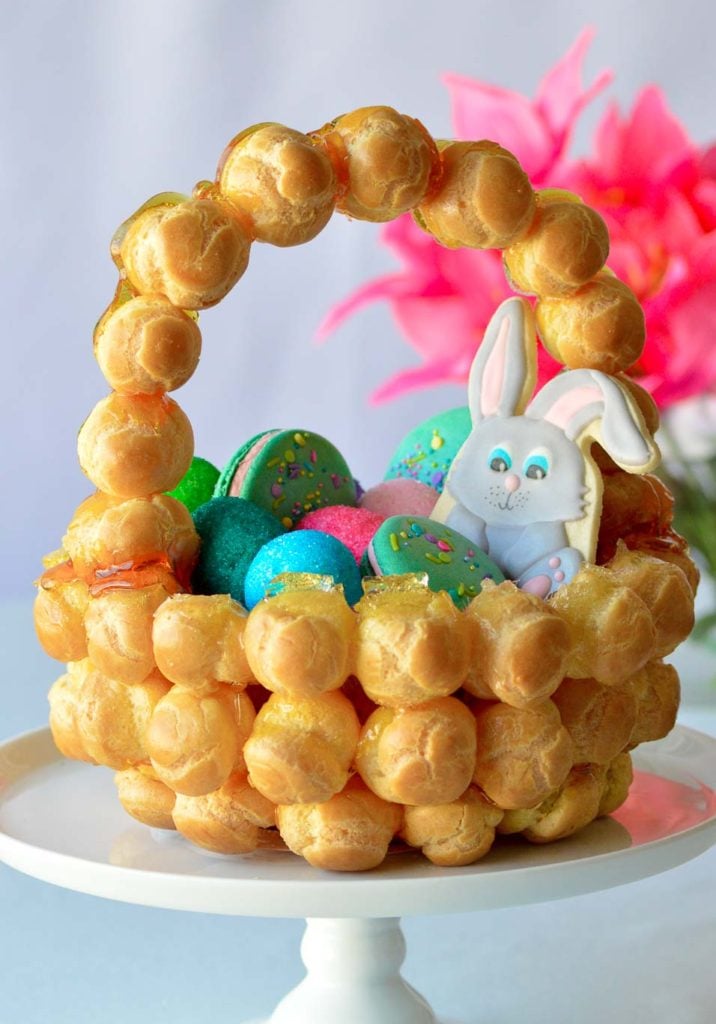
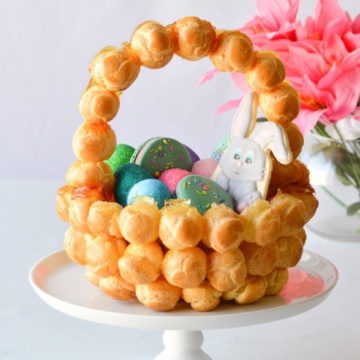
This festive take on the classic croquembouche is a delicious and surprisingly simple way to impress a crowd at Easter brunch!
If you're making multiple desserts this year, don't miss my collection of Easter treat ideas and recipes.
The idea for a croquembasket came to me like a dream at Christmas. My cousin was trying to make a croquembouche and I has just finished watching the episode of Zumbo's Just Desserts on Nextflix where they make a Lovembouche. I sat up in my chair and was like Croquembasket for Easter! Of course, I forgot about it for the next two months. But as Easter is fast approaching and I’m starting this blog, I thought it would be a fun experiment.
Prior to this, I had never made a croquembouche so before even attempting, I did a lot of research. Strangely, most recipes out there don't call for a candy thermometer. But a lot of people also complain in the comments that their caramel is hard as a rock. So, I highly recommend using one and cooking the caramel to 320-340 degrees F (170 C).
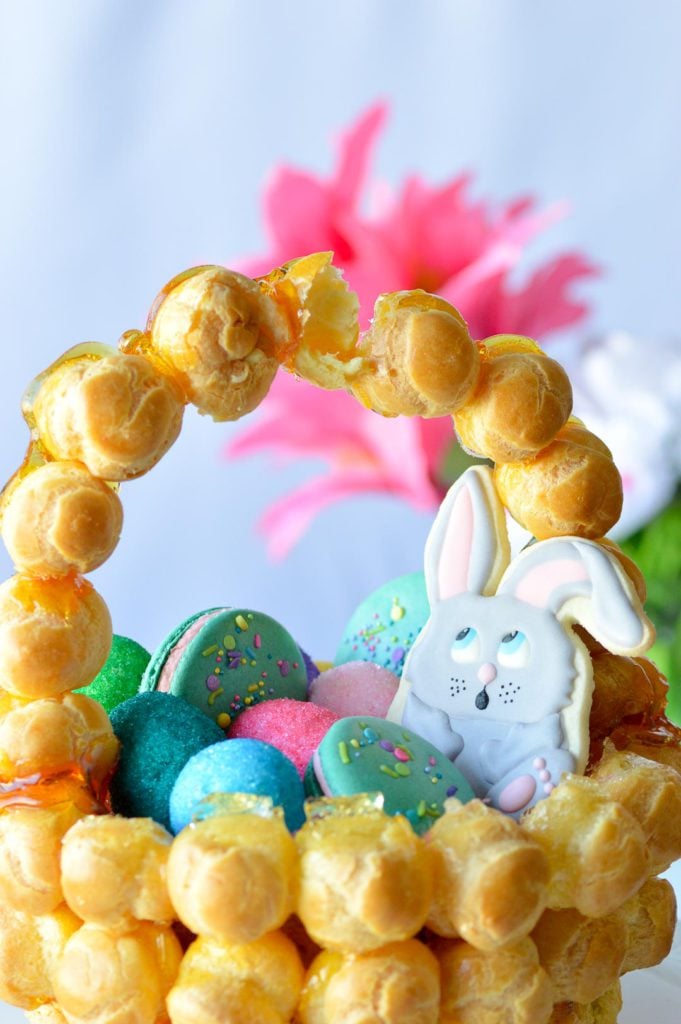
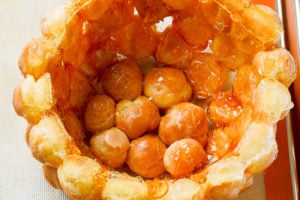
By the way, the caramel on this is on point! It’s so good. While I love making Pate a Choux I’m not a huge cream puff fan. They need to be super fresh or else they’re kind of mushy and soggy. I prefer mine with Craquelin to help offset the sogginess but in a croquembouche they are crispy and awesome. Seriously, they are so tasty. I filled my cream puffs with basic Pastry Cream, but you can fill with whatever you want. And for the finished basket I filled with spun sugar, homemade marshmallow easter eggs, and macarons.

Here are my tips:
- Get a candy thermometer to ensure your caramel is the right consistency. I cook until about 320-330 and then turn the heat to low. It will still cook a little more and continue to darken in color.
- Non- Stick Cooking Spray is your best friend in this process. The caramel can be difficult to work with, and spraying down your tongs, aluminum foil, and basically everything you're resting the croquembouche on makes removing it from the plate and foil so much easier. It makes the whole process go smoothly and makes clean up a lot easier as well.
- Make sure to add the water and corn syrup to the sugar when you cook it. This helps the sugar cook evenly. A lot of recipes just call for sugar and corn syrup, with no water, but I've found the sugar doesn't cook as even. Especially if you have a electric oven or uneven heat like I do. Also, the corn syrup helps makes the caramel more stable and less like to get grainy so be sure to add it if you have it.
- Wipe down the sides of the pan you’re cooking the caramel with a pastry brush dipped in water and don't touch it while it cooks. This will help prevent crystallization and grainy caramel.
- When placing creams puffs on the bowl, start at the bottom, closest to the slipmat (so top of a bowl if it were upright but bottom when it's flipped onto the slipmat). When you flip it upside down that will be top of the basket, and it will ensure you have an even flat top.
- If any part seems flimsy, especially the handle, you can just add more caramel to reinforce it. My handle actually broke when I tried to attach it, and I simply redipped in the caramel, reattached, let harden, and no one was the wiser.
- When cleaning, I let everything soak in super hot water. It dissolves the hardened sugar after awhile.
For this basket, I double my basic Pate a Choux and Pastry Cream recipe. Depending on the size of the bowl you’re using, it will give you some extra cream puffs but that’s fine. The bigger the bowl you’re using, the more cream puffs and caramel you’ll need. If you want to really make it easy, you can buy frozen cream puffs in the store.
INGREDIENTS
- 60-70 filled 1 inch cream puffs I double my Pate a Choux and Pastry Cream recipes
Carmel
- 2 cups sugar
- ½ cup water
- 1 Tbsp Corn Syrup
Tools:
- Non-Stick Cooking Spray
- Metal or Heatproof Bowl
- Metal Tongs or Disposable Chopstick
- Spoon
- Large Pan
- Aluminum Foil
- 2 Heatproof Slipmats or pieces of parchment
- Measuring tape
Instructions
- Pour sugar, water, and corn syrup into a pot. Stir until the water is even distributed. If any sugar gets on the sides of the pot, take a pastry brush dipped in water and wipe it down. You want the sides clean. This help prevent crystallization of the caramel.
- Turn on the heat to medium high.
- Do not touch the caramel mixture! The entire process for the caramel to melt down takes about 15-20 minutes. If you touch it or mix it, it will get grainy so don’t do that.
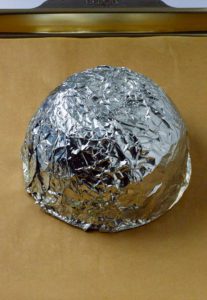
- While the caramel is cooking cover the outside of your metal bowl with aluminum foil. Then, spray the bowl, the parchment, and your tongs or chopsticks with non-stick cooking spray.

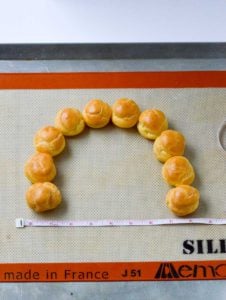
- Measure the diameter of the bowl. Make a basket handle shape with cream puffs on either a slip mat or parchment lightly sprayed with cooking spray. Make sure that the diameter of your bowl is the distance between the two ends of the basket handle.

- After about 10 minutes, you can start checking the caramel with your thermometer. The caramel should get to 320-340 degrees. Once it gets near that temperature it will get a nice golden brown.
- Working fast, turn the heat all the way down, but keep the caramel on the burner.
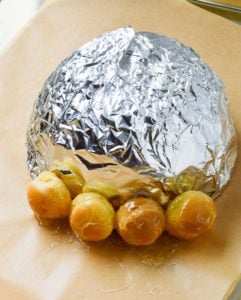
- Taking your tongs, pick up a cream puff and dip it in the caramel, focusing on getting the bottom and sides covered in caramel. Then, place on the aluminum covered bowl.
- Repeat with a new cream puff, placing right next to each other. You have a few seconds after you place a cream puff on the bowl to move it around. You want them as close together as possible.

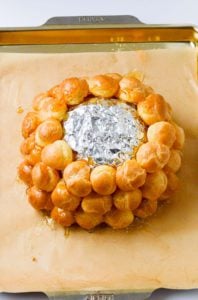
- Work your way around the bottom of the bowl. Once you’ve gone around, start on the second layer. Once finished the second do the third, etc. Do not put cream puffs on the top of the bowl (which is the bottom of the actual bowl and will be the bottom of the basket).

- Once you have the sides of the bowl done let cool while you’ll work on the basket handle. For the basket handle, use the same method but place the cream puffs directly onto the slip mat in the shape you formed of a handle. Let cool completely.

- Once the bowl is cooled down, remove the bowl and aluminum foil and keep on a slipmat or parchment paper. Start dipping more cream puffs into the carmel and put in the bottom of the bowl.

- To add the handle, spoon or dip one end into the caramel and place on the basket. Then, spoon some caramel around the other side of the handle. Hold in place while it dries.
- Let the entire thing harden. Booom! Fill with spun sugar, cotton candy, or whatever treats you like and let everyone dig in. You want to eat soon.
Notes
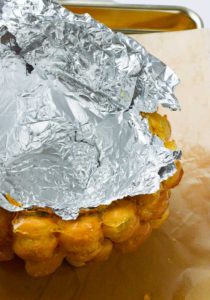
- If you’re using a metal bowl, it will need to cool in order to remove it from the aluminum foil. It can seem like it’s stuck, but once it’s cools it shrinks and should be able to remove without a problem.
- With the handle, it helps to turn it to the side when viewing to make sure you're holding the handle and letting it dry at a 90 degree angle.
- If you need to, you can reinforce the handles with skewers to help keep in place. I didn’t need to do this, but if I were traveling with it or bringing it to a different location, I probably would.
- The number of cream puffs you'll need will depend on the size of the bowl you're using. The bigger the bowl, the more you'll need.


Wendy says
Beautiful work!