These adorable Halloween Chocolate Covered Strawberries are a fun and simple Halloween themed dessert!
Aren't these Halloween chocolate covered strawberries cute?! Halloween strawberries are all over tiktok and Instagram, and these homemade version is so fun to make!
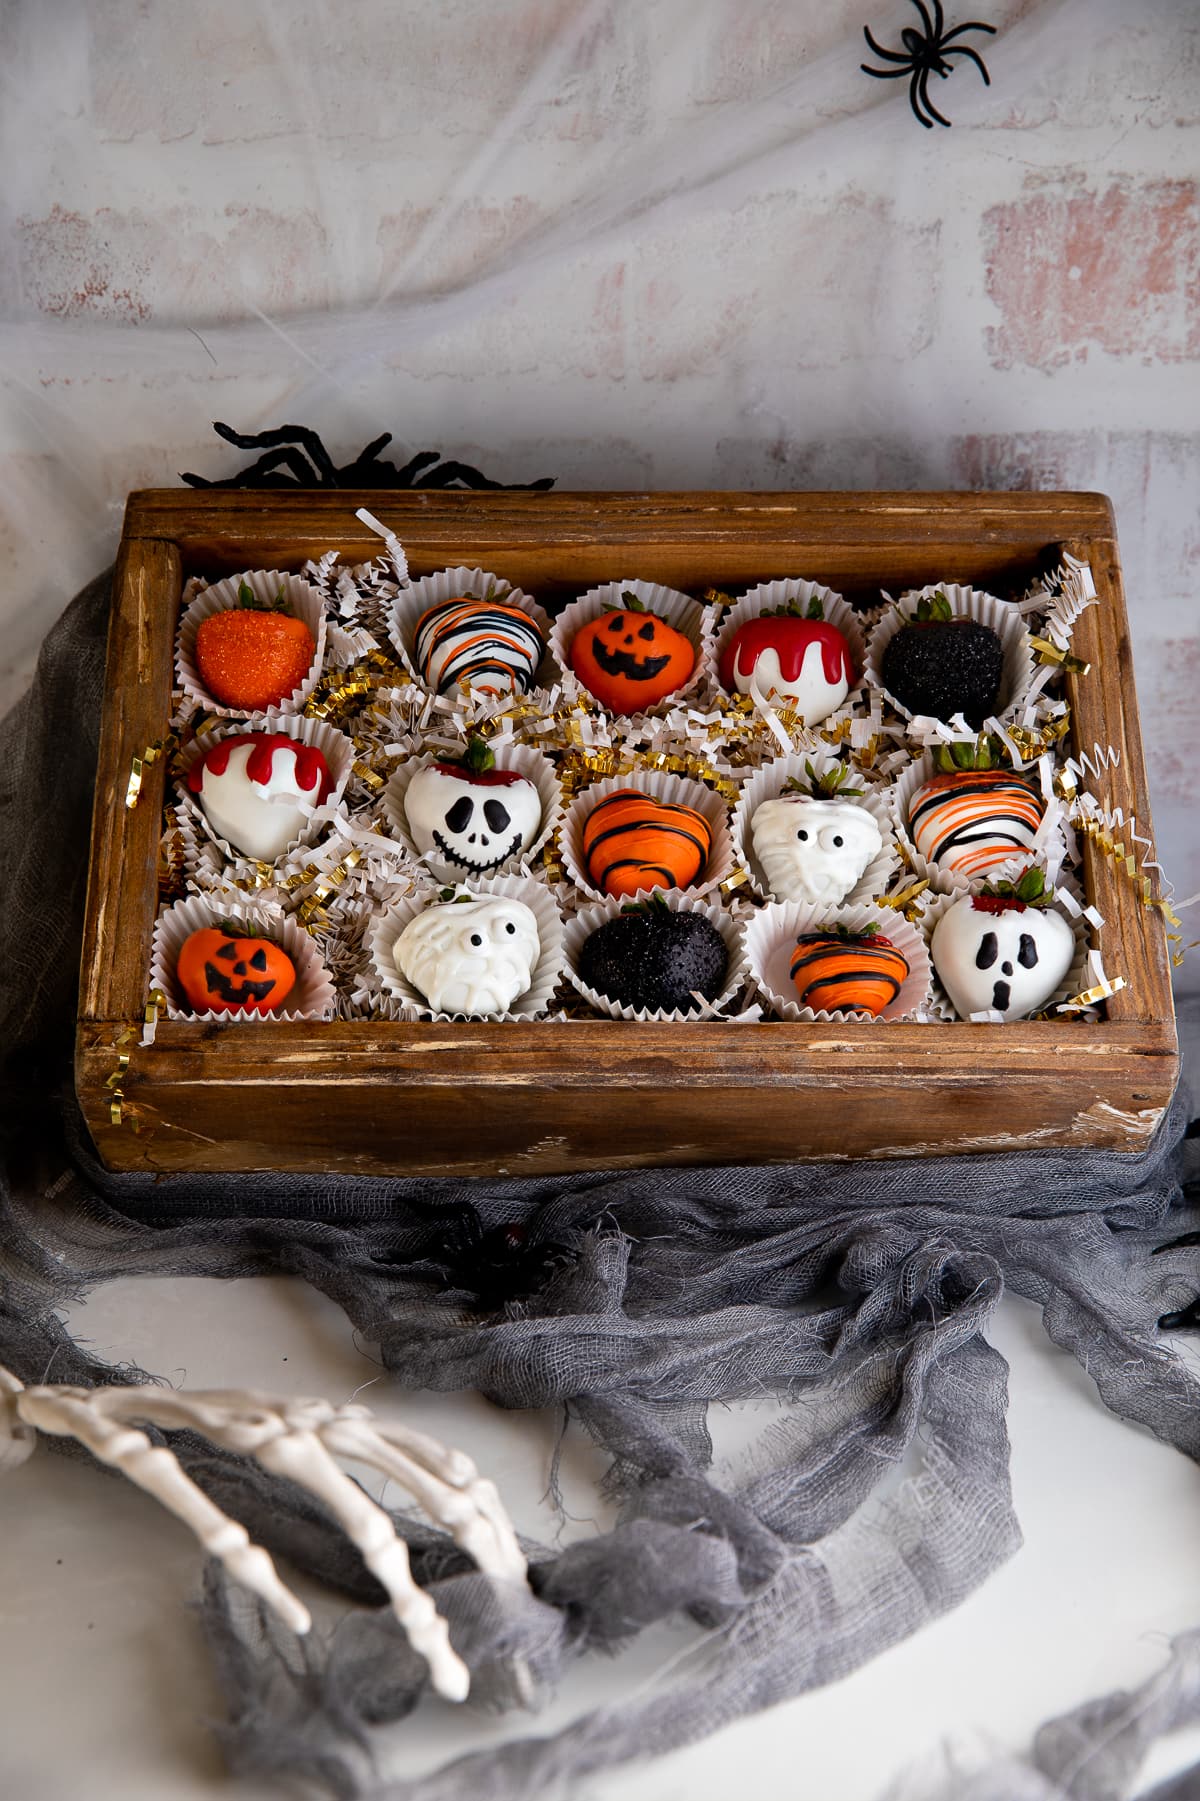
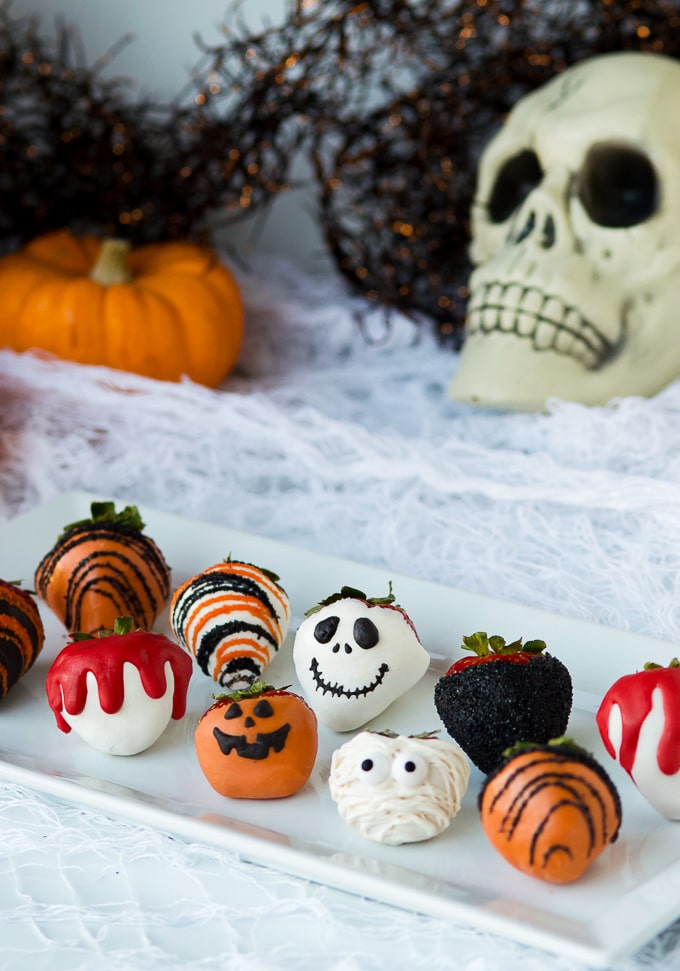
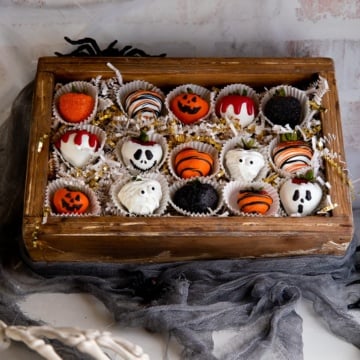
Using white, orange, red, and black candy melts, sprinkles, and other fun edible decorations, this tutorial shows you how to make your own ghost, jack-o-lantern, mummy, and blood chocolate covered strawberries, perfect for parties or a holiday gift!
Ingredients and Tools
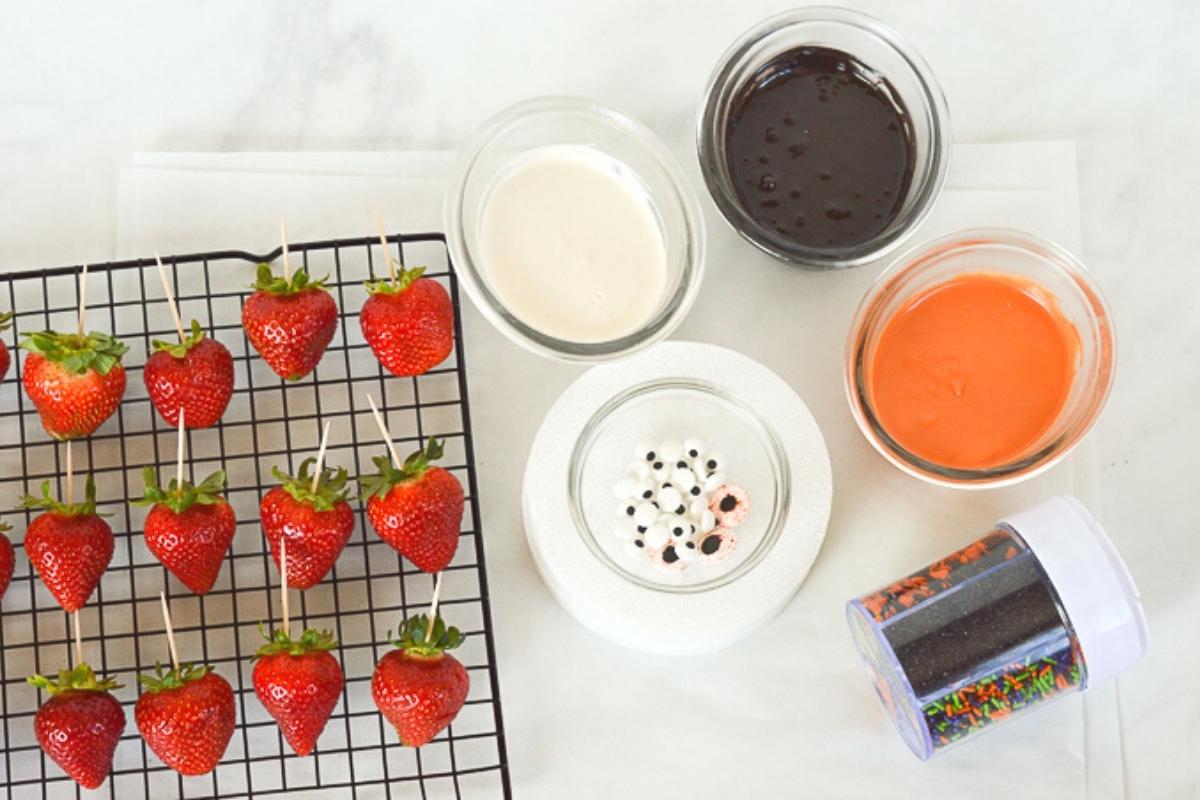
For all decorated chocolate covered strawberries you’ll need the following:
Tools
- Tipless Piping Bags or Ziplock Bags
- Scissors
- Parchment or Wax Paper
- Toothpicks
- Sprinkles and Candy Eyes
- Styrofoam board (optional)
- Paint Brush (optional)
- Scribe Decorating Tool (optional)
How to Make
If you've never made chocolate covered strawberries before, check out this post for the basic of how to dip them in chocolate before moving onto the Halloween decorations.
Prep
- Wash and dry your strawberries. Make sure they are completely dry before you dip them as wet strawberries will not hold the chocolate as well and can cause the chocolate to get grainy.
- Put toothpicks in the end of your strawberries and gently pull the stems back towards to the toothpicks, to keep them out of the chocolate.
- Melt your chocolate or candy melts according the instructions on the package. In order to keep the best dipping consistency, always heat the chocolate on defrost or half power until melted.
Dipping Strawberries in Chocolate
Holding the toothpick, dip the strawberries in the chocolate, and roll around to get the entire strawberry covered.
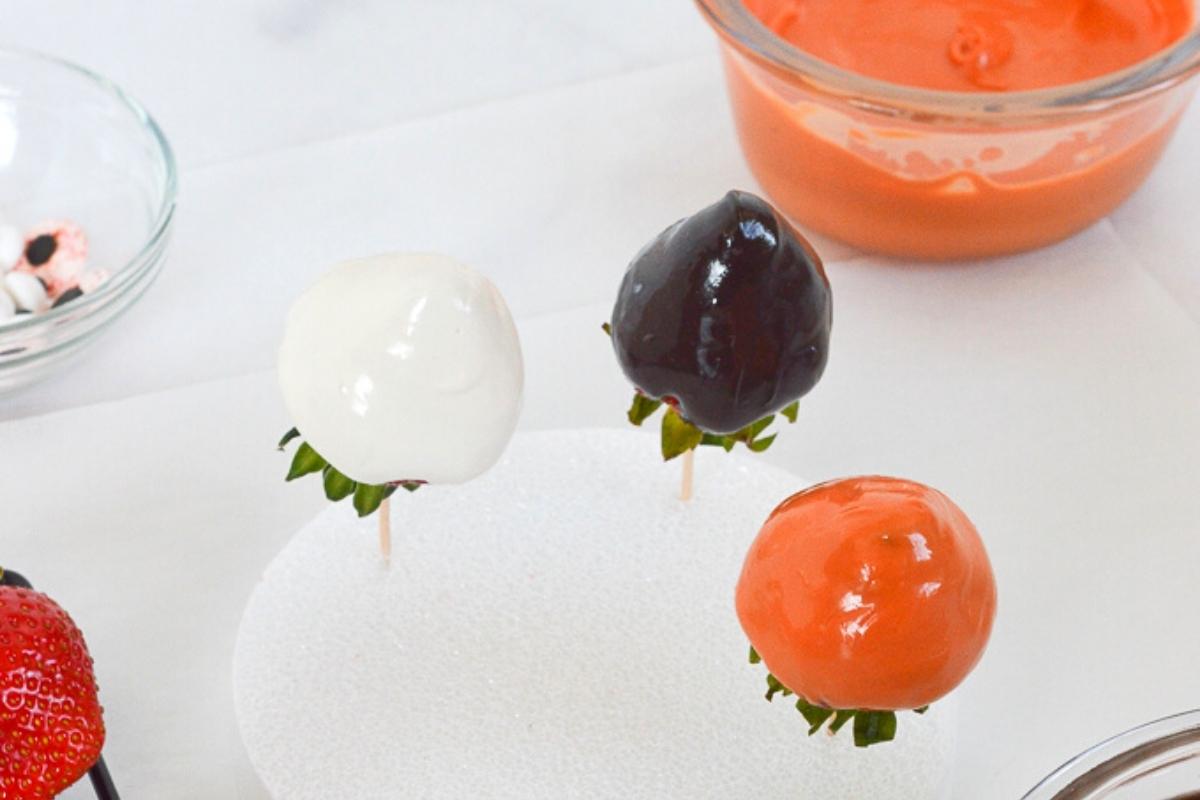
After you've dipped the strawberry, turn it upside down and gently shake and turn to evenly coat the strawberry with chocolate. Once it's covered, place onto a styrofoam board or onto a piece of parchment or wax paper to dry.
Mummy Strawberries
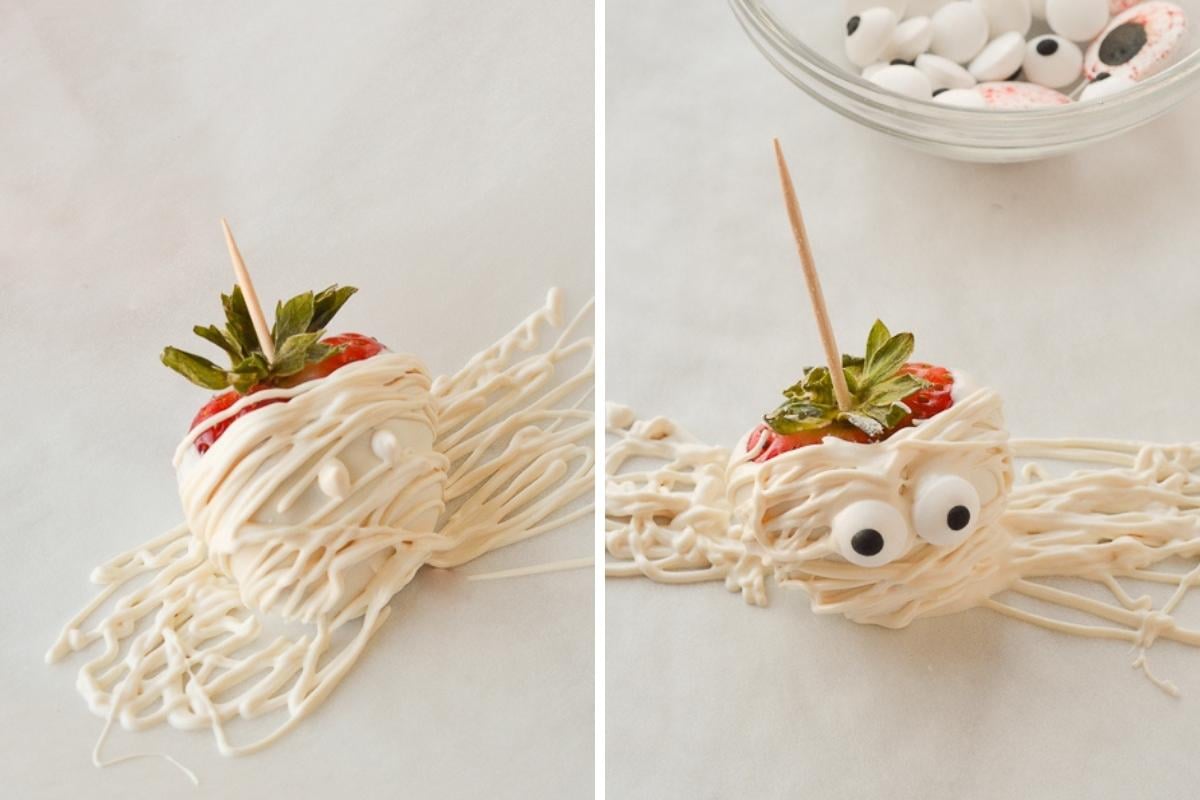
These are so cute and I think the easiest of all the decorated strawberries! Place melted white chocolate into a pastry bag. Cut off the tip and drip back and forth over a dried white chocolate covered strawberry until it's completely covered, leaving a small space in the middle for the eyes.
Place small dots where the eyes are, and put on your candy eyes while the chocolate is still wet. Place back on the parchment and let dry completely.
Blood Drip Strawberries
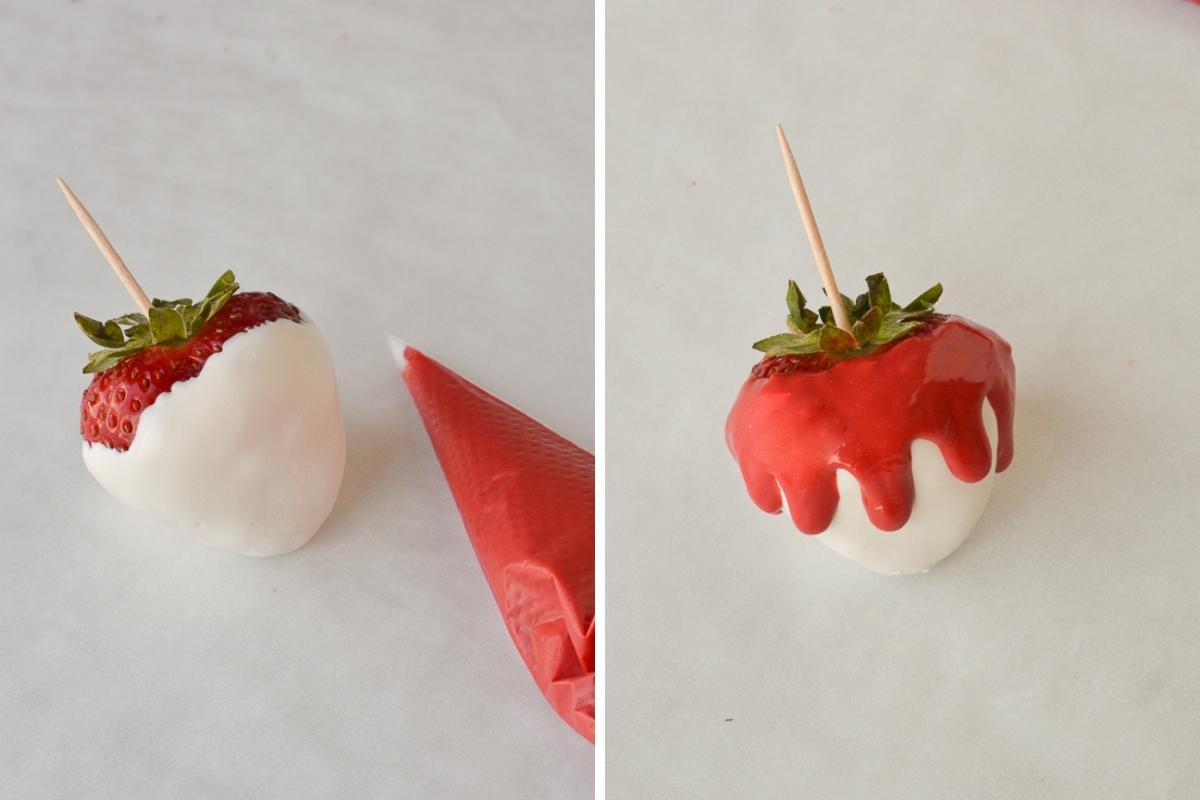
Use a completely dry white covered strawberry. Place melted red chocolate into a pipeless pastry bag. Cut off the tip and drip onto the top of the strawberry so it looks like dripping blood.
You can pick up the strawberry using the toothpick to help control the drips and placement of the drips. Let dry and enjoy!
Jack-O-Lantern Strawberries
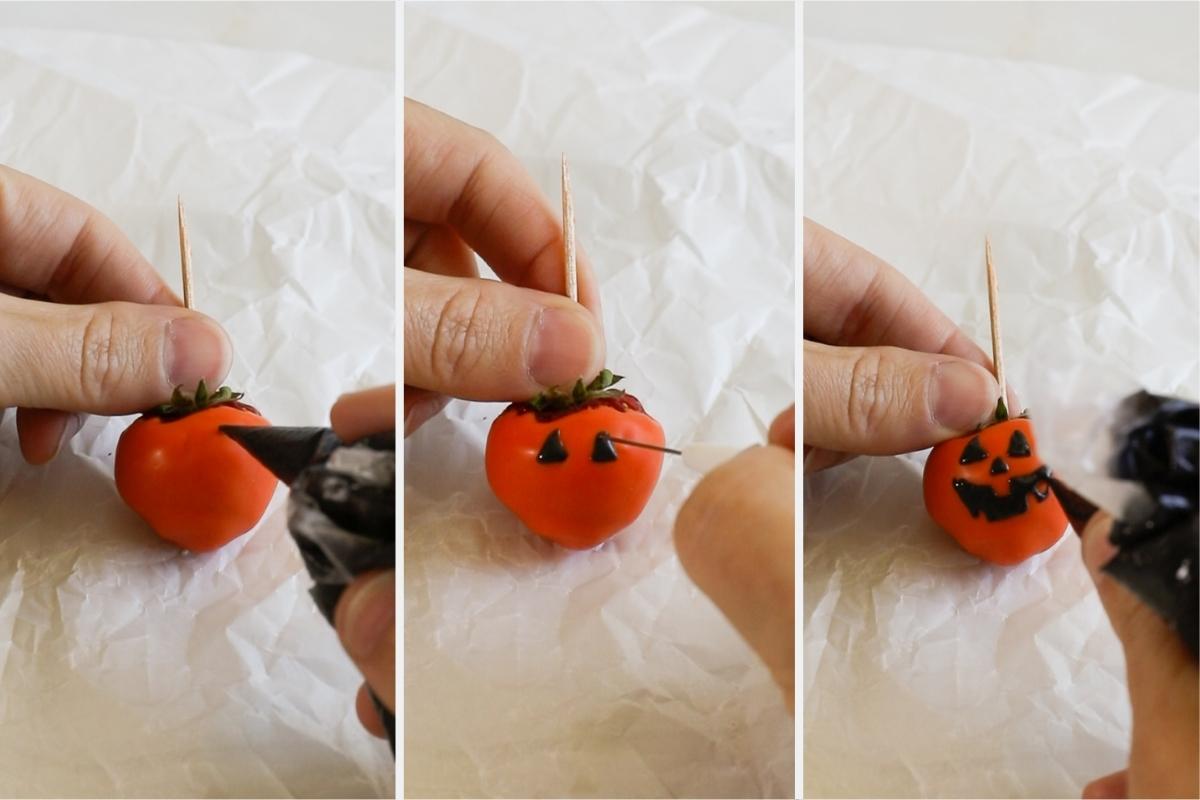
I recommend practicing your faces onto a piece of parchment until you get a design and faces you like, then moving on to the orange chocolate covered strawberries.
Place melted black candy melts into a pastry bag and cut off a very tiny piece of the tip. Adding a bit of shortening to the melted black candy melts will help thin it out so it's easier to move around.
Draw your faces onto the dried orange chocolate covered strawberries. Using a toothpick or scribe, gently move around the melted chocolate to get it into the exact place you want.
This is a common royal icing technique and can help make sharp corners and tiny lines. Place back on parchment to let dry.
Skeleton and Ghost Chocolate Covered Strawberries
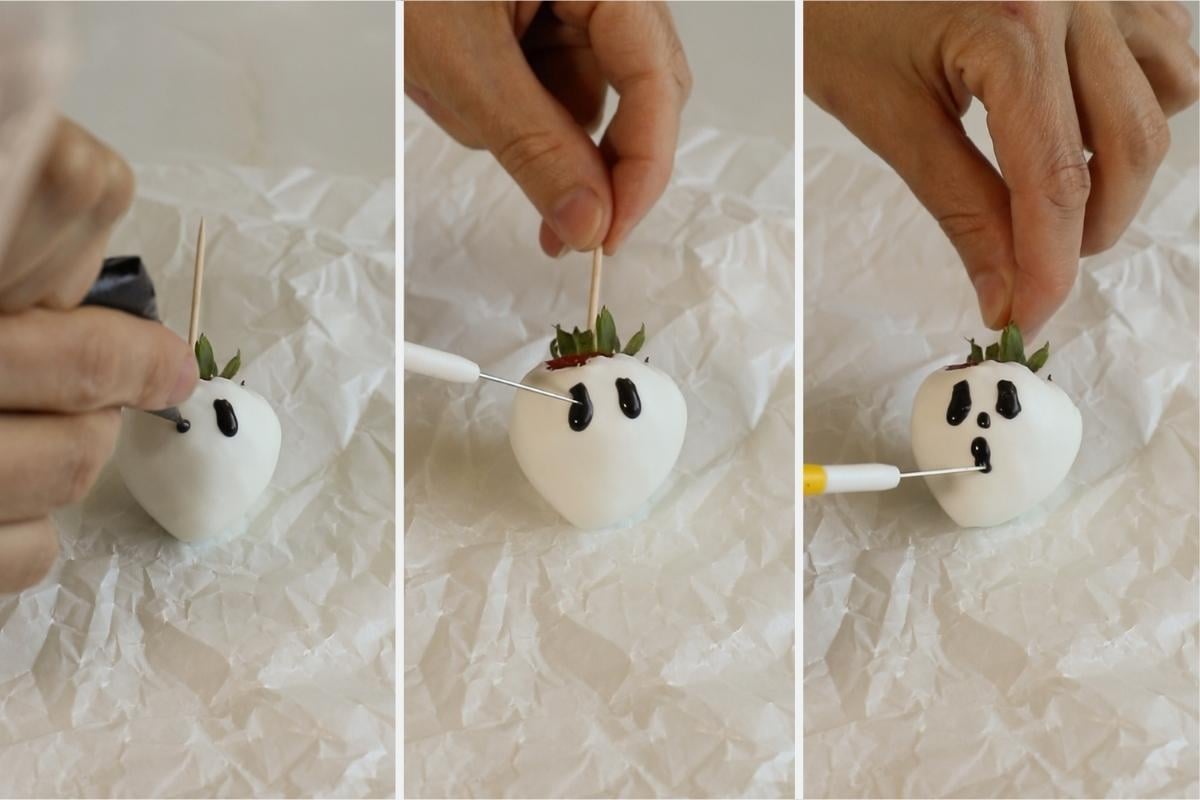
Making skeleton and ghost chocolate covered strawberries is exactly the same process as making Jack-O-Lanterns. I recommend practicing first until you get a face you like and then using very warm or thinned out black candy melts make the faces on the white chocolate covered strawberries as shown. You can move around the black chocolate with a scribe toothpick to get it exactly where you want it.
Sprinkles
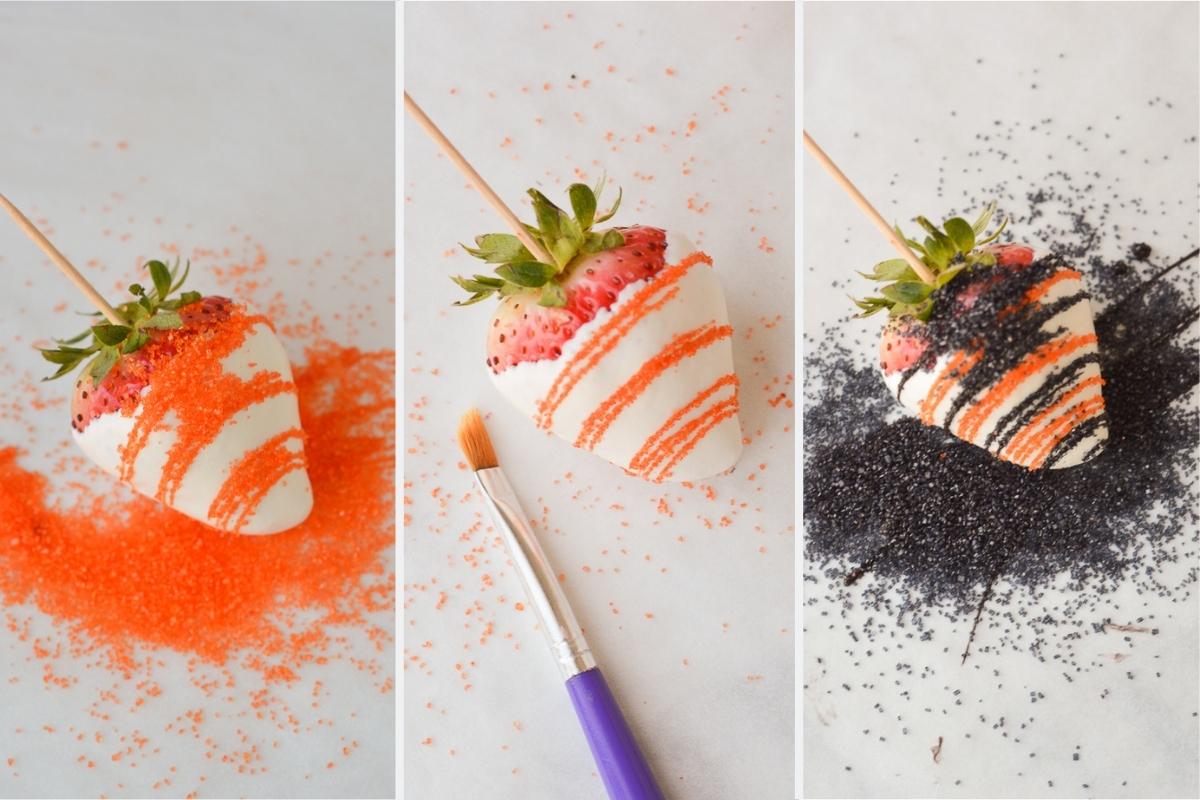 Add melted chocolate to a tipless pastry bag and cut off the tip. The size cut off will determine how large the lines are on your strawberry.
Gently drizzle the chocolate back and forth over a dry chocolate covered strawberry. If adding sprinkles, pour on sprinkles while the drip lines are still wet and let dry completely before removing the excess sprinkles.
If doing more than one color, add one color at a time and let dry completely between each color.
When adding sprinkles or sanding sugar, let dry completely before removing the excess sprinkles. You can use a paint brush, pastry brush, or your fingers to gently wipe the excess sprinkles away.
Tips and Tricks
- You can not add regular food coloring or gel food coloring to white chocolate melts or it will get grainy. You must use the candy melts in the colors you need them or you can use white candy melts with candy colors, which are oil based food coloring and won't cause the chocolate to seize.
- Make sure your strawberries are completely dry before you dip them. If there is water the chocolate will not stick as well.
- After you dip the strawberries, turn them upside down and gently shake them to make sure the strawberries are evenly covered and there are no bumps or drips.
- While I use a styrofoam board to dry the strawberries, you can also place them on a clean piece of parchment paper, wax paper, or a silicone mat to dry.
- In order to keep the best dipping consistency, always heat the candy melts on defrost or half power. I've found heating on full power will almost always overheat the chocolate and you'll then need to thin it out with vegetable shortening or coconut oil to get it back to dipping consistency.
Storing and Making Ahead
These chocolate covered strawberries are best the day that you make them. But, they will last about 12 hours at room temperate out or 1-2 days in the fridge.
After 12-24 hours they can start to leak or weep strawberry juice and don't look as nice, but they still taste good.
Looking for more Halloween recipes? Check these out!
- Halloween Ghost Cupcakes
- Halloween Sugar Cookies
- Halloween Pumpkin Pie
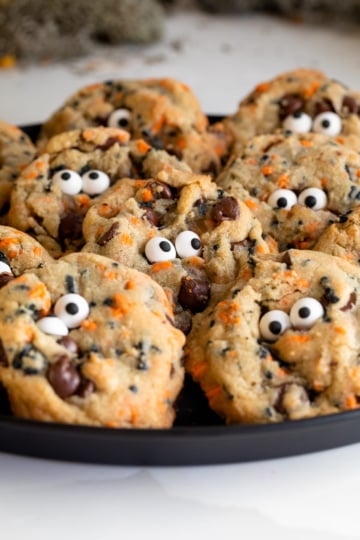
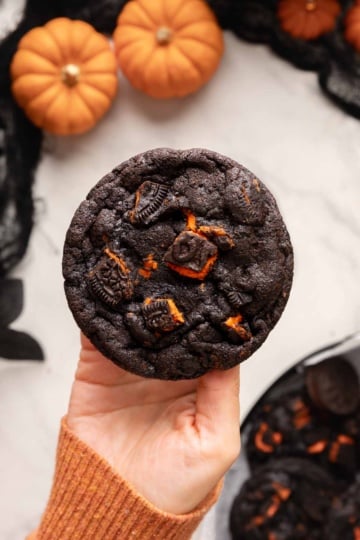
- Halloween Chocolate Chip Cookies
WANT TO JOIN THE PARTY? Subscribe to my newsletter and follow on Tik Tok, Pinterest, Instagram, and Facebook for all the latest recipes!
Halloween Chocolate Covered Strawberries
Equipment
- Tipless Pastry Bags or Ziplock Bags
- Scissors
- Parchment or wax paper
- Sprinkles and Decorations
- Styrofoam board (optional)
- Paint Brush (optional)
- Scribe Decorating Tool, optional
INGREDIENTS
Ingredients
- Strawberries
- Chocolate Candy Melts
- Vegetable shortening or coconut oil
Instructions
CHOCOLATE COVERED STRAWBERRIES
- Wash and dry your strawberries. Make sure they are completely dry before you dip them as wet strawberries will not hold the chocolate as well.
- Put toothpicks in the end of your strawberries and gently pull the stems back towards to the toothpicks, to keep them out of the chocolate.
- Melt your chocolate melts according the instructions on the package.
- If necessary, add a tiny bit of coconut oil or vegetable shortening. I find about ½-1 tsp per ½ cup of candy melts and only if the candy melts have been overheated, but it can vary depending on brand.
- Holding the toothpick, dip the strawberries in the chocolate, and roll around to get the entire strawberry covered.
- After you’ve dipped the strawberry, turn it upside down and gently sake and turn to evenly coat the strawberry with chocolate.
- Once it’s covered, place onto a styrofoam board or onto a piece of parchment or wax paper to dry.
Full Sprinkle Chocolate Covered Strawberries
- Immediately after you’ve dipped the strawberry in chocolate, pour sprinkles on top of the strawberry while holding it slightly above a piece of parchment paper. Turn the strawberry around as you pour to evenly cover in sprinkles.
- This makes it easy to reuse the sprinkles by using the parchment to put them back in a bowl or container.
- Place the sprinkle covered strawberry in the styrofoam or onto a clean piece of parchment paper to dry.
Lines and Sprinkled Covered Lined Strawberries
- Let the base chocolate covered strawberries dry completely
- Put the second color into a tipless pastry bag and cut off a tiny piece of the tip
- The size cut off will determine how large the lines are on your strawberry.
- Gently drip the chocolate back and forth over the strawberry
- If adding sprinkles, our on sprinkles while the drip lines are still wet and let dry completely before removing the excess sprinkles.
- Do one color at a time and let dry completely between each color.
- When adding sprinkles, let dry completely before removing the sprinkles. You can use a paint brush, pastry brush, or your fingers to gently wipe the excess sprinkles away. Again make sure the chocolate is completely dry before you remove the sprinkles, and you can reuse the sprinkles by using the parchment to put them back into a bowl.
- Repeat with different colors until you’ve got the covered strawberries of your dreams.
HALLOWEEN CHOCOLATE COVERED STRAWBERRIES
Mummy Strawberries
- Place melted white chocolate into a piping or ziplock bag. Cut off the tip and drip back and forth over a dried white chocolate covered strawberry until it’s completely covered, leaving a small space in the middle for the eyes.
- Place small dots where the eyes are, and put on your candy eyes while the chocolate is still wet.
- Let dry
Blood Drip Strawberries
- Use a completely dry white chocolate covered strawberry.
- Place melted red chocolate candy melts into a piping bag. Cut off the tip and drip onto the top of the strawberry so it looks like dripping blood.
- You can pick up the strawberry using the toothpick to help control the drips and placement of the drips
Jack-O-Lantern and Ghost Strawberries
- Since this requires a bit of practice, I recommend practicing your faces onto a piece of parchment until you get a design and faces you like.
- Place melted black candy melts thinned with shortening or coconut oil into a pastry bag and cut off a tiny piece of the tip.
- Draw your faces onto the dried white and orange chocolate covered strawberries.
- Using a toothpick or scribe, gently move around the melted chocolate to get it into the exact design you want. This is a common royal icing technique and can help make sharp corners and tiny lines.
- Let dry.
Notes
- In order to keep the best dipping consistency, always heat the candy melts on defrost or half power. I’ve found heating on full power will almost always overheat the chocolate and you’ll then need to thin it out with vegetable shortening or coconut oil to get it back to the correct dipping consistency.
- You can not add regular food coloring or gel food coloring to white chocolate melts or it will get grainy. You must use the candy melts in the colors you need them or you can use white candy melts with candy colors, which are oil based food coloring and won’t cause the chocolate to seize.
- Make sure your strawberries are completely dry before you dip them. If there is water the chocolate will not stick as well.
- These are best the day you make them, but you can keep them in the fridge for one to two days. After 12-24 hours they can start to leak strawberry juice, but they still taste fine.

Leave a Reply