These classic and easy thumbprint cookies with an icing filling are a simple recipe for melt-in-your-mouth cookies that are perfect for all occasions!
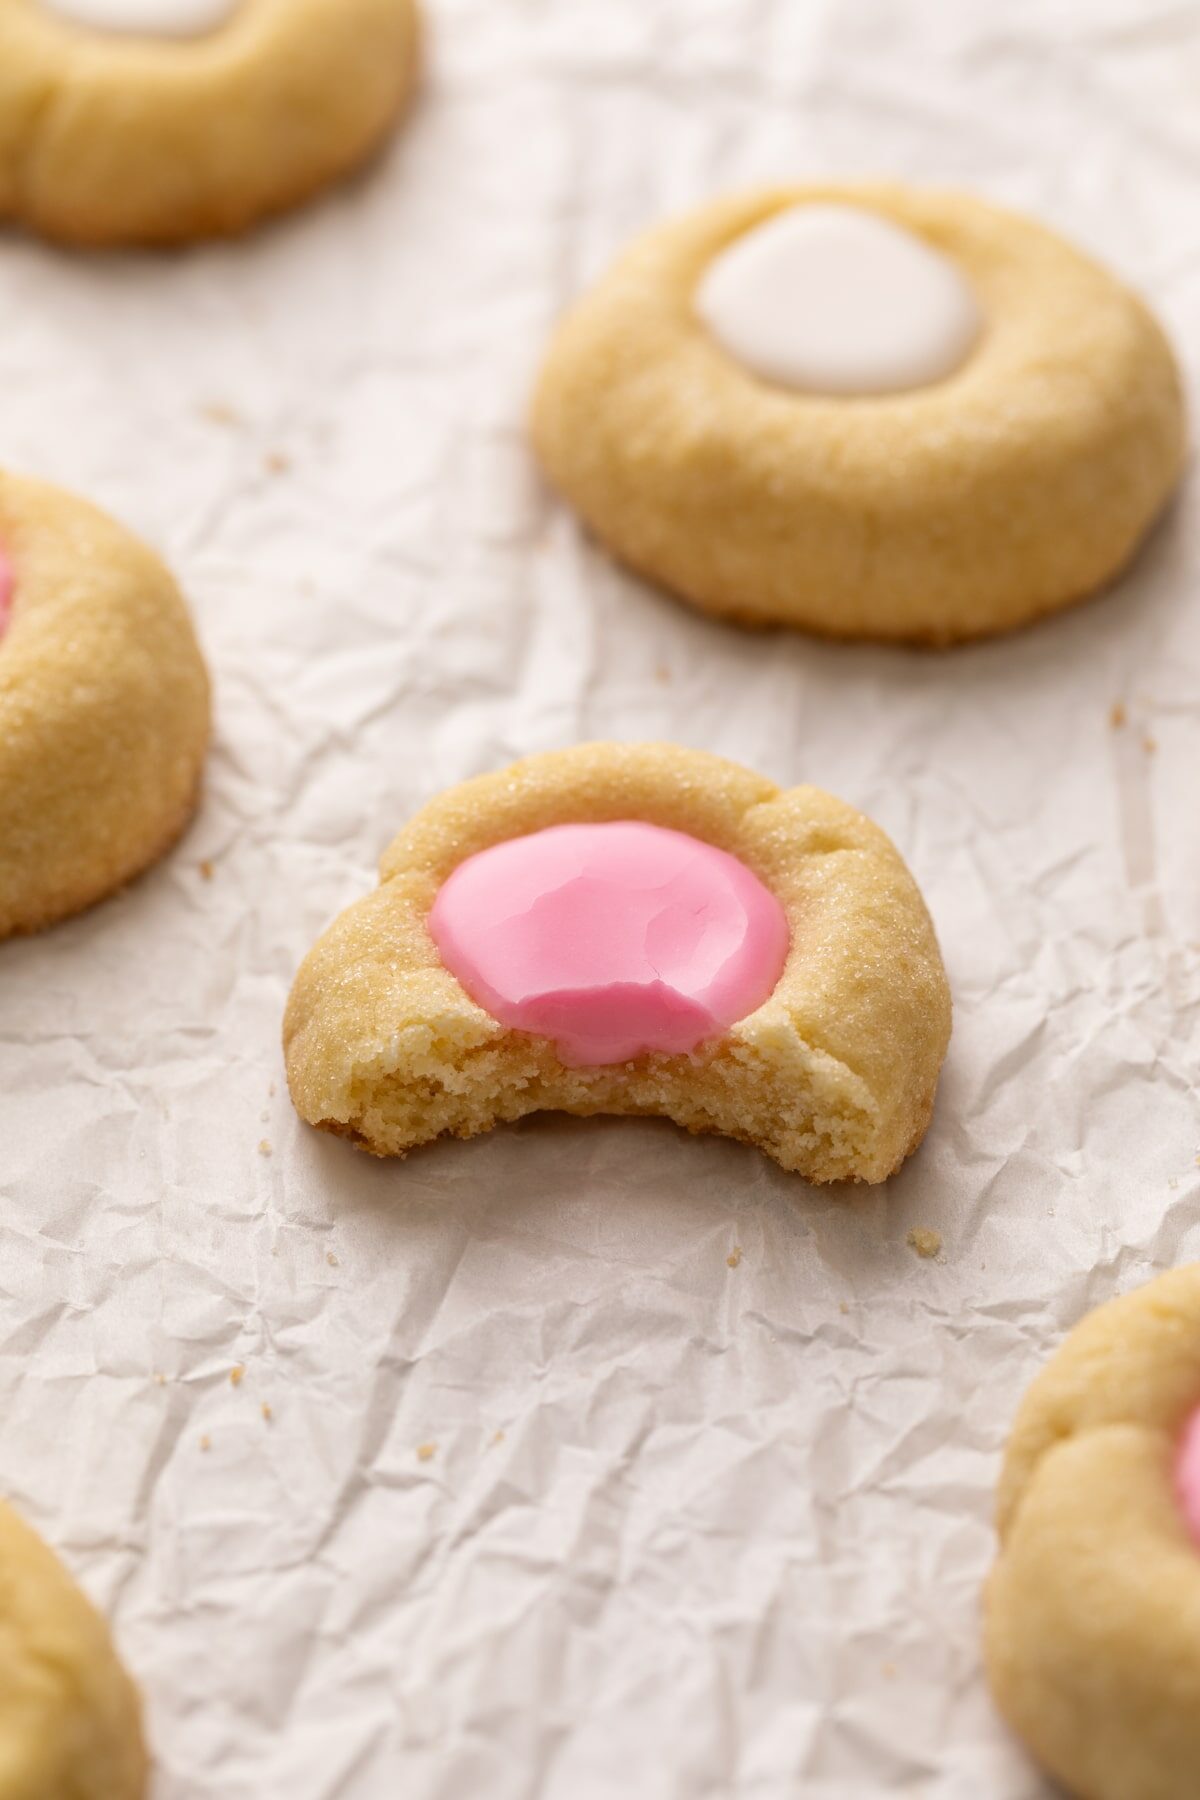
Thumbprint cookies are such a classic cookie. With a shortbread like cookie and tasty filling, they are a super simple cookie to make. And, while most recipes call for some type of jam filling, this recipe uses icing!
Why use icing instead of lemon curd, nutella, or jam? While those fillings are delicious, the main reason I sometimes like to use icing to fill my cookies is because you can really customize the color and make super fun-themed thumbprint cookies!
You can turn them into animals faces, hearts, ghosts, christmas trees, really any simple shape you can think of. And, by using icing you can get the perfect color to compliment your cookies.
Why You'll Love Them:
- Easy: These cookies are super simple, with a 10 minute prep time! And, they can be made with ingredients you probably already have in your house!
- Fun: these are so fun and by filling these cookies with coloring and flavored icing, you turn classic thumbprint cookies into a delicious pinterest worthy or Instagramable dessert!
- Delicious: These cookies are delicious, and you can use different extracts in the filling to vary the flavor profile however you want!
Ingredients

- All-Purpose Flour: make sure to either weight your flour using a kitchen scale, or spoon and level the flour. if you dip your measuring cup into the flour, you'll likely get too much flour in the recipe.
- Vanilla Extract: I personally like vanilla extract in this cookie recipe, but sometimes I'll also add almond extract or lemon extract as well!
- Milk: This is to thin out the icing, you can use any type of milk you'd like, low fat, 2% or even non-dairy milks like almond or soy milk.
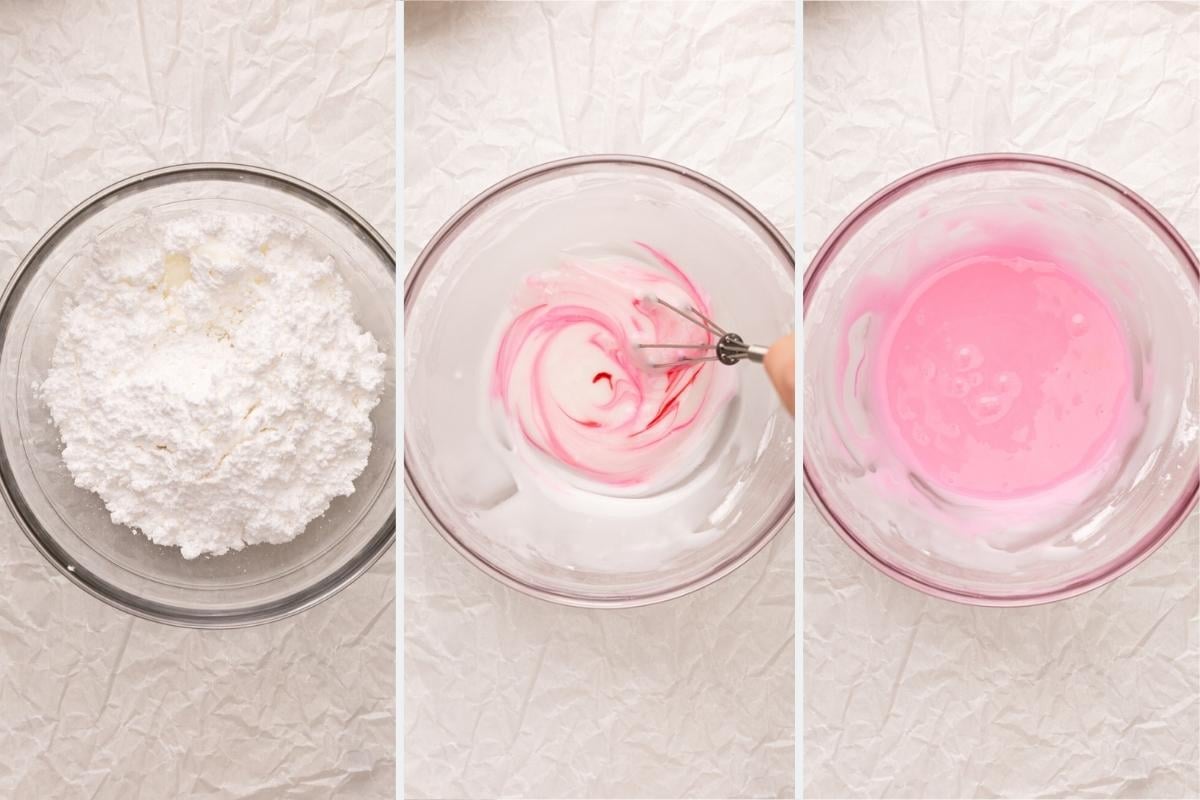
- Food Coloring (optional): This is for coloring the icing. I prefer gel food coloring for more vibrant colors.
How to Make
Step 1: Make Cookie Dough
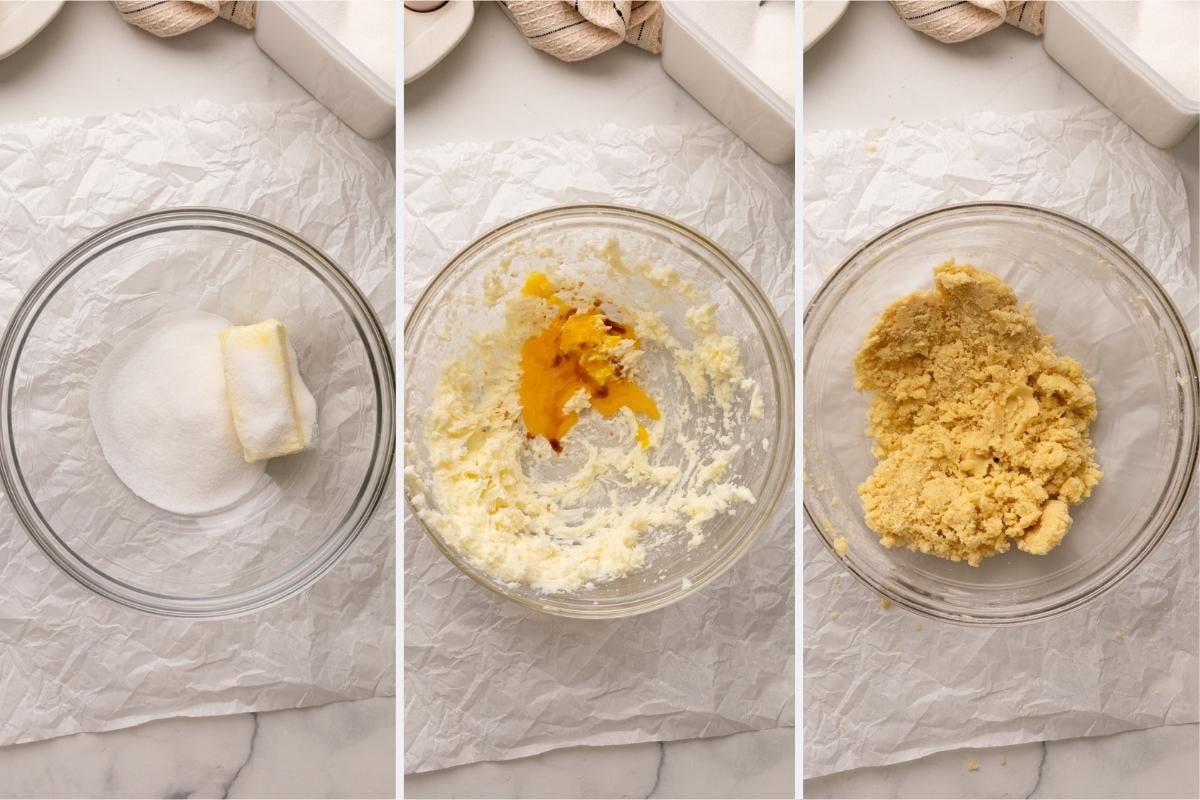
Cream Butter and Sugar: In a large bowl using a hand held mixer, or a standing mixer with a beater attachment, cream the softened butter and granulated sugar until light and creamy, about 2-3 minutes.
Add Wet Ingredients: Mix in the egg yolk, salt, and extracts until combined.
Mix in Flour: Add the flour and mix until just combined. Do not overmix the cookie dough.
Step 2: Form and Bake Cookies
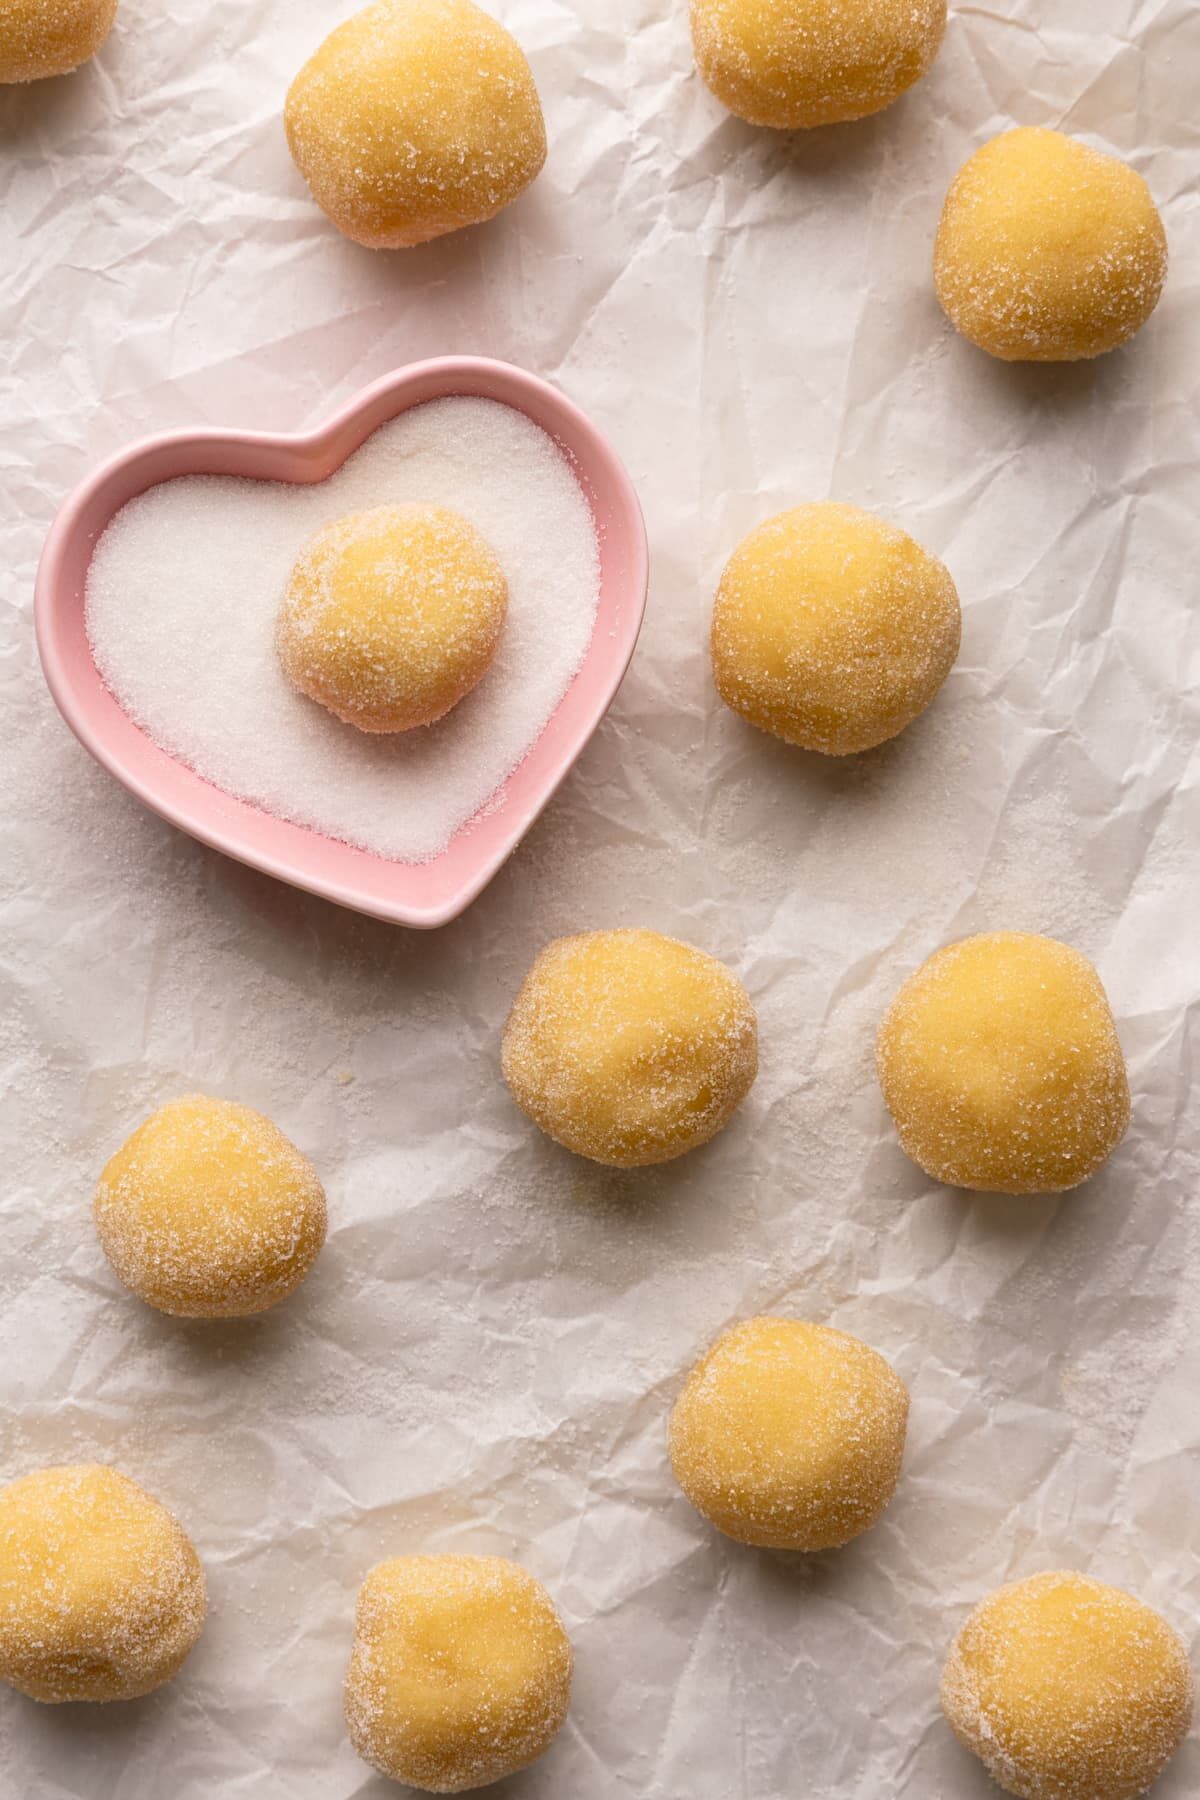
Form Cookies: Using an ice cream scoop or a large spoon, scoop about about 1.5 tablespoon balls of dough and roll in your hands until a uniform ball forms.
Roll in Sugar (optional): If desired, roll the ball in more granulated sugar, by placing the balls of dough in a shallow bowl of granulated sugar and rolling around until it is fully covered.
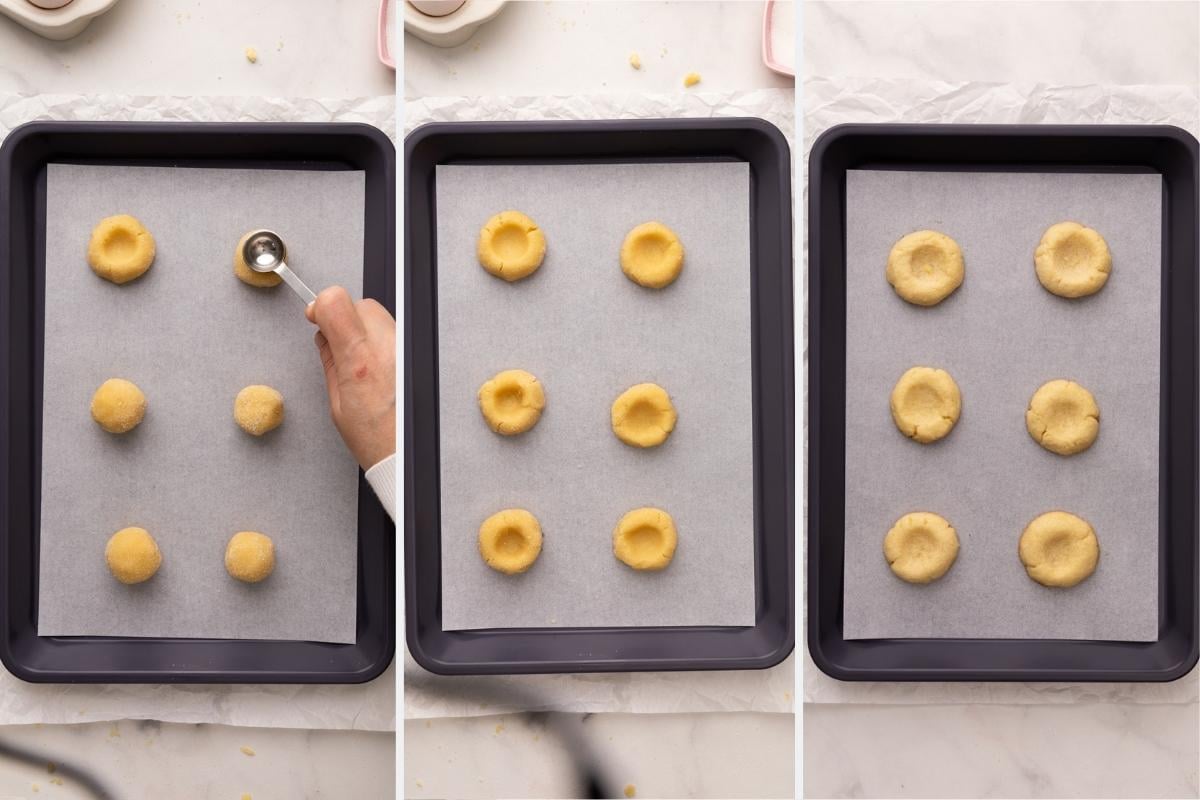
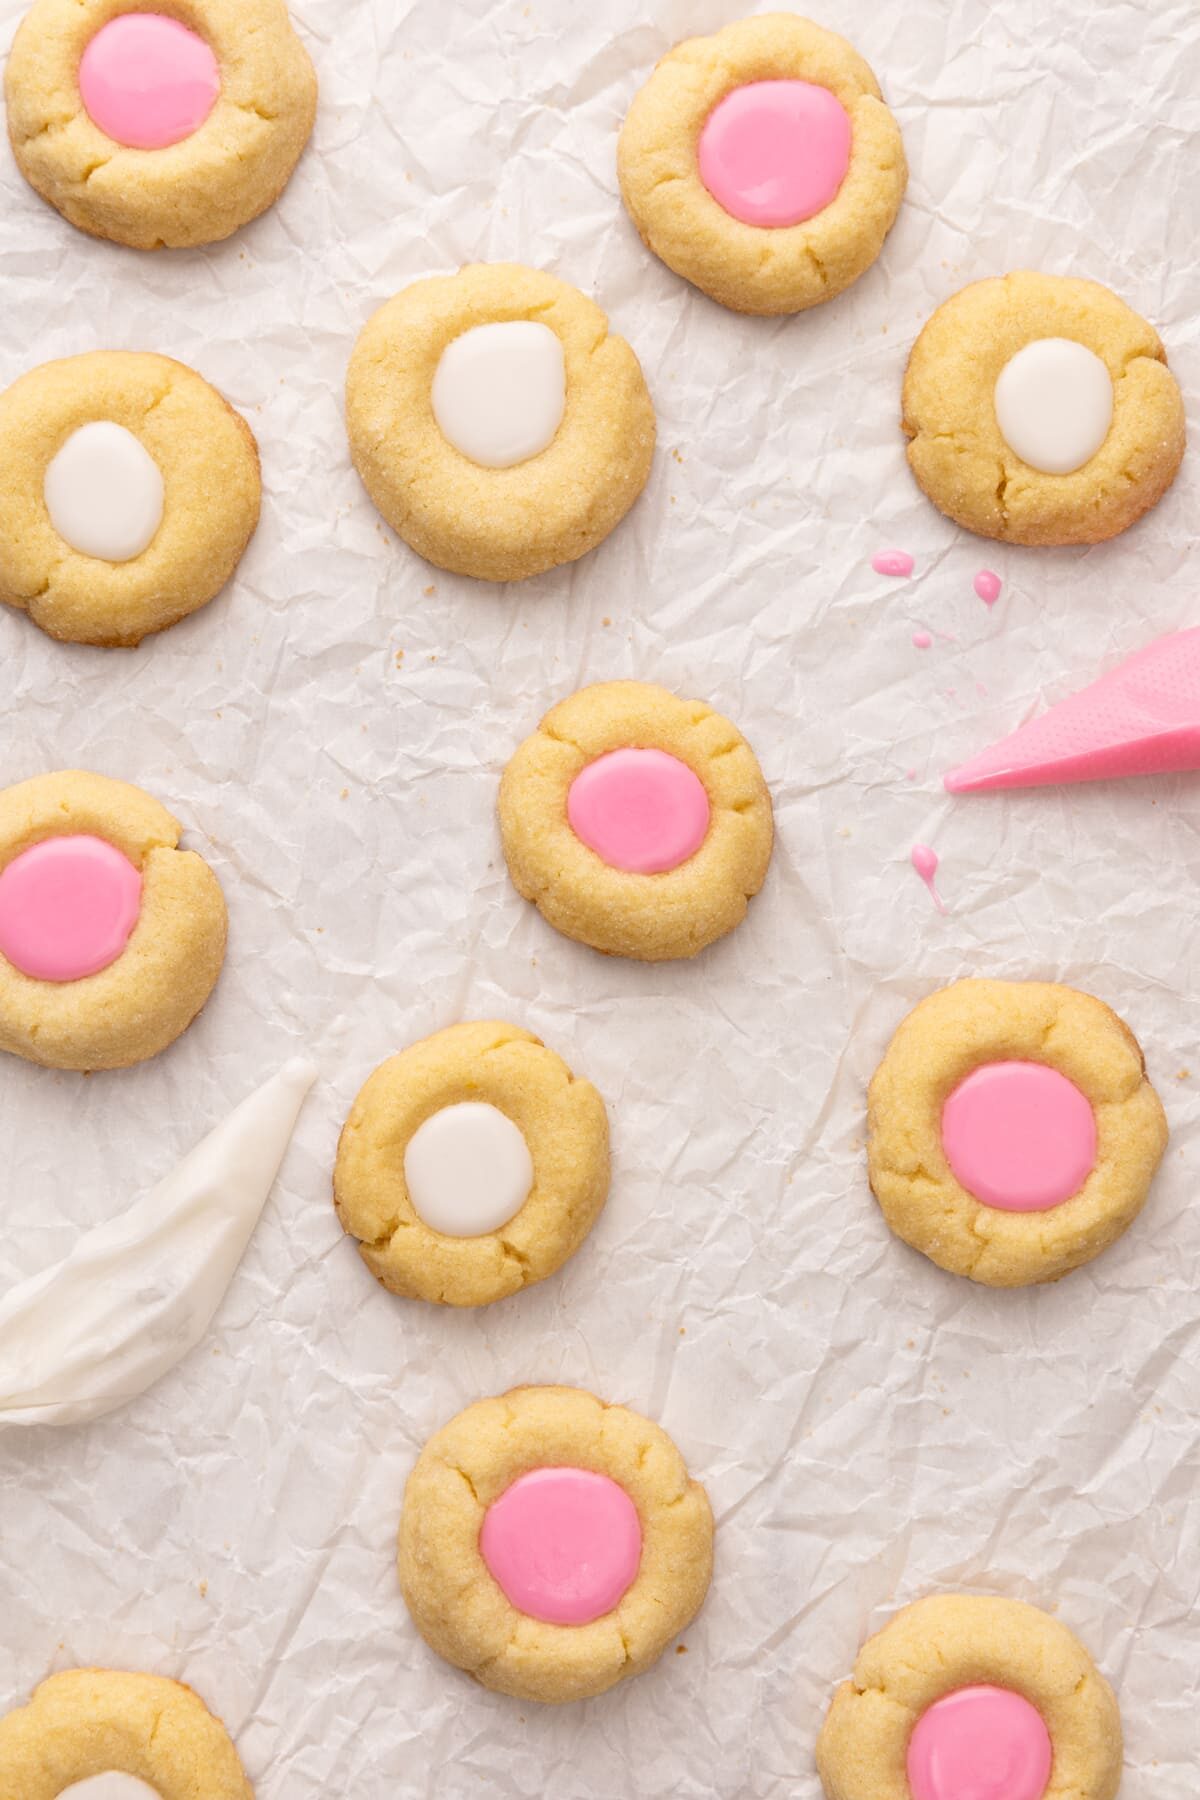
Make Thumbprint: Place the balls of dough on a baking sheet lined with parchment paper or a silicone baking mat, keeping them about 2 inches apart. Using your thumb, finger, or the back of a 1/2 teaspoon, gently press down in the middle of the ball of cookie dough. If the dough cracks, gently press the cookie back together with your fingers.
Bake Cookies: Bake in 325℉ preheated oven until the cookies just start to brown, about 12-15 minutes. Remove from oven, and let the cookies cool completely before filling.
Step 3: Bake and Add Icing
Make Icing: The icing is super easy to make, just Mix together the powdered sugar, milk, extract, and any optional food coloring until fully combined.
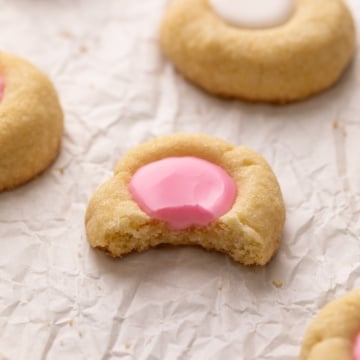
Ice Cookies: Once the cookie have cooled, add the icing to a pastry bag with the tip cut off and fill the thumbprint with the icing. You can also drizzle any extra over the entire cookies as well. If you don’t have a pastry bag, you can use a ziplock bag with the tip cut off, or gently spoon in the icing.
Serving, Storing, and Making Ahead
This recipe makes about 18-20 one and a half inch cookies and can easily be doubled as needed.
These thumbprint cookies can be make a day or two in advance and the icing will harden the longer they sit. They will last 1-2 days in an airtight container at room temperature. They can also be frozen up to two month, although the icing will totally dry out and harden once frozen.
Looking for More Cookie Recipes? Check These Out!

WANT TO JOIN THE PARTY? Subscribe to my newsletter and follow on Tik Tok, Pinterest, Instagram, and Facebook for all the latest recipes!
Thumbprint Cookies With Icing Filling
INGREDIENTS
Cookies
- 1/3 cup granulated sugar plus more for rolling
- 1/2 cup unsalted butter (1 stick) 4 oz, room temperature
- 1 tsp vanilla extract
- ¼ tsp salt
- 1 large egg yolk
- 1 ¼ cups all-purpose flour 150 grams, weighed or spooned and leveled
Icing
- 1 cup powdered sugar
- 1 tablespoon milk any type
- 1/2 tsp vanilla extract optional
- gel food coloring optional
Instructions
- Preheat oven to 325 ℉. Line a baking sheet with parchment paper or a silicone baking mat. Set aside.
- In a large bowl using a hand held mixer, or a standing mixer with a beater attachment, cream the softened butter and granulated sugar until light and creamy, about 2-3 minutes.
- Mix in the egg yolk, salt, and vanilla extract.
- Add the flour and mix until just combined. Do not overmix the cookie dough.
- Using an ice cream scoop or a large spoon, scoop about about 1.5 tablespoon balls of dough and roll in your hands until a uniform ball forms.
- If desired, roll the ball in more granulated sugar.
- Place the balls of dough on the prepared baking sheet, keeping them about 2 inches apart. Using your thumb, finger, or the back of a 1/2 teaspoon, gently press down in the middle of the ball of cookie dough.
- If the dough cracks, gently press the cookie it back together with your fingers.
- Bake in the preheated oven until the cookies just start to brown, about 12-15 minutes.
- Remove the cookies from the oven and cool on the baking sheet for 5-10 minutes. Then remove the cookies by placing on a cooling rack to cool completely before filling.
Icing
- In a medium bow, mix the powdered sugar, milk, extracts, and any optional food coloring until well combined.
- Add to a pastry bag or a ziplock back with the tip cut off. Fill the completely cooled cookies with the icing. If desired let the icing harden a bit and then enjoy!
Notes
- This recipe makes about 18-20 one and a half inch cookies and can easily be doubled as needed.
They will last 1-2 days in an airtight container at room temperature. - They can also be frozen up to two month, although the icing will totally dry out and harden once frozen.
- If coloring your icing, I recommend gel food coloring for more vibrant colors.


Vicky Monroe says
These look so delicious. Going to try to make these soon. Thanks for the recipe
Gale says
The cookies spread too much and I had to remake my indention when I took them out of the oven. What did I do wrong?
Ethan says
butter measurement was wrong. keep 1/2 cup butter but change sugar to 1/2 cup as well and add flour until they look right, i used about 2 cups in the end. add almond extract and finely chopped pecans to make them even better.