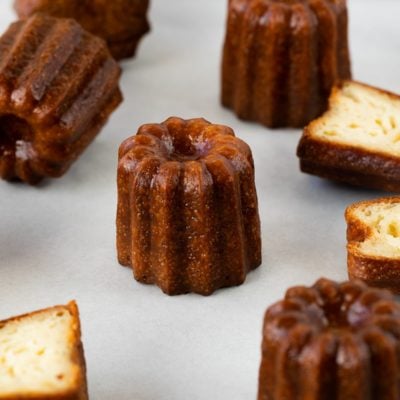
French Caneles (Cannelé de Bordeaux)
Using simple ingredients like milk, sugar, flout and butter, with special fluted molds, this French Canele recipe yields a delicious dessert, perfect for Christmas or holiday baking!
Servings: 12
Calories: 211kcal
Equipment
- Canele Molds
- Tongs and/or heat proof gloves
- Baking Sheet
- Aluminum Foil/Parchment Paper
- Glass Bowl/Jar or Saucepan
Ingredients
- 2 cups whole milk 500g
- 3.5 tablespoons unsalted butter 50g
- 1 vanilla bean or 1 tablespoon extract or paste
- 3/4 cup +1 tablespoon all purpose-flour 100g
- 2 cups unsifted powdered sugar 250g
- 1 teaspoon sea salt or 3/4 tsp table salt
- 2 large whole eggs
- 2 large egg yolks
- 1/4 cup spiced rum
- 1 oz beeswax see notes on beeswax
- 1 oz butter salted or unsalted
Instructions
MAKING THE BATTER (2 days prior to baking)
- If you’re using a whole vanilla bean cut the vanilla bean in half, and scape the seeds out.
- Place the milk, butter, and whole vanilla bean and seeds in a medium sized saucepan over medium heat.
- Cook for about 3-5 minutes, stirring consistency and bring to boil. Watch carefully as the milk can overflow if cooked too high/fast.
- Once it reaches a boil (about 180-185℉), immediately remove from heat and set aside to cool about 20 minutes.
- While the milk is cooling, sift together flour, powdered sugar, salt.
- Gently mix the eggs and egg yolks together. You’re trying keep too much air from getting into the eggs so don’t beat too intensely. Then, strain or pour into the flour mixture (no need to mix together at this point).
- Once the milk has cooled, (to be exact you want it less than 120℉ so it’s cool enough that it doesn’t cook the eggs), remove the vanilla bean and place in a large bowl. Do not discard the vanilla bean. We’ll be using the vanilla bean and bowl later.
- Pour milk mixture onto the flour/egg mix and gently stir together. It will have visible lumps at this point.
- Pour the batter over a fine mesh strainer into the large bowl you’ve put the vanilla bean into. Press any lumps out of the batter through the stainer so you get a nice, lump free batter.
- Stir in the rum and vanilla extract or vanilla bean paste if using.
- Cover the bowl with plastic wrap and place in the fridge for 2 days (a full 48 hours), stirring occasionally to break up the batter. During this time it might get a small film on the top. This is fine and normal. Just stir to redistribute the batter.
PREPARE MOLDS (1 hour before baking)
- If using copper or metal molds, place the canele molds on a parchment or aluminum foil lined baking sheet. Place the baking sheet in the oven and set to 475℉. This will warm up the molds which helps the beeswax mix stay on the molds but not get too thick.
- Melt your beeswax in a glass jar or bowl in the microwave or in a pan on a stove top. See notes and post for tips on melting beeswax.
- While the wax is melting, line a baking sheet with parchment paper or aluminum foil and place a cooling rack on top.
- Once the wax has melted, add the butter and stir until it is incorporated. If you need to, you can continue heating in the microwave or on the stovetop until it’s all melted.
- Remove canele molds out from oven and using a pair of tongs or a heat proof gloves and pour the hot wax into the canele mold, filling all the way up and rotation around if necessary until it coats the entire inside.
- Immediately pour the hot wax from the first mold into the next mold and place the first mold upside down onto the prepared baking sheet we've lined with parchment and a cooling rack This allows the wax to drip off the canele mold so it doesn’t have too much wax inside.
- Moving quickly so the molds stay warm, continue filling the molds with the wax and pouring into them next mold, while setting the coated molds upside down on the wire rack. If the wax coating is too thick, place molds back in the oven until it melts and pour out the extra into the original container of wax.
- If using silicone or cavity molds - use a pastry brush to brush the wax into the mold.
- Once all the molds have been coated in wax, place them in the freeze for at least 1 hour before baking.
- While the molds are in the freezer, line another baking sheet with parchment or aluminum foil and place in the oven to preheat.
BAKING CANELES
- When ready to bake, take the rested batter out of the fridge and give it a good stir to make sure it’s thoroughly mixed.
- Remove the molds from the freezer and using a pourable measure cup or ladle, fill each mold with batter up to about ¼ inch from the top as they will expand while baking.
- Remove the preheated baking sheet from the oven and place the canele molds directly on the hot sheet, about 1-2 inches apart, making sure they’re equally spaced.
- Carefully place the baking sheet back in the middle rack of the oven.
- Immediately turn down the heat to 450℉ and bake for 15 minutes, turning the baking sheet half way through.
- After 15 minutes, turn down the heat again to 350℉ and bake for another 45-60 minutes, turning the pan each 15 minutes.
- If/when the caneles rise far up out of the canele mold, remove from oven and let the settle back into the molds. They should settle down in a minute or two and you can use tongs to help them back into the mold. Be sure to stop the timer so you keep an accurate record of how long they need to bake.
- Baking time can vary depending on the size of your molds, so start checking if they're done after 45 minutes by removing the canele from a mold. They should slide right out when tipped upside down.
- If the caneles are still golden or have the ‘white tip’ (see troubleshooting section), place back in the mold and bake/check at 5 minutes intervals until they’re done. I recommend checking one canele at a time as they all can be done at different times.
- When done, immediately remove from mold and let cool on a wire rack 1-2 hours at room temperate.
- These are best the day they’re made and will stay crisp about 6-8 hours.
Video
Notes
- If you’ve never made caneles, I recommend reading through the entire post and recipe before making them. While they’re actually quite simple, there are a number of steps so having an idea of what the full recipe entails will be helpful.
- Silicone molds or metal cavity molds are a much more economical way to make caneles as using authentic copper molds can be expensive. But, it can be difficult to get the signature browning on the silicone molds (although the caneles will still be delicious!). I've even heard of people making them in muffin tins.
- Make sure you’re using real beeswax. There are a lot of fake beeswax out there, I recommend Etsy sellers like this or this seller on Amazon. See section on edible beeswax for more information.
- While not required, a scale and digital thermometer can really help with with making perfect caneles. If you’re not using a scale, be sure to use the spoon and swipe method for measuring the flour of swipe method of spooning the flour into the measure cups and swiping the excess off the top with a knife.
- Do not to add too much wax to the canele mold or they’ll never brown and you’ll get a mouthful of wax when eating them.
- While baking, the batter puffing up out of the molds is fine. When it happens, take the caneles out of the oven and let it settle back down into the mold. See troubleshoot for more information on this.
- Check caneles for done-ness one at a time. I’ve found they can all reach perfect brownness at different times.
- This recipe makes 12 - two inch caneles. The amount of caneles you get the recipe will vary depending on the size of your molds.
- Baking times can also vary depending on the size of your molds, so start checking if they’re done after 45 minutes (30 minutes for mini caneles).
- These caneles are best the day you make them and will stay crisp 6-8 hours. They will last 3-5 days in the fridge.
Nutrition
Serving: 12 Inch Canele | Calories: 211kcal | Carbohydrates: 28g | Protein: 4g | Fat: 8g | Saturated Fat: 5g | Polyunsaturated Fat: 1g | Monounsaturated Fat: 2g | Trans Fat: 1g | Cholesterol: 78mg | Sodium: 241mg | Potassium: 78mg | Fiber: 1g | Sugar: 22g | Vitamin A: 310IU | Calcium: 57mg | Iron: 1mg